Email Templates: Creating and Editing
Email templates are the default messages Aeon sends — order confirmations, cancellation notices, appointment reminders, and anything else that goes out to a researcher. Each template has a saved subject, address lines, and body, and the body is created dynamically at send time from live database values (the request number, the researcher's name, the call number, and so on). Staff pick a template when they send an email from a request or a user; the system picks one automatically when a request reaches a status that's wired to route an email.
This page covers building and maintaining those templates in the Customization Manager. You open the editor, work from a list of existing templates on the left, and either tweak one or start a new one. Aeon includes a set of system templates you can edit but not rename or delete; anything you build yourself is a custom template you fully control.
- A message Aeon sends needs new wording, a different subject line, or an extra database value pulled in — edit the existing template.
- You want a variation of a stock message (say, a second cancellation notice for a specific collection) — copy a template and save it under a new name.
- You're standing up a brand-new automated email for your site — create a custom template from scratch.
Working with email templates requires the Integrations configuration capability. Without it, Email Templates doesn't appear in the Customization Manager (it lives under Integrations & Messaging) and opening it directly is refused; every create, edit, copy, and delete is gated on this capability at the API as well. Roles and capabilities are managed under Customization Manager → Roles & Permissions.
Opening the editor
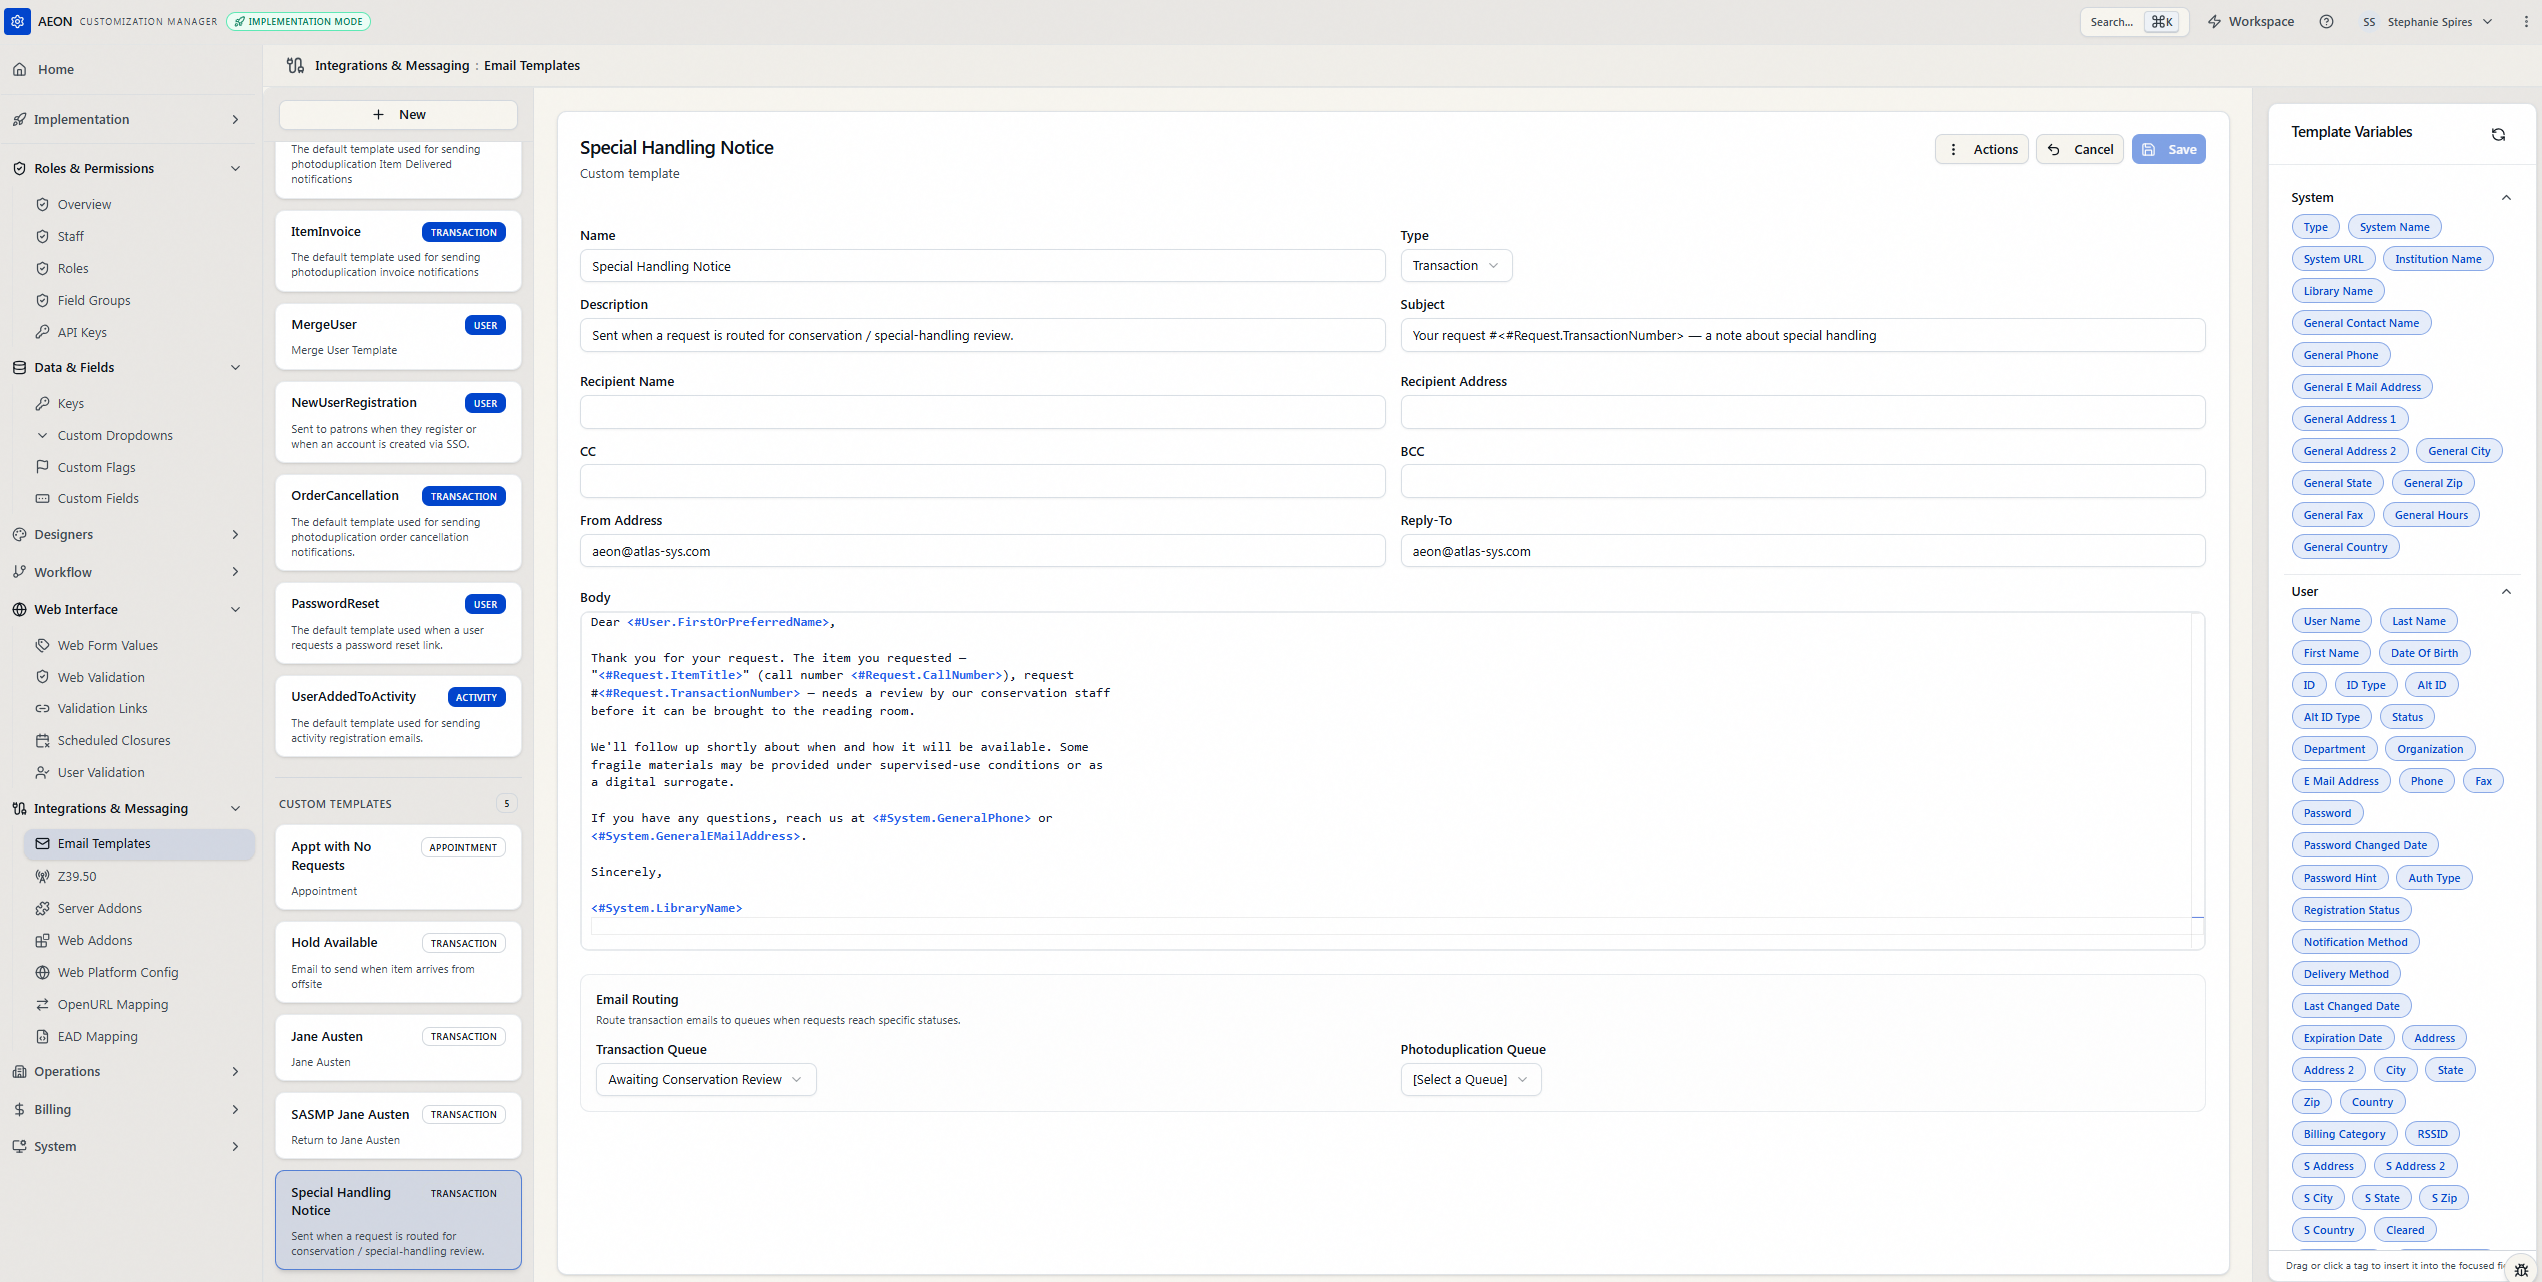
In the Customization Manager, go to Integrations & Messaging → Email Templates. The page is a two-pane editor:
- Left pane — the template list, split into System Templates and Custom Templates, each with a count badge. Click any template to load it.
- Right pane — the editor for the selected template, with a Template Variables panel docked on the right edge on wider screens.
On a phone or narrow window the panes stack: you see the list first, tap a template, and a Back bar takes you back to the list.
The four template types
Every template is one of four types, and the type controls which database tables you can pull values from:
| Type | Used for | Example |
|---|---|---|
| Transaction | Emails about a request | "Your item is ready in the reading room" |
| User | Emails about a researcher's account | "Your account has been activated" |
| Activity | Emails about an activity (class, event) | "Reminder: your scheduled visit" |
| Appointment | Emails about a reading-room appointment | "Your appointment is confirmed" |
Transaction templates have the widest set of tags (request fields, queue fields, billing, researcher, appointment) because a request touches the most data. The others are scoped to their own world plus the shared System and User tags.
Creating a new template
- In the left pane, click New.
- Choose the type from the menu — Transaction, User, Activity, or Appointment.
- A blank editor opens with the title New Template. Fill in the fields (see Template fields below). At minimum, give it a Name.
- Build the Body and address lines, inserting database tags where you want live values (see Inserting database tags).
- Click Create (or press Ctrl+S / ⌘S).
The new template appears under Custom Templates in the list and is immediately available wherever staff send that type of email.
Template names are the identifier Aeon uses everywhere, so each must be unique and 50 characters or fewer. If you try to create a template with a name that's already taken, the save is rejected.
Copying a template
Copying is the fast way to make a near-duplicate — for instance, a cancellation notice tailored to one collection.
- Select the template you want to start from.
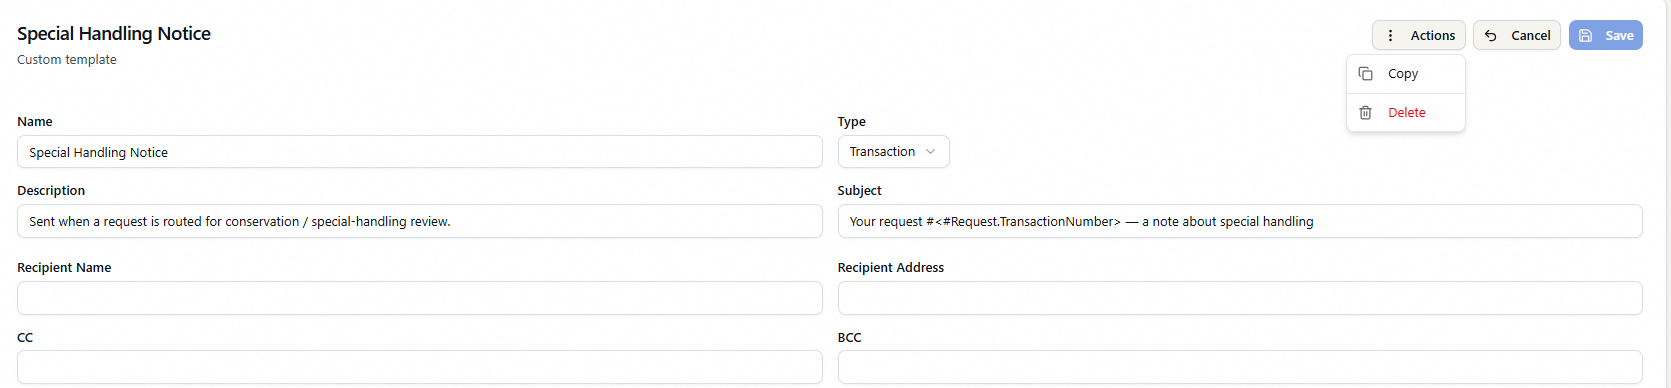
- Open the Actions menu (top right of the editor) and choose Copy. (You can also right-click a template in the left pane and choose Copy.)
- The editor reloads with the title Copy of <name> and the name field pre-filled with "Copy of …". Change the name to whatever you want.
- Make your edits, then click Create.
The copy is always a custom template, even when you copied a system one, so you get full control over it.
Editing a template
- Click the template in the left pane.
- Edit any field — Name (custom templates only), Subject, the address lines, the Body, and so on. The Body is highlighted in amber while it has unsaved changes.
- Click Save (or Ctrl+S / ⌘S).
If you start editing one template and then click a different one (or click New) before saving, Aeon stops you with a Discard unsaved changes? prompt. Choose Stay here to go back and save, or Discard & continue to throw the edits away and move on.
You can edit a system template's content — subject, addresses, body — but you cannot rename it, change its type, or delete it, and its routing settings are read-only. The Name and Type fields are disabled, and the editor labels the template "System template (protected)." If you need a renamed or structurally different version, copy it to a custom template instead.
Template fields
The editor groups the fields the same way the message itself is structured:
Details
- Name — the template's unique identifier (max 50 characters; editable on custom templates only).
- Type — Transaction, User, Activity, or Appointment (editable on custom templates only).
- Description — an internal note describing what the template is for (max 255 characters).
- Subject — the email subject line; supports tags (max 255 characters).
Address lines — these set who the message goes to and who it appears to come from. Each accepts static text, a database tag, or both:
- Recipient Name (max 100)
- Recipient Address (max 100)
- CC (max 255)
- BCC (max 255)
- From Address (max 255) — defaults to your system's configured from-address on a new template.
- Reply-To (max 255) — also defaults to the system from-address on a new template.
Body — the message text, edited in a dedicated body editor (see below). Database tags are highlighted in blue so they stand out from prose.
Each field shows a live character counter so you know when you're approaching its limit.
The body editor
The Body is edited in a code-style editor with word wrap turned on. It's plain text — there's no rich-text formatting — which keeps templates portable and predictable. Database tags you've inserted, like <#Request.ItemTitle>, are colored blue so they're easy to spot inside the surrounding text.
Inserting database tags
Tags are placeholders that Aeon replaces with real values when it sends the email — so <#User.FirstName> becomes the researcher's first name, and <#Request.TransactionNumber> becomes the request number (for example, 12345). You don't type tags by hand; you insert them from the Template Variables panel on the right.
- Expand a category in the Template Variables panel (such as Request, User, or System).
- Place the tag where you want it:
- Body — click into the body, then click a tag to drop it at your cursor, or drag it in.
- Subject or an address line — drag the tag onto the field. (Clicking a tag currently drops it into the Body regardless of which field has focus, so use drag for these fields.)
The tag appears as <#Category.FieldName> — for example <#Request.CallNumber> or <#User.EMailAddress>.
The Template Variables panel only shows the categories that make sense for the current type. Every template gets System (your site's contact details) and User tags. A Transaction template additionally gets Request, Researcher, Queue, Photoduplication Queue, Billing, and Appointment categories. Activity templates get Activity tags; Appointment templates get Appointment tags. Your custom fields show up too, under categories like Request Custom Fields and User Custom Fields. If you change the Type while editing, the panel refreshes to match.
Inside the editor, Ctrl+S / ⌘S saves and Alt+A / ⌥A opens the Actions menu.
Email routing (Transaction templates only)
A Transaction template can be tied to a queue so that the email goes out automatically when a request lands in that queue. In the editor's Email Routing box you'll find:
- Transaction Queue — the regular-request queue whose arrival triggers this email.
- Photoduplication Queue — the equivalent for photoduplication requests.
Leave either set to [Select a Queue] to leave it unrouted. The Email Routing box is always shown, but its dropdowns are active only for Transaction templates — on User, Activity, and Appointment templates the box is greyed out and marked Disabled. It's also read-only (marked Disabled) on system templates of any type, with the note "Routing settings are read-only for system templates."
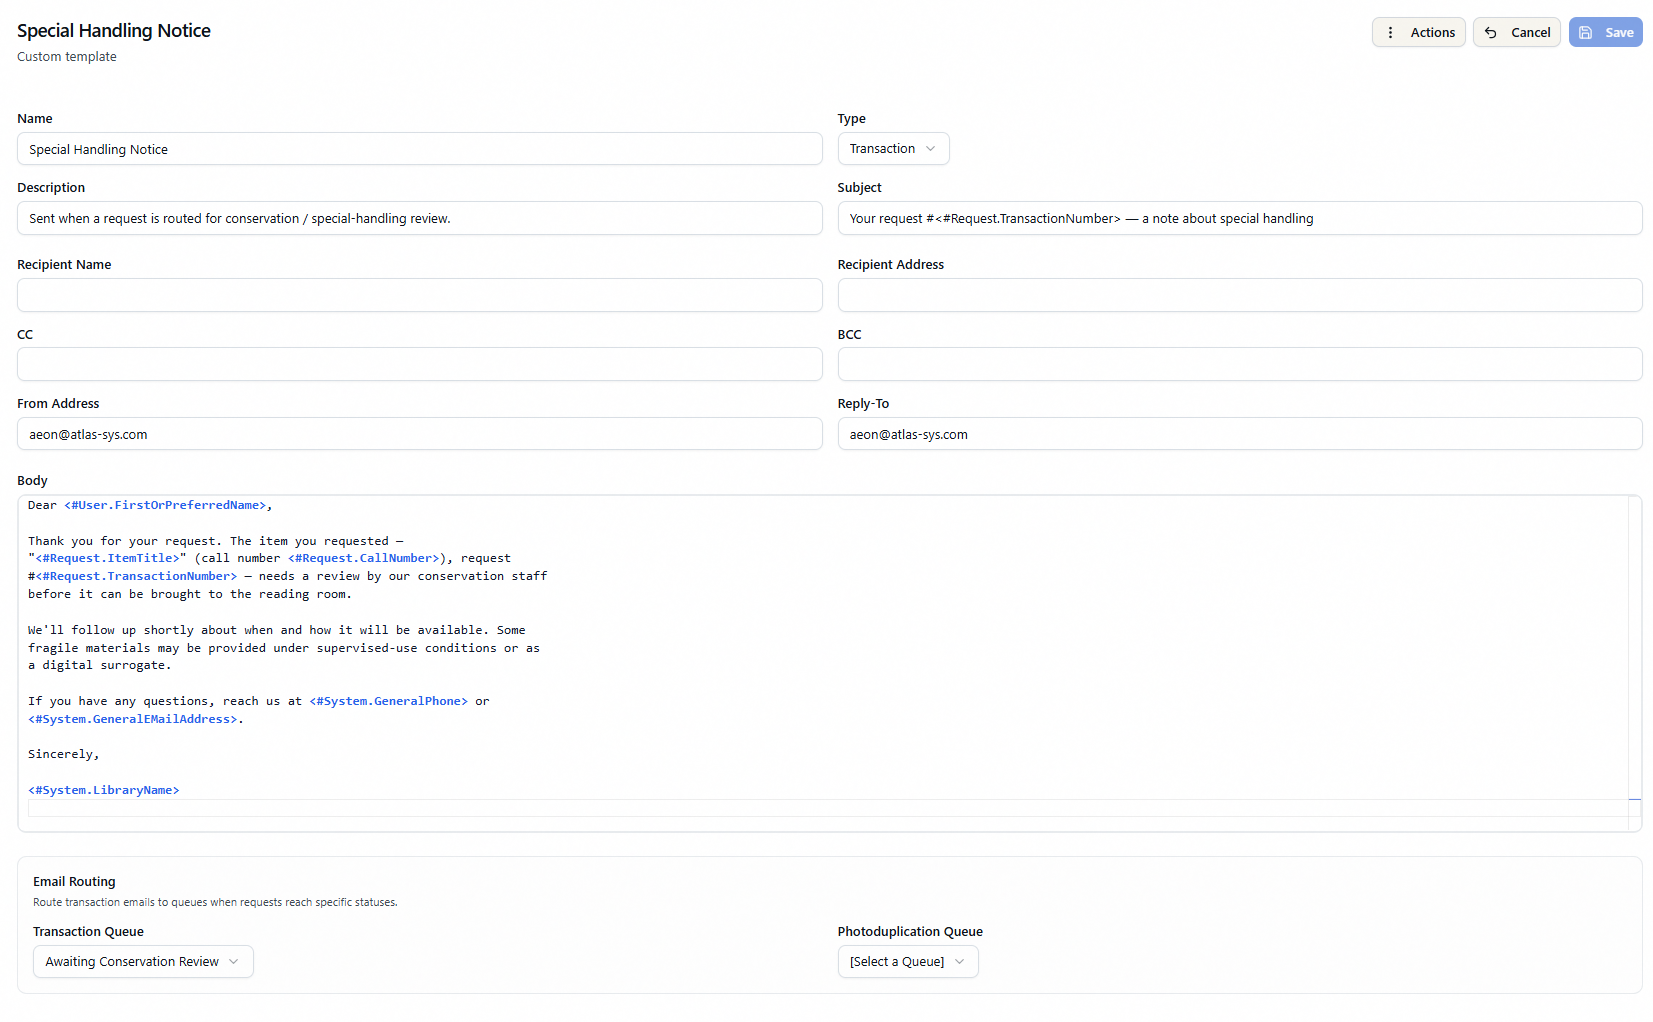
Wiring a template to a queue is what turns it from a manual, staff-picked message into an automated one. When a request's status changes into the chosen queue, Aeon sends the routed template without anyone clicking anything. For composing and sending a template by hand, see the request and user email pages under Daily Work → Communication.
Deleting a template
- Select the custom template you want to remove.
- Open the Actions menu and choose Delete (or right-click the template in the left pane and choose Delete).
- Confirm.
The template is removed and the editor falls back to the first remaining template.
The Delete action is disabled for system templates, and the server refuses the request even if attempted — "System templates cannot be deleted." Deletion is permanent; there's no undo, so make sure no routing or workflow still depends on a custom template before you remove it.