Custom Flags
Custom flags are labels you can attach to requests to mark them for a specific purpose — for example, a Supervisor Review flag for requests that need a second look, or a Rush flag for items needed quickly. Flags are independent of a request's status: a request can be flagged no matter where it sits in your workflow, and flagging it doesn't move or change it. Once a flag exists, it shows up alongside your status queues so staff can pull up every request carrying that flag at a glance.
This page is about defining the flags themselves — the master list of flag names that everyone can then use. It lives in the Customization Manager under Data & Fields → Custom Flags. Defining a flag here is what makes it available; the actual act of putting a flag on a request (or taking it off) happens out in daily work and is covered in Bulk Operations and request routing.
- A team needs a new way to mark requests — "Fragile," "Needs Conservation," "Hold for Class" — and you want to add it to the shared list.
- A flag name has a typo or no longer matches how your staff talk about it, and you want to rename it.
- A flag is obsolete and you want to retire it so it stops cluttering the list.
Flags are stored in the CustomFlags table. In the Aeon 7 web client you manage that table through the Custom Flags editor described here — there's no separate desktop tool required. (In older documentation you may see flags described as a desktop-client-only task; that is no longer the case.)
Opening the Custom Flags editor
- Open the Customization Manager.
- In the navigation, expand Data & Fields.
- Choose Custom Flags.
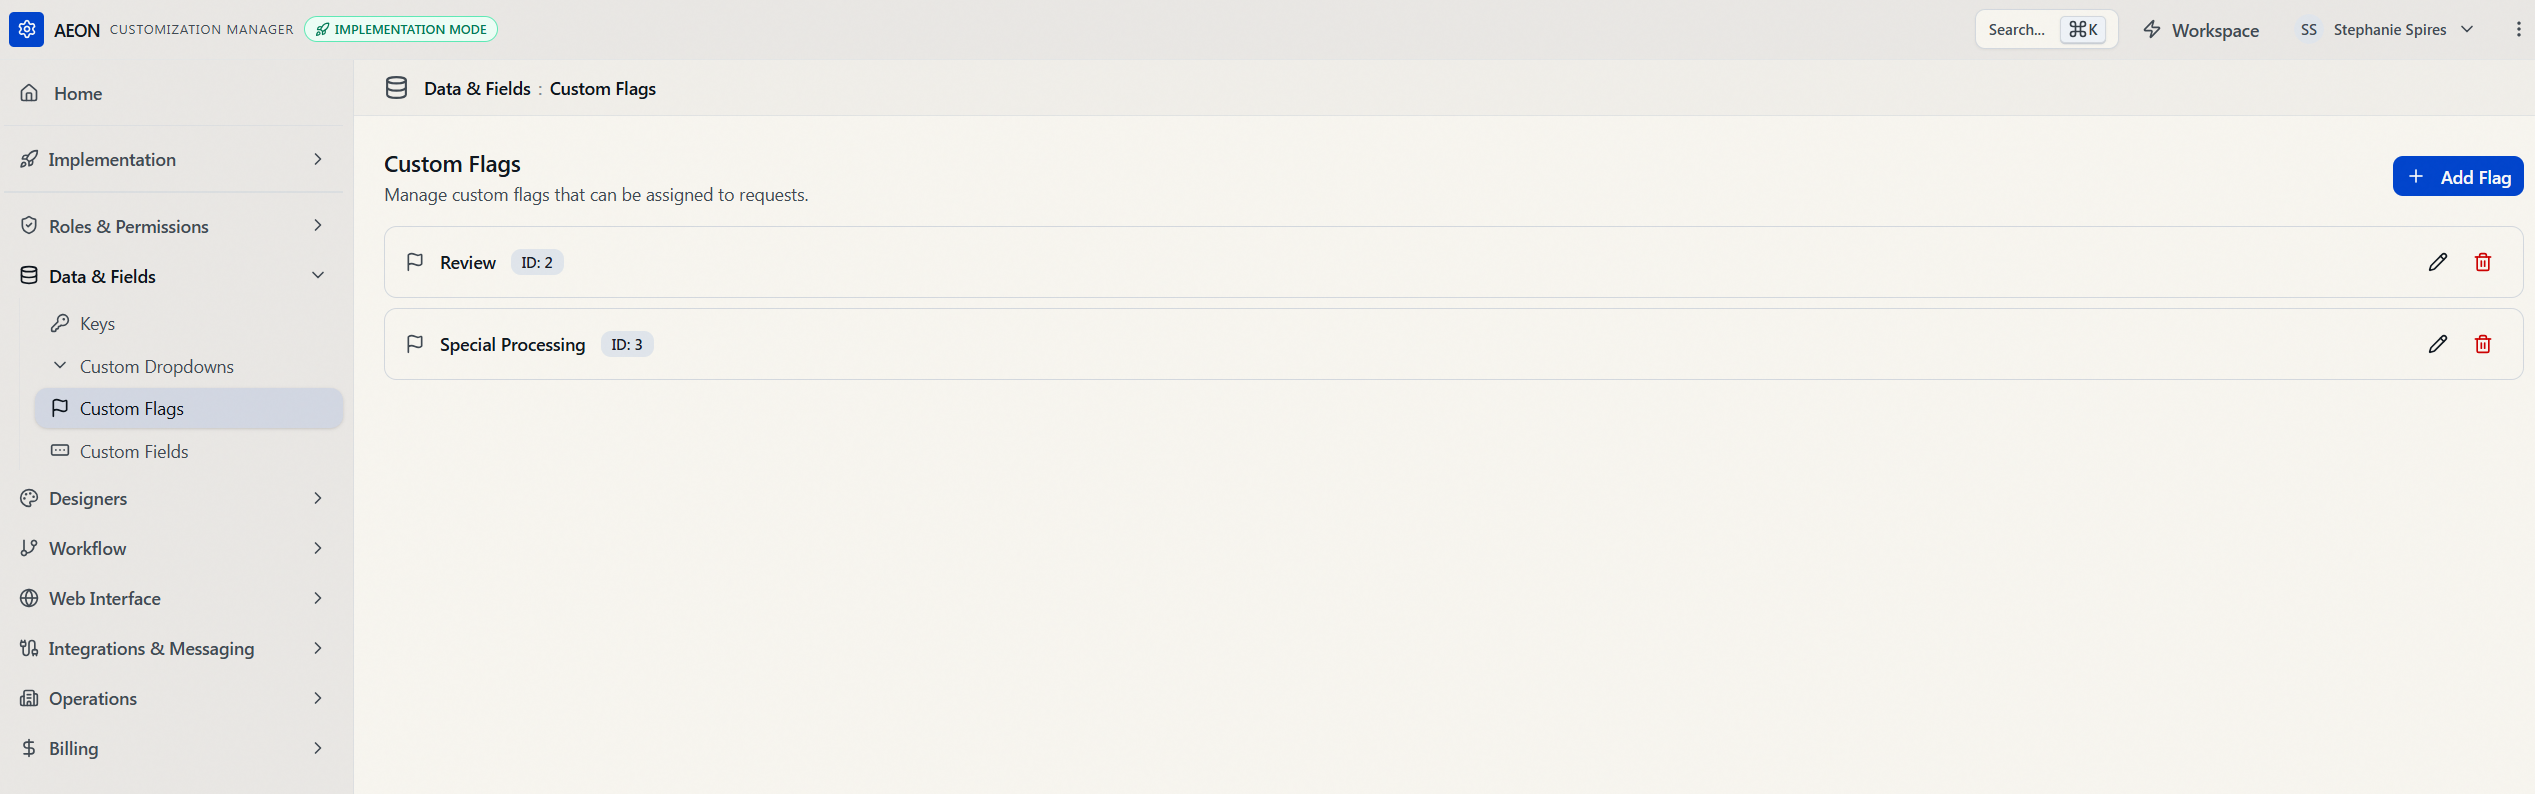
The editor opens with the heading Custom Flags and the subtitle "Manage custom flags that can be assigned to requests." Every flag you've defined is listed, each row showing the flag's name, an ID: badge with its numeric identifier, and edit and delete buttons on the right. If you haven't created any yet, you'll see "No custom flags defined" with a prompt to "Add a flag to get started."
Adding a flag
- Click Add Flag (top right of the editor).
- In the Add Flag dialog, type the name into the Flag Name field — for example,
Supervisor Review. Names can be up to 50 characters. - Click Add.
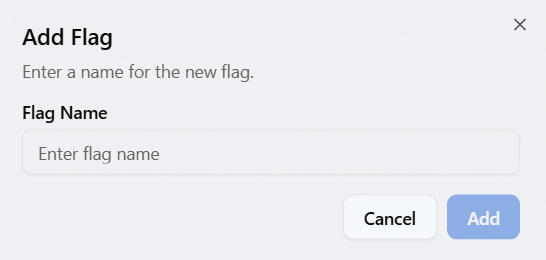
The flag is saved immediately, a "Flag added" confirmation appears, and the new flag drops into the list with its auto-assigned ID. There's no separate save step for the page — each flag is committed when you click Add.
In the Flag Name field, pressing Enter saves the flag just like clicking Add, as long as the name isn't blank.
Renaming a flag
- Find the flag in the list.
- Click the pencil (edit) button on its row.
- The Edit Flag dialog opens with the current name filled in. Change the text in the Flag Name field.
- Click Update.
You'll see a "Flag updated" confirmation. Renaming changes the label everywhere the flag appears — existing requests that carry the flag keep it, now shown under the new name, because the flag's underlying ID doesn't change.
Deleting a flag
- Find the flag in the list.
- Click the trash (delete) button on its row.
- A Delete Flag confirmation asks "Are you sure you want to delete the flag '…'? This action cannot be undone."
- Click Delete to confirm, or Cancel to back out.
A "Flag deleted" confirmation appears and the flag drops off the list.
There's no undo, and Aeon doesn't check whether the flag is in use first. Deleting it removes the flag from the pickers in daily work and from every request currently carrying it — those requests simply stop showing the flag (nothing else about them changes; flags are just markers). If a flag is only out of season rather than truly obsolete, leaving it in place costs nothing.
After you've defined a flag
Defining a flag here only adds it to the shared list. Staff apply and remove flags out in the request workflow:
- On a single request — through the request's actions, when processing it.
- On many requests at once — using the bulk selection bar to add or remove a flag across everything you've selected. See Bulk Operations.
Because flagged requests surface alongside status queues, a flag like Supervisor Review effectively gives you a running, one-click list of every request awaiting that review — without changing any request's actual status.
Creating, renaming, and deleting custom flags is part of the Data & Fields configuration area. A staff member needs the Data & Fields configuration capability on their role to make changes here. Roles without it won't be able to reach the Customization Manager's Data & Fields section. (Applying flags to requests in daily work is governed separately by request permissions, not by this configuration capability.)