Bulk Operations
Most request work happens one record at a time: you open a request, work it, and route it on. But some jobs are faster in bulk — clearing a stale queue, flagging a batch for review, cancelling a withdrawn activity's items, or printing call slips for everything a researcher requested. For those, Aeon lets you select several requests at once and act on the whole set from a single bar.
The pattern is always the same: tick the requests you want, a bulk-action bar slides up from the bottom of the screen, you pick an action, confirm, and Aeon reports how the batch went. The bar appears anywhere you see a list of requests — a queue, search results, custom search, a user's requests, an activity's requests.
Use bulk operations when you'd otherwise repeat the same step on request after request. For a single request, the toolbar on the request itself is usually quicker — open it and use the workflow buttons. Bulk is for "do this to all of these."
Select the requests
- Open a queue, run a search, or open any list of requests.
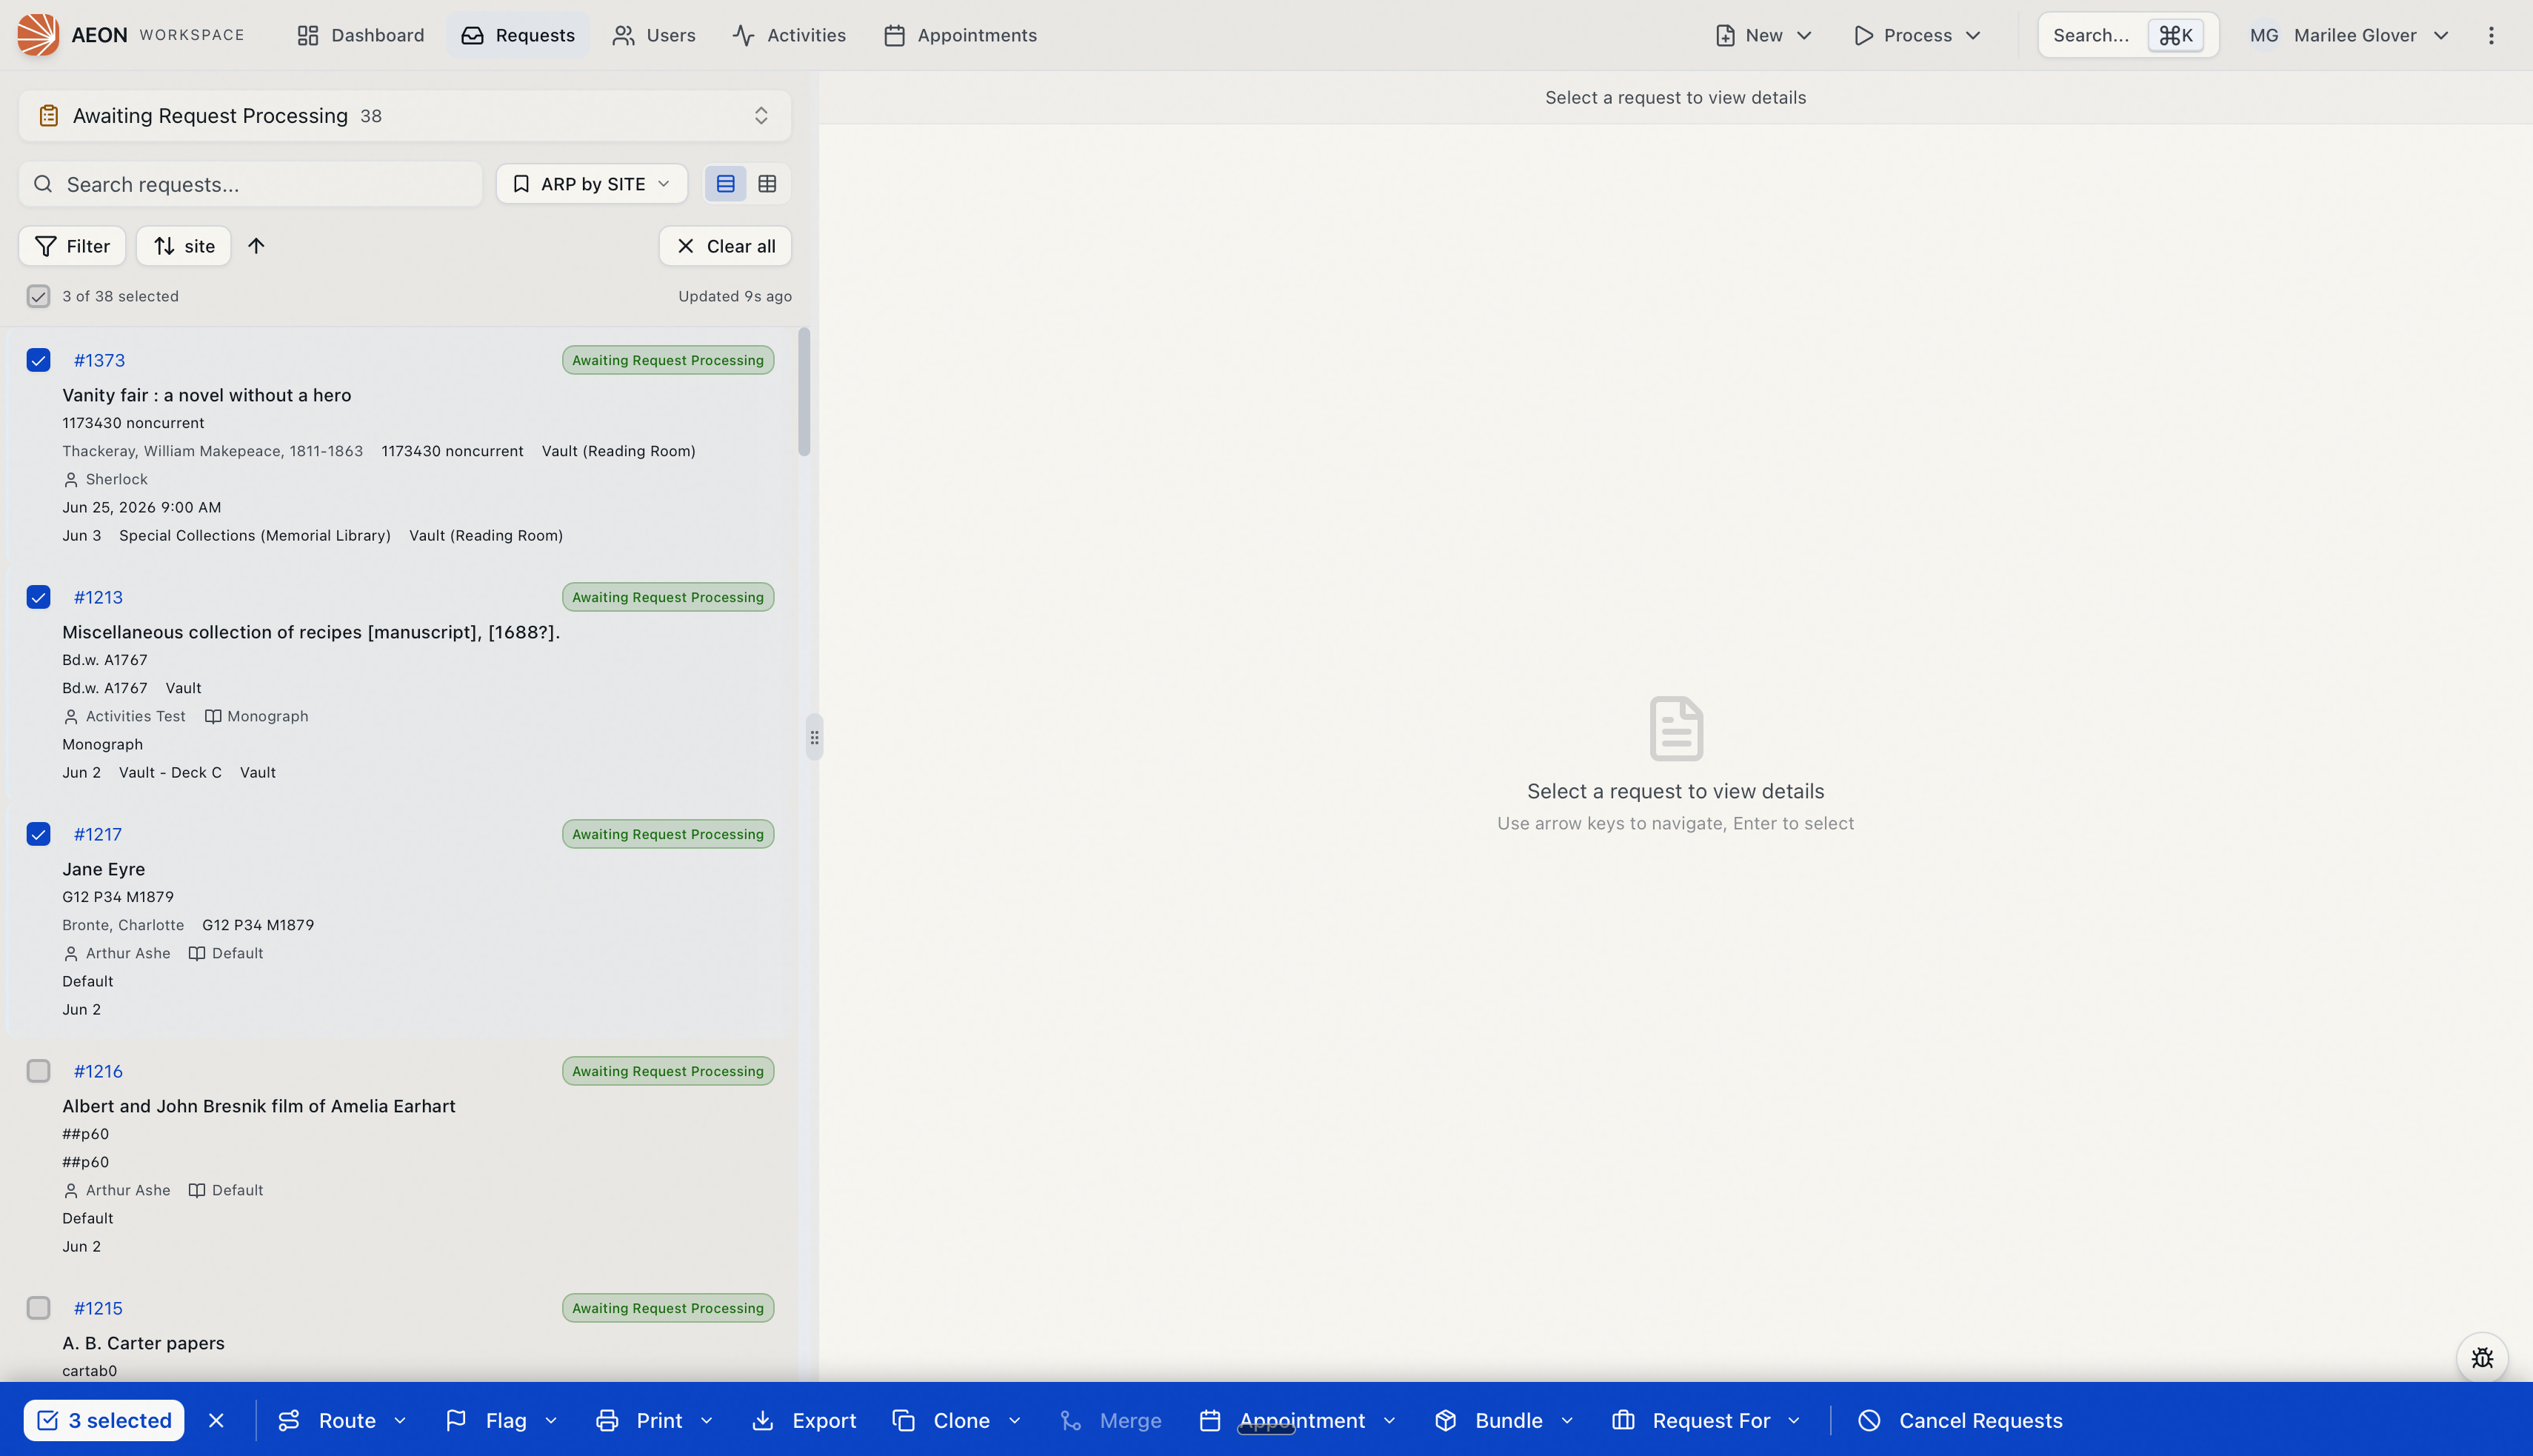
- Tick the checkbox on each request you want to include. The moment one request is selected, the bulk-action bar appears along the bottom of the screen.
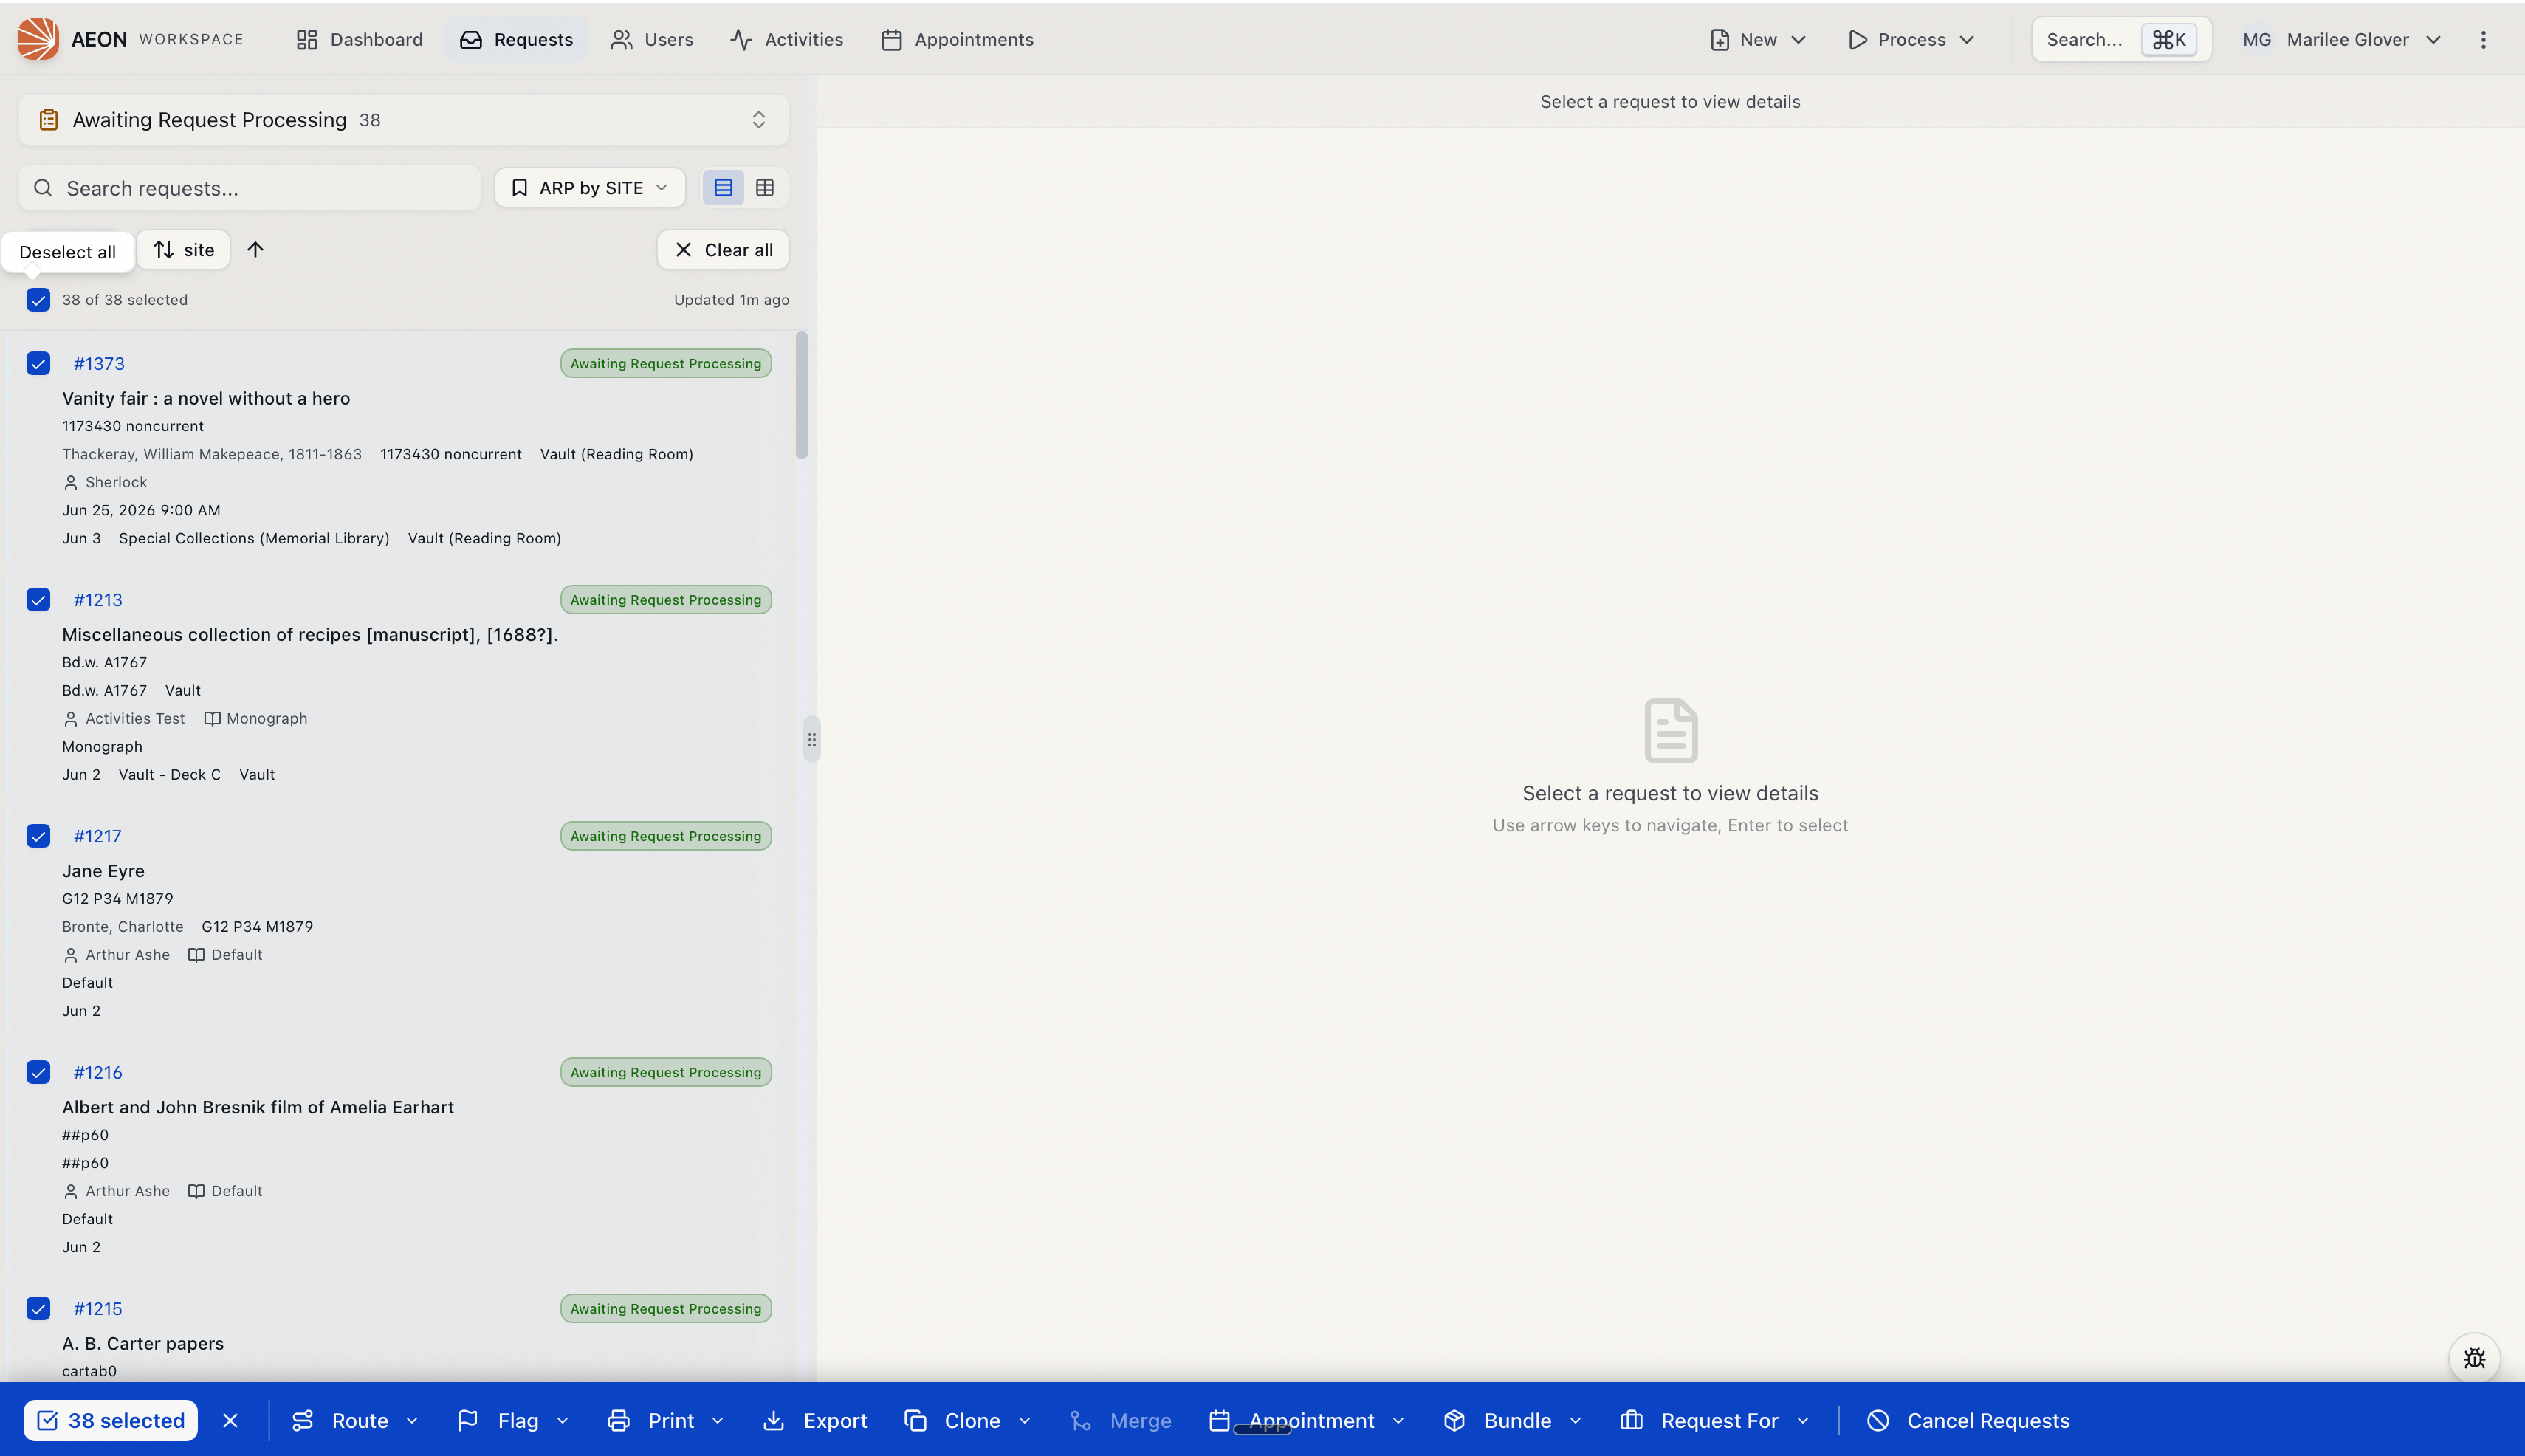
- To select the whole list at once, use the Select all checkbox at the top of the list. Click it again (now labelled Deselect all) to clear everything.
The bar's left end shows a count — N selected — so you always know how many requests an action will touch. The ✕ next to the count clears your selection and hides the bar.
Select all checks every request loaded into the list — more than what's visible on screen, but not the whole queue if it's still loading as you scroll (30 of 412 selects 30). Trust the N selected count for the real scope, and scroll to the bottom first if you need the entire queue.
Run an action
With requests selected, choose an action from the bar. Each one either runs straight away, opens a short dialog to gather a detail (a destination, a reason, a user), or — for actions that need confirmation — asks you to confirm first.
The actions available, left to right:
-
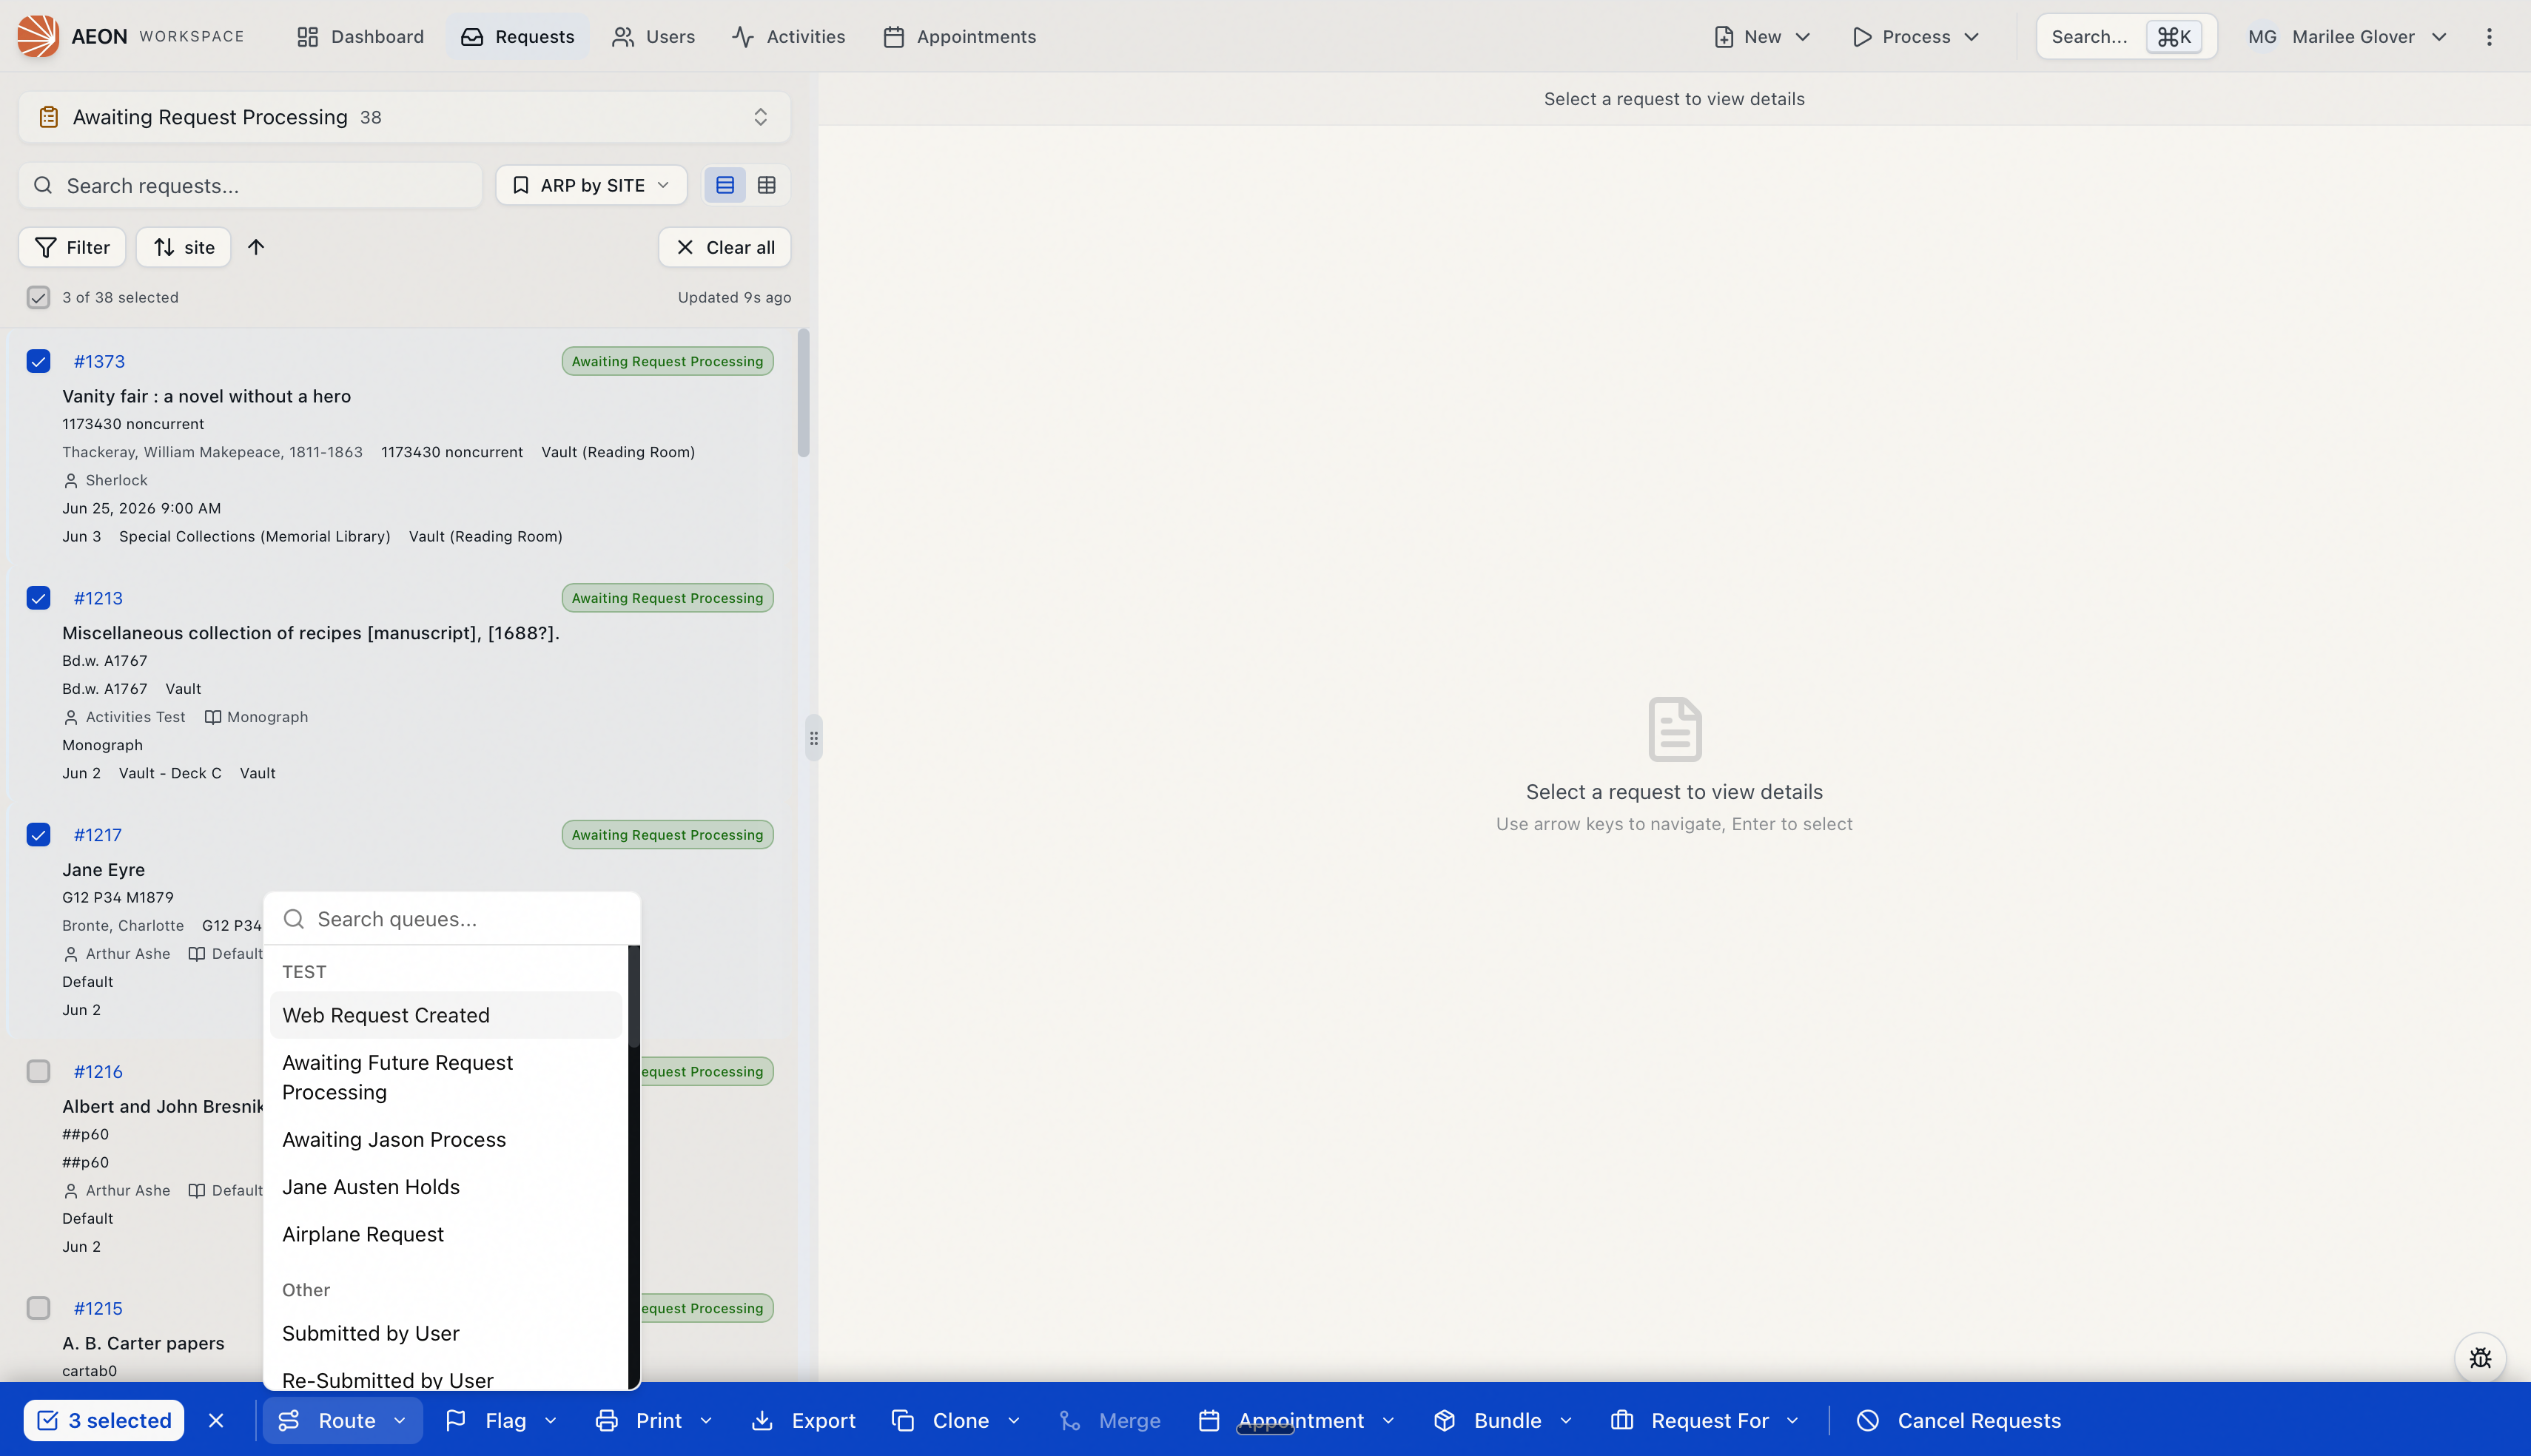
Route — move the selected requests to another queue. Pick a destination from the menu (queues are grouped the way your site has organized them), then confirm in the Route Requests dialog. See Routing a Request for the full picture, including routing to another site.
-
Flag — add or remove a custom flag on every selected request. The menu lists your flags twice, under Add Flag and Remove Flag.
-
Print — print Request, Callslip, Invoice, or Digitization Request documents for the whole selection in one batch. Choosing one opens the print dialog to pick a template. See Printing Call Slips.
-
Export — export the selected requests to a file. Pick a format from the popover.
-
Clone — copy the selected requests. Clone copies each request for its own owner; Clone to User… sends every copy to one researcher you choose. See Cloning a Request.
-
Merge — combine the selected requests into one. Enabled only when you've selected two or more requests that all belong to the same user. See Merging Requests.
-
Appointment — Assign to Appointment… links the selection to one of the researcher's appointments (available only when every selected request belongs to the same user); Remove Appointment clears the appointment link.
-
Bundle — Assign to Bundle… adds the selection to a request bundle; the Remove from Bundle list removes them from a bundle you pick.
-
Request For — change who a request is for: Assign to Activity…, Assign to Researcher…, or Clear Association. These require the selected requests to share a single user.
-
Cancel Requests — cancel the whole selection with a reason and an optional note. This is the destructive red action at the right end of the bar. See Cancelling a Request.
Merge, Assign to Appointment…, and the Request For actions all require every selected request to belong to the same user (and the same researcher, for proxy requests). If your selection mixes users, those actions are disabled or report an error — Aeon won't, for example, assign one appointment across several different researchers. Hover a disabled button and Aeon tells you what's missing.
What you can do depends on your role
The bar only offers the actions your role is allowed to perform. Each action is gated by the same permission used for the single-request version, so the bar never lets you do in bulk something you couldn't do one at a time:
| Action | Permission needed |
|---|---|
| Route, Merge, Cancel Requests | Full on Requests |
| Flag, Clone, Appointment (assign/remove), Bundle, Request For | Edit on Requests (Appointment actions also need Edit on Appointments) |
| View on Requests | |
| Export | View on Reports & Export |
If an action is greyed out (or missing) while others are available, your role doesn't have the level that action requires. Route, Merge, and Cancel Requests sit a step above everyday processing — they need Full, the same as manual routing — so a role with only Edit can flag, clone, and print in bulk but won't see those three.
Read the results
Bulk actions are best-effort: Aeon processes each request on its own and keeps going if one fails, so a single problem request never blocks the rest of the batch.
- When everything succeeds, you get a short confirmation — for example, "Routed 8 requests to Awaiting Reshelving" or "Cancelled 12 requests. 12 emails sent." — and your lists refresh.
- When some requests fail, a results dialog lists each one that didn't go through, with the reason (commonly that a request no longer exists or belongs to a site you don't have access to). The requests that succeeded are already done; use the list to follow up on the stragglers.
- Clone always opens a results dialog, even on full success, so you can see the new transaction numbers (each shown as original → new request, with the new numbers clickable).
After an action completes, Aeon clears your selection and hides the bar.
When you assign requests to an activity or researcher, Aeon first checks whether any selected request has a billing account that wouldn't be valid for the new association. If so, it shows a warning listing those requests before it makes the change, so you can decide whether to go ahead.
What happens behind the scenes
Each bulk action calls the same operation as its single-request counterpart, once per selected request, and rolls the outcomes up into the success/failure summary you see. Routing applies any custom routing your site configured; cloning creates new linked transactions; cancelling records a reason and optionally emails researchers; and so on. None of these actions touches a request you didn't select, and your site's automatic routing rules keep applying afterward.