Creating a New User
Most users create themselves: a researcher registers through your library's Aeon web pages, and their record is waiting for you to clear. You only create a user by hand for the cases the public registration form doesn't cover — a walk-in researcher at the front desk who needs to start working now, a phone or mail patron, or a record you're setting up on someone's behalf. This page covers that manual path.
Creating a user takes the same two things every time: a username and a password. Everything else — name, ID, contact details, research topics — is optional and can be filled in now or added later when you edit the record. When you save, Aeon creates the account and drops you straight onto that user's page so you can keep working.
- A researcher arrives in person or contacts you directly and isn't already in Aeon — create the record so you can place requests for them.
- You're setting up an account ahead of time (for an activity group, a known visitor, a proxy) before that person ever touches the web pages.
- For routine self-service registrations you usually don't create the user — they register themselves and you handle them through User Clearance instead.
Opening the New User form
- In the left navigation, click New User.
- The New User form opens at
/users/new. The top of the form is an Account Credentials panel; below it is the full user profile, laid out the same way as a normal user record.
The browser URL is /users/new, so you can bookmark it or keep it open as a shortcut for front-desk work.
Creating a user needs Edit access to the Users capability — the same level as editing a user record. If your role is view-only for users, the New User form shows Access Restricted ("You don't have permission to access this section.") with a link back to the dashboard, and the API rejects the create as well. Ask an administrator to adjust your role if you need to add users.
Step 1 — Set the account credentials
The Account Credentials panel at the top of the form holds the two required fields plus a couple of options. These are the only fields you must fill in.
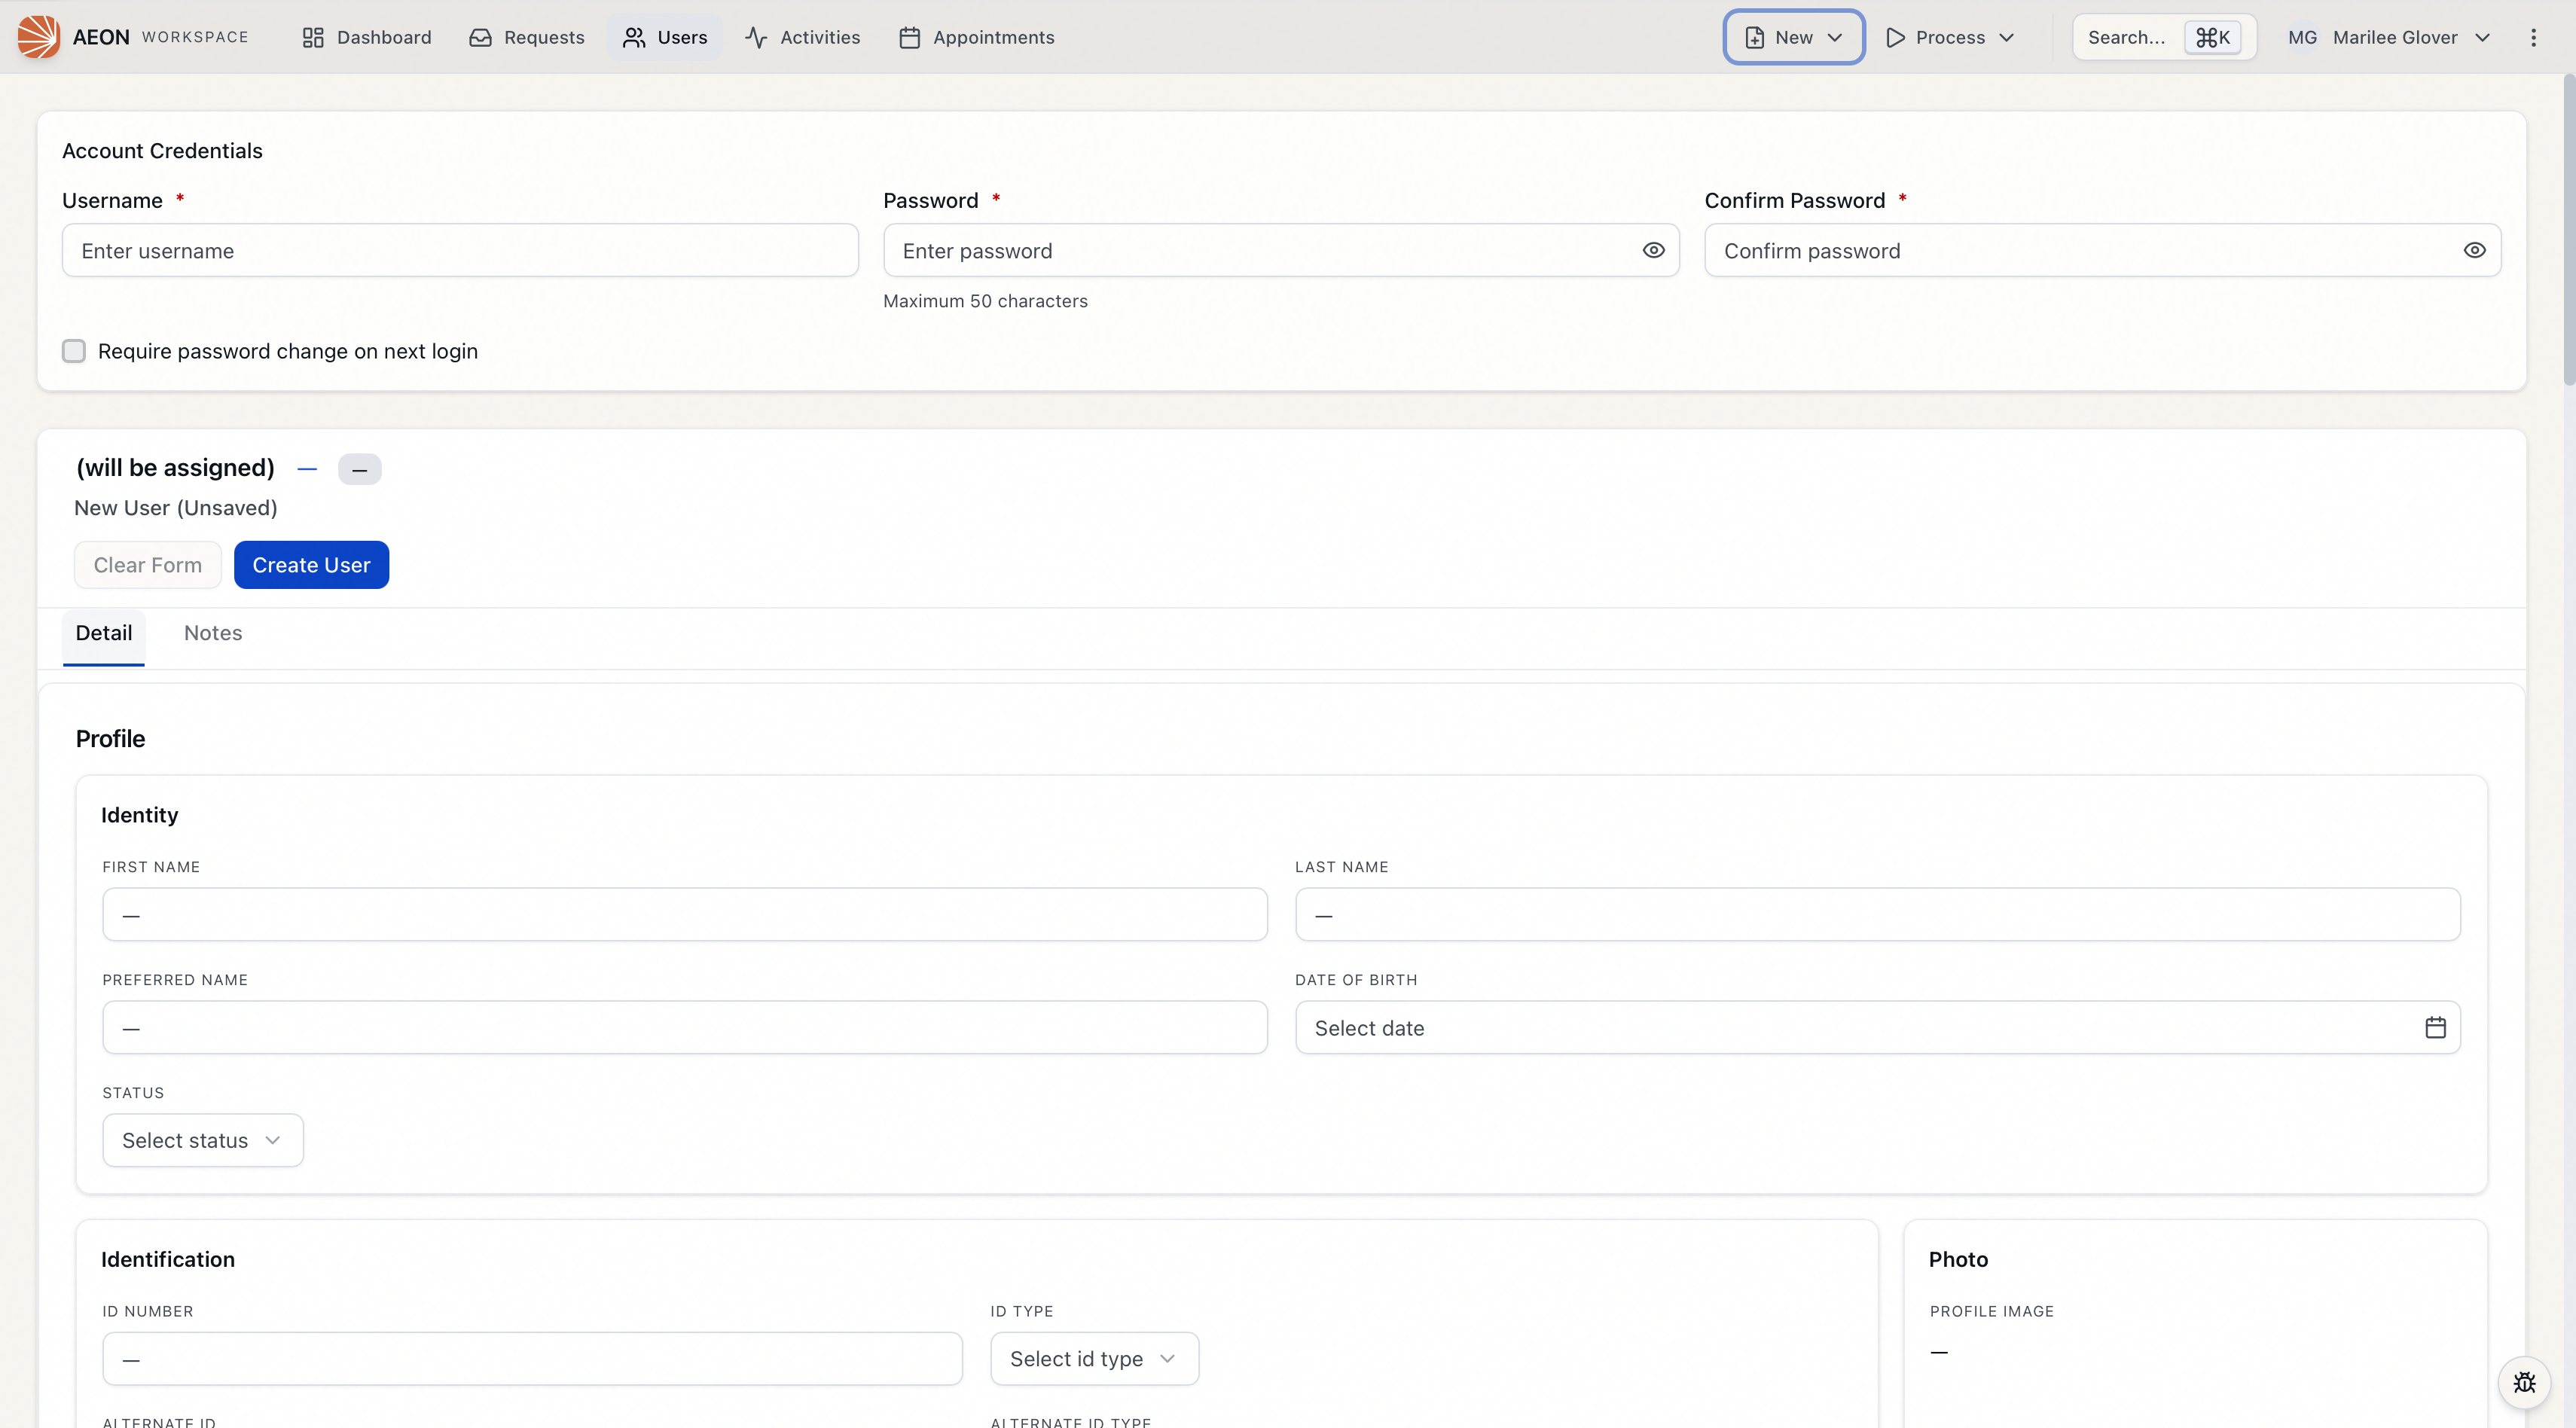
- Username — type the username for the new account. This is marked required with a red asterisk. (See the note below on auto-generated usernames, where this field behaves differently.)
- Password — type a password. Required, maximum 50 characters. Use the eye icon at the end of the field to show or hide what you've typed.
- Confirm Password — type the same password again. The two must match or Aeon won't save.
- Require password change on next login — optional checkbox. Tick it when you've set a temporary or placeholder password and want the user forced to choose their own the first time they sign in to the web pages. Leave it unticked if the password you entered is the one they'll keep.
Some sites have Aeon auto-assign usernames (the AutoGenerateUserName setting). When that's turned on, the Username field is disabled and shows "(auto-generated)" — you don't type one, and Aeon assigns the next number on save. If you see an editable Username field with a red asterisk, your site expects you to enter one.
Step 2 — Fill in the profile (optional)
Below the credentials panel is the user profile form — the same layout you see when viewing or editing an existing user. Fill in as much or as little as you have: name, preferred name, ID and ID type, status, department, organization, email, phone, address, research topics, and any custom fields your site has defined.
- None of these are required to create the account. You can save with just a username and password and add the rest later.
- Drop-downs such as Status, Department, ID Type, State, Country, and Billing Category pull their choices from your Customization Manager lists, so the options you see match your site's configuration.
- The exact sections, field order, and which fields appear are controlled by your site's User form layout (set in the Form Designer). Two sites — or even two roles at the same site — may see a different-looking form. The required username and password in the credentials panel are always present regardless of layout.
Tabs like Requests, History, Appointments, Proxies, and Billing don't appear on the New User form — there's nothing to show until the record is saved. They become available on the user's page once you create the account.
Step 3 — Create the user
When you're ready:
- Click Create User at the top of the form (or press Ctrl-S on Windows / Cmd-S on Mac). The button reads Creating… while it works.
- Aeon validates your entries before saving. If something's off, you'll see a message and the save stops:
- "Password is required"
- "Password cannot exceed 50 characters"
- "Passwords do not match"
- "Username is required" (when you're expected to enter one)
- "This username has already been taken. Please try another." — pick a different username.
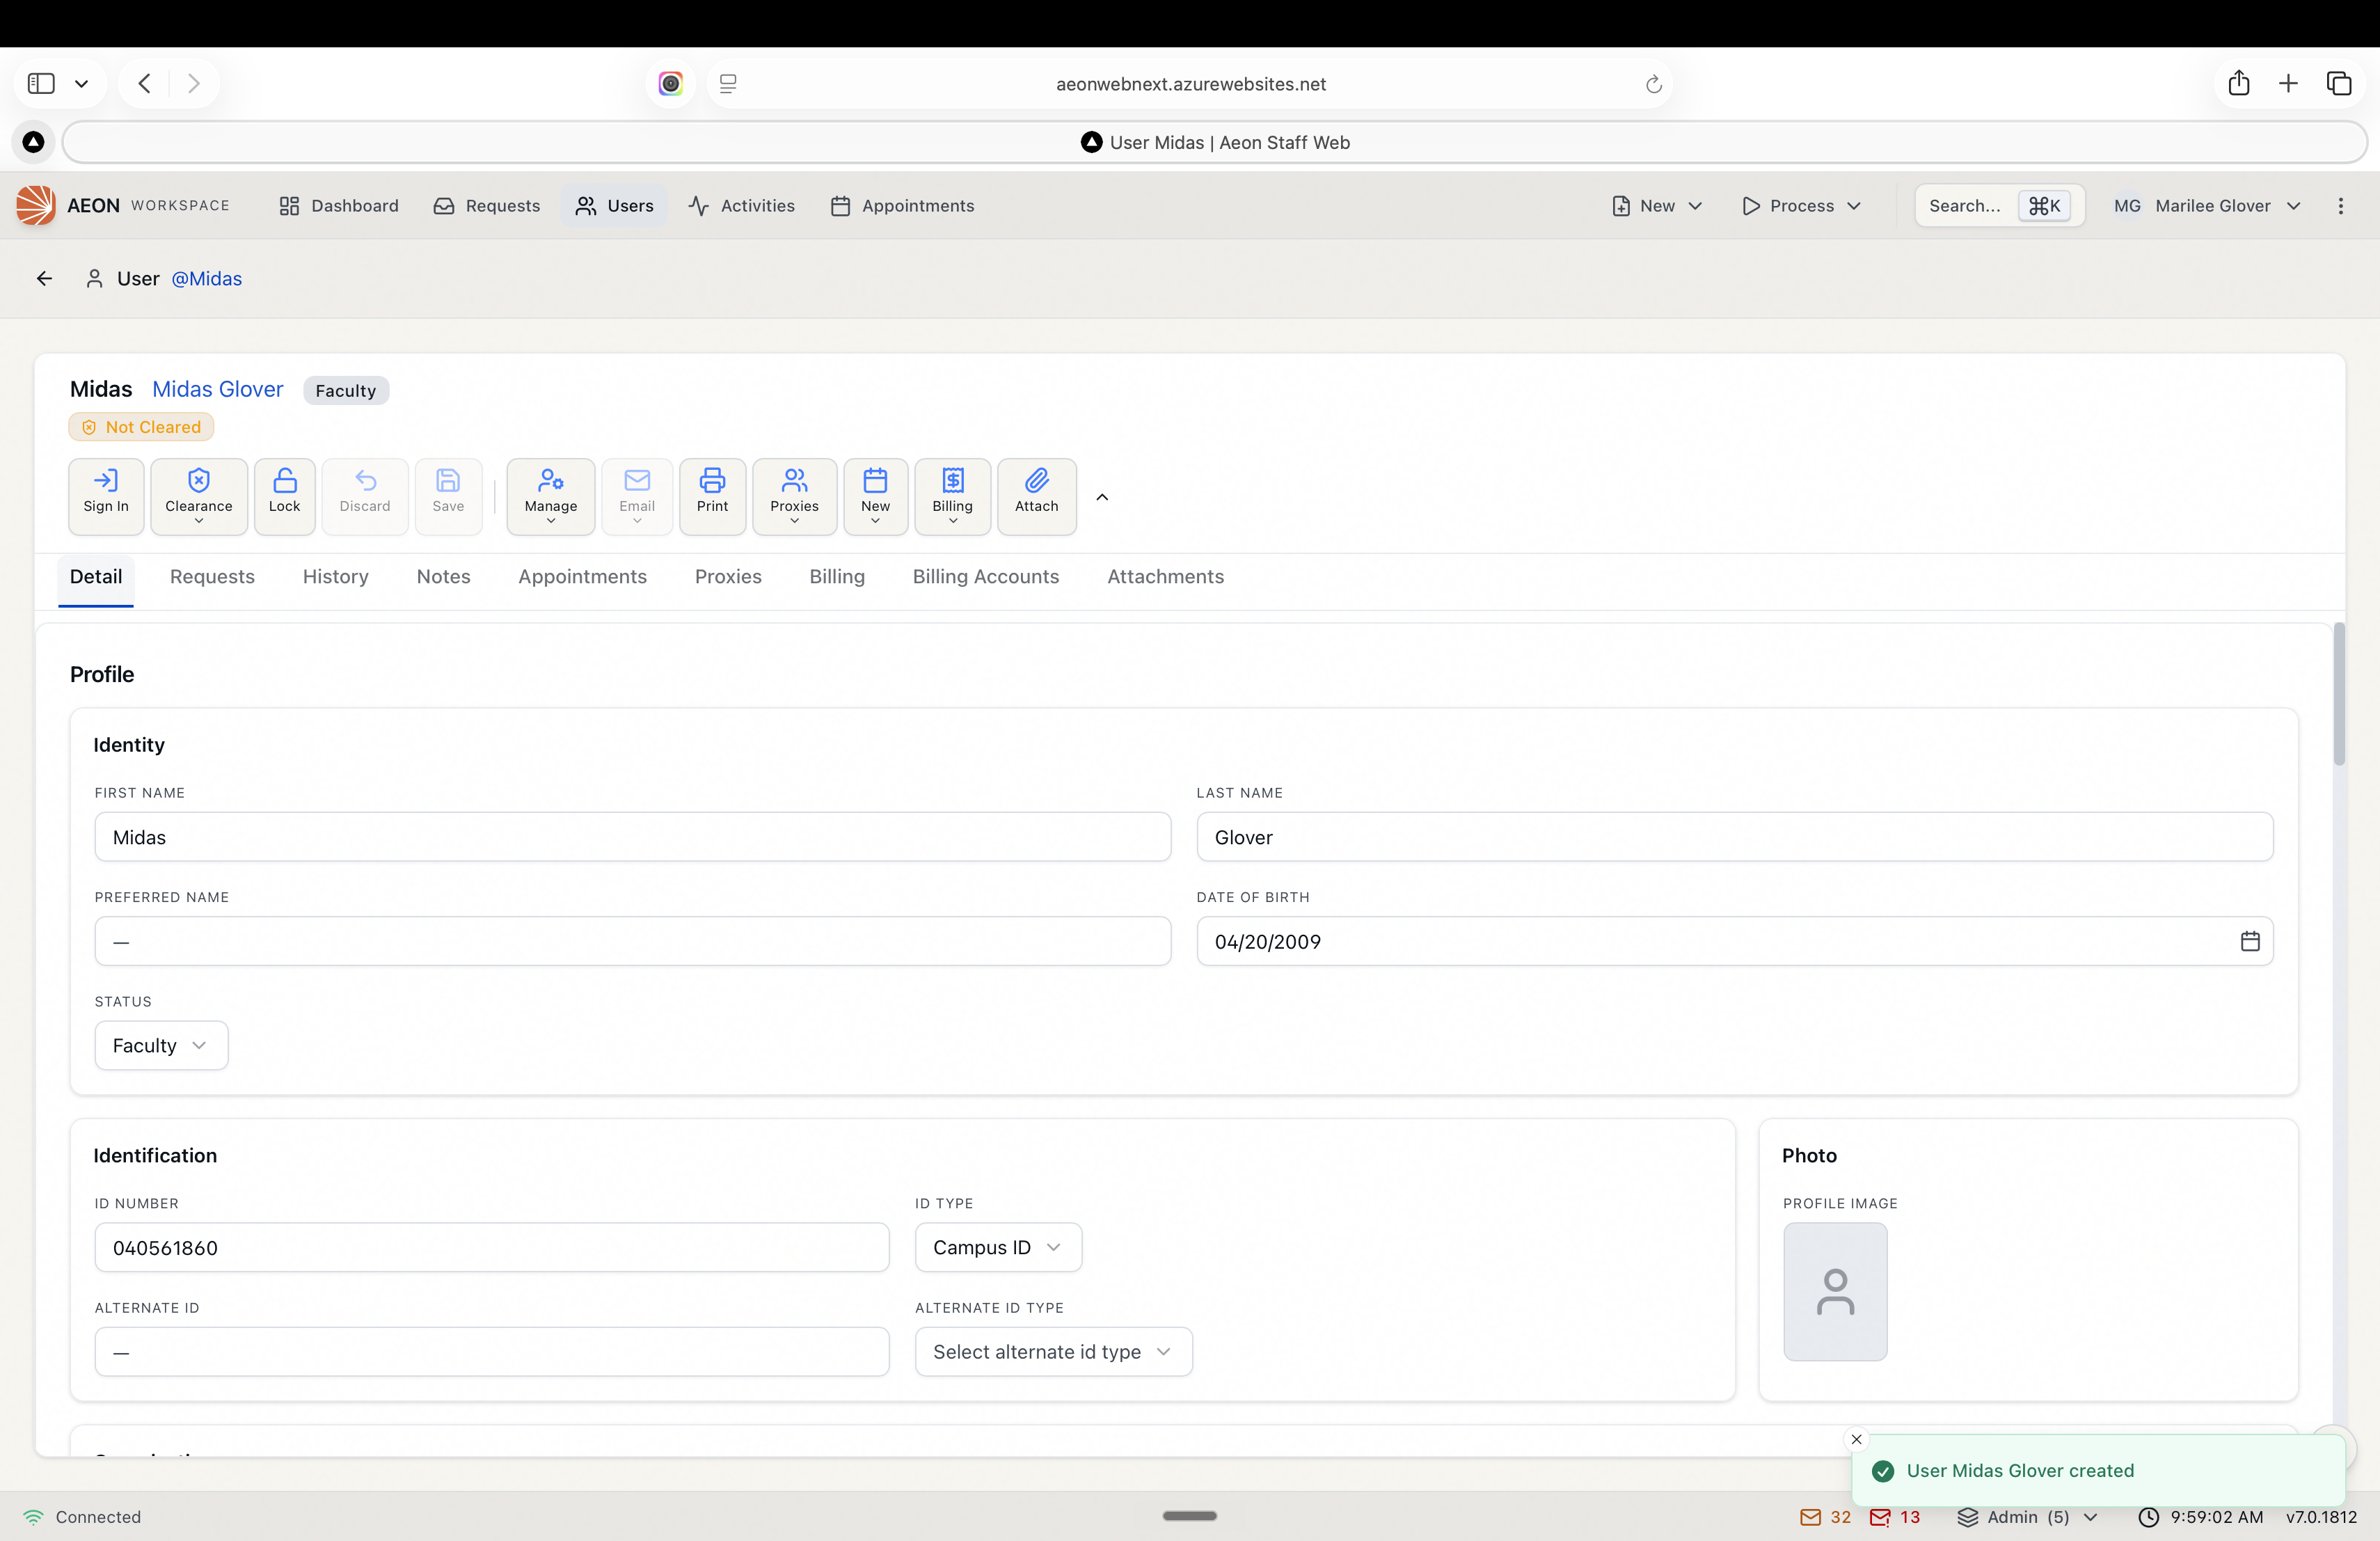
- On success, a "User name created" confirmation appears and Aeon navigates you to the new user's page, where you can place a request, add notes, or keep editing.
The Clear Form button resets every field back to empty; it's disabled until you've entered something. Use it to start over without reloading the page.
What happens to the new user
A manually created user is added with Cleared set to No, exactly like a self-registered user. That means the new record lands in your Users Waiting to be Cleared list, and the normal clearance workflow applies — creating the account doesn't automatically clear it. Aeon also stamps a creation date and sets an expiration date based on the user's status (or your site's default), so the standard expiration rules apply from day one.
You can add a user photo from the web client once the record exists — the photo control is part of the user profile. In Aeon 6 this was a desktop-client-only task; in Aeon 7 you can do it here in the web client.