Viewing Appointment Details and History
Most of the time you're looking at the appointment calendar: a week of slots across one or more reading rooms. When you need to know more about a specific booking — who it's for, what they're coming to see, whether they've been confirmed, or what's changed since it was created — you click the appointment and a detail panel slides in from the right. The calendar stays where it is, so you keep your place in the schedule while you read.
The detail panel is the hub for one appointment. It shows the booking's particulars, gives you a running list of staff notes, and keeps a complete history of every change. It's also where you act on the appointment: confirm it, edit it, sign the researcher in, jump to their user record, or open a linked request — all without leaving the calendar.
- A researcher is at the desk and you want to pull up their appointment to confirm who they are and what they booked.
- You want to check whether an appointment has already been confirmed, or read the notes a colleague left on it.
- You need to see what changed on a booking and who changed it — the History tab is the audit trail.
- You want to act on the appointment (confirm, edit, sign in, email) straight from the schedule.
Opening the detail panel
- Open the Appointments calendar and navigate to the day, week, or room you need (Day, Week, Month, Timeline, and Agenda views all work the same way here).
- Click the appointment block for the booking you want — for example, a 10:00 a.m. slot for a researcher in the Main Reading Room.
- The Appointment Details panel slides in from the right edge of the screen.
The browser URL updates to include the appointment (for example, /appointments?date=2026-06-04&view=week&appointment=842), so you can copy the address to send a colleague straight to the same booking.
To close the panel, click the X in its top-right corner, click anywhere on the calendar behind it, or press Escape. The calendar never moves while the panel is open.
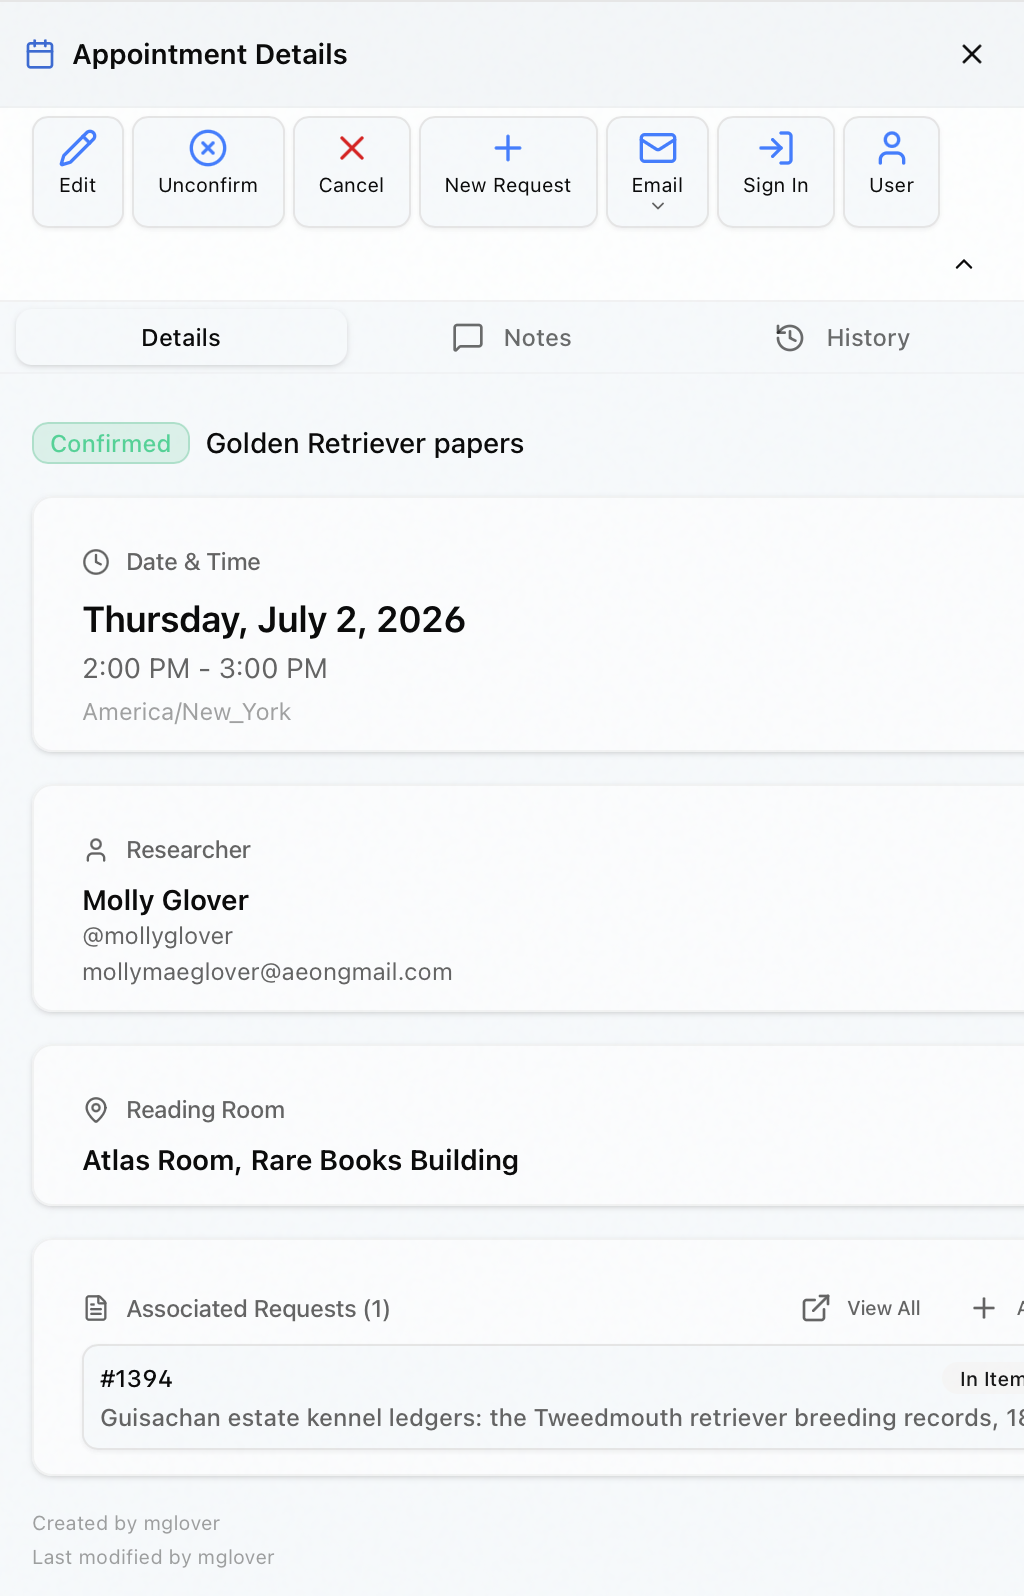
At the top of the panel a colored badge shows the appointment's status:
- Confirmed (green) — the booking is set; the researcher can be signed in.
- Unconfirmed (amber) — the booking exists but hasn't been confirmed yet.
- Cancelled (red) — the appointment was cancelled.
The available actions change with the status (see The action bar below).
The Details tab
The panel opens on the Details tab, which lays out everything about the booking in cards:
- Date & Time — the full date and the start/end times, shown in the reading room's own time zone (the zone is printed underneath, e.g.
America/New_York). Times are converted for you, so what you see is the local time the researcher is expected. - Researcher — the researcher's display name, their
@username, and email. The name is a link: click it to open the full user record. - Reading Room — the room the appointment is booked into.
- Associated Requests — requests tied to this appointment, each shown with its transaction number (e.g.
#12345), a status badge, and the item title. Click a request to open it. This card appears only when the appointment already has at least one linked request; when none are linked yet, use New Request on the action bar. - A small footer line shows who created the appointment and who last modified it.
Working with associated requests
When the appointment has at least one linked request, the Associated Requests card is your bridge between the booking and the material the researcher wants to see:
- Click any listed request (for example
#12345) to open it in full. - Click View All to open a search of every request linked to this appointment.
- Click Add Request to start a new request pre-filled for this researcher and attached to this appointment.
The Associated Requests card — including View All and Add Request — appears only when the appointment already has linked requests. To attach the first request to an appointment that has none, use the New Request button on the action bar. Either way, the new request carries the researcher's username and the appointment forward automatically.
The Notes tab
The Notes tab is a running log of staff notes about the appointment — anything you'd want the next person at the desk to know ("Researcher running ~20 min late," "Pull boxes 3 and 7 in advance"). The tab label shows a count badge when notes exist.
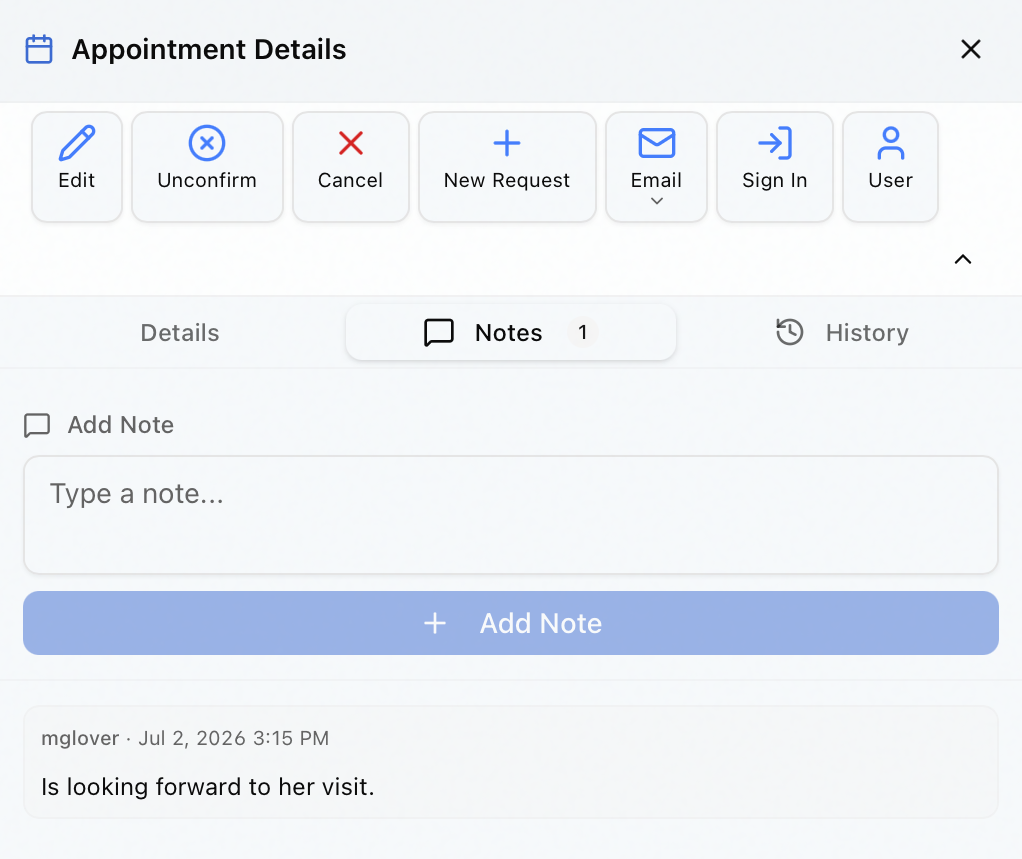
To add a note:
- Click the Notes tab.
- Type into the Add Note box at the top ("Type a note…").
- Click Add Note. The note appears in the list below, stamped with your username and the date and time.
Each note shows who wrote it and when. To remove one, hover over it and click the trash icon; Aeon asks you to confirm with "Are you sure you want to delete this note? This action cannot be undone." before it's removed.
Appointment notes are an internal record for your team. They are not sent to the researcher — if you need to contact them, use the Email action on the action bar instead.
The History tab
The History tab is the appointment's audit trail, headed Activity History with a count of the entries. Every meaningful change is recorded as a dated entry, newest first, with a colored badge naming the kind of action:
| Badge | What happened |
|---|---|
| Created | The appointment was created. |
| Updated | A field was edited. |
| Rescheduled | The date or time was changed. |
| Confirmed | The appointment was confirmed. |
| Unconfirmed | A confirmed appointment was set back to unconfirmed. |
| Cancelled | The appointment was cancelled. |
Each entry shows the date and time of the action (again in the reading room's time zone) and the staff member who performed it ("By username"). When the change touched a specific field, the entry also shows that field name with its old value struck through and the new value beside it — for example, StartTime: Jun 4, 2026 10:00 AM → Jun 4, 2026 11:00 AM for a reschedule.
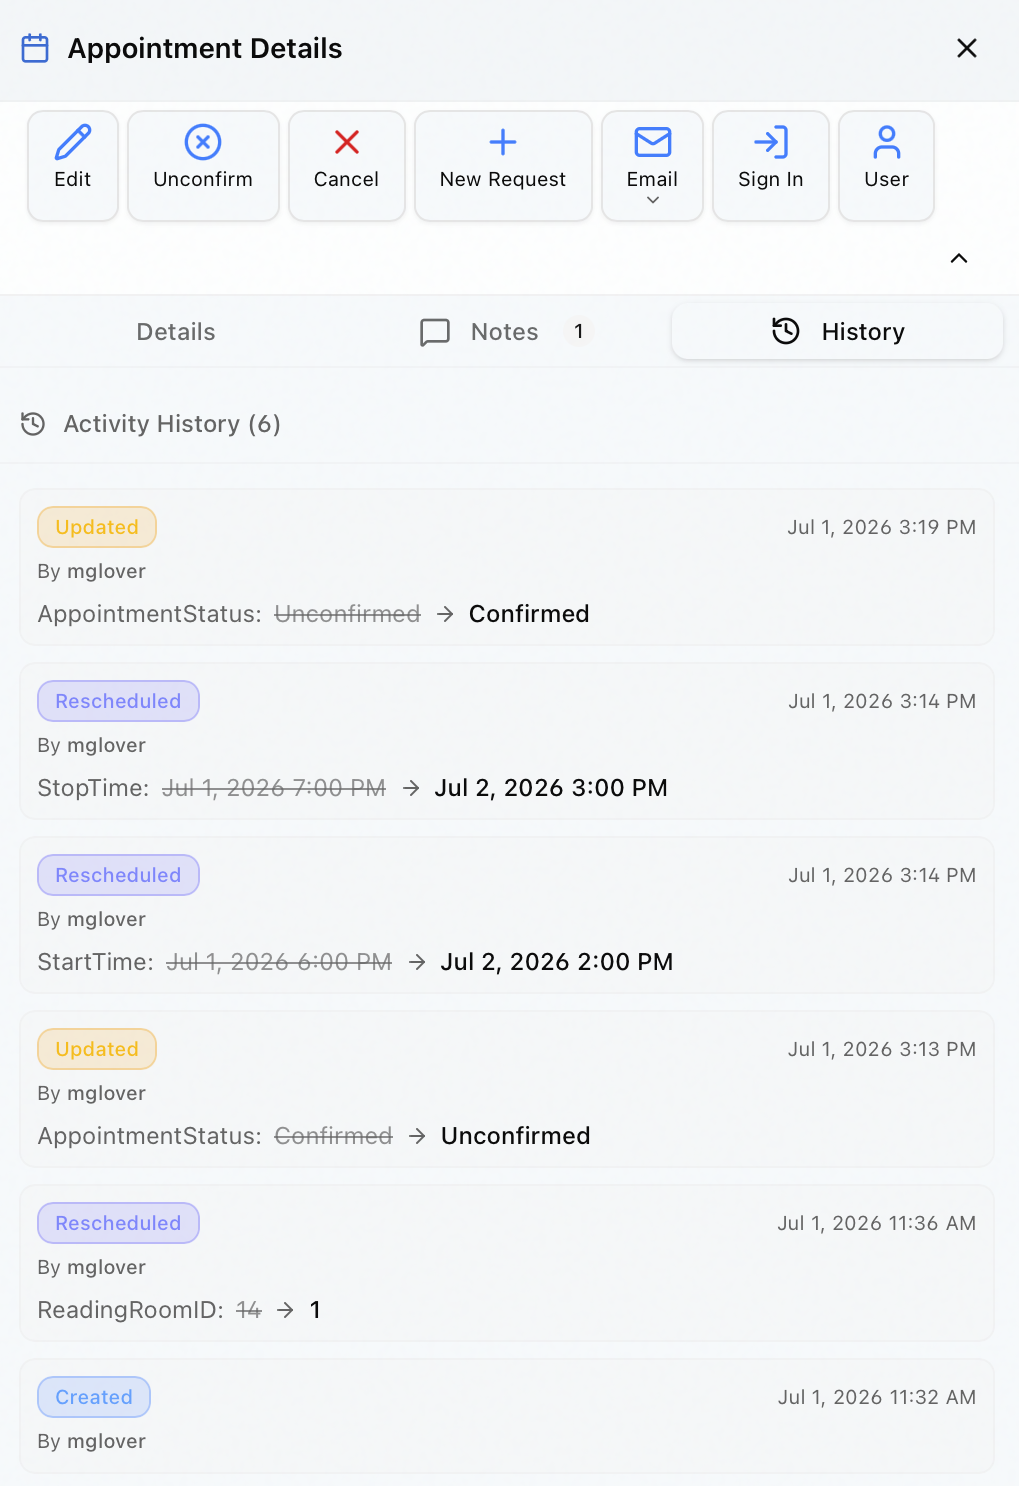
If a booking doesn't look the way you expect — wrong room, shifted time, unexpectedly cancelled — the History tab tells you exactly what changed and which staff member made the change, with timestamps. It's the fastest way to reconstruct what happened to an appointment.
The action bar
Across the top of the panel, below the header, is the action bar. Which buttons appear depends on the appointment's status:
- Edit — change the room, date/time, name, or proxy availability (hidden once an appointment is cancelled).
- Confirm — appears only when the appointment is Unconfirmed; confirms the booking, with the option to send a confirmation email.
- Unconfirm — appears only when the appointment is Confirmed; sets it back to unconfirmed.
- Cancel — cancels the appointment (hidden once it's already cancelled).
- New Request — start a request for this researcher, linked to the appointment.
- Email — appears when appointment email templates exist; pick a template to compose a message to the researcher. A preview loads with the recipient, subject, and body filled in, and you can edit it before sending.
- Sign In / Sign Out — appears only when the appointment is Confirmed. Sign In appears when the researcher isn't signed into the reading room yet; once they're in, it switches to Sign Out.
- User — opens the researcher's full user record.
If the action bar is crowded, use the expand/collapse toggle at its right end to switch between icon-only and labeled buttons.
The detail panel is read-only unless your role grants the matching appointment permission. Aeon enforces this on the server:
- Viewing the panel — its Details, Notes, and History tabs — requires the View level of the Appointments permission. Anyone who can open the calendar can read an appointment.
- Edit, Sign In, Sign Out, and adding a note require the Edit level of Appointments.
- Confirm, Unconfirm, Cancel, and deleting a note require the Full level of Appointments.
- New Request is governed by the Requests permission, not Appointments — it opens the standard request-creation form, which enforces its own permission.
If your role doesn't meet the level for an action, that button is disabled (or the action fails on the server). If you're view-only for appointments, you can read everything but change nothing.