Configuring Reading Room Locations
A location is a specific seat, table, or area inside a reading room — Seat 1, Table A, Carrel 3. Locations are optional. A reading room works fine without any: staff just sign researchers into the room itself. You add locations when you want to track where in the room a researcher is sitting — useful for retrieving materials, monitoring use of restricted items, or simply keeping order in a busy room.
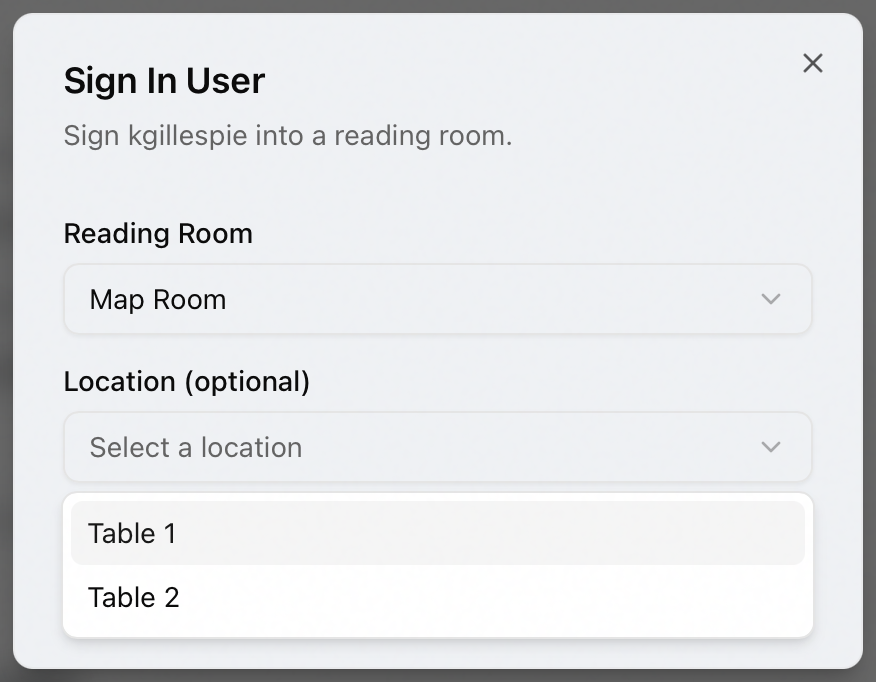
Once a room has locations, they appear in the Location dropdown during reading-room sign-in. The staff member picks the room, then picks the seat. That choice is recorded with the sign-in, so the reading-room history and the dashboard show who is where.
You set locations up in the Locations tab of a reading room's configuration, in the Customization Manager. This is a setup task you do once when a room is created (or when seating changes), not part of daily work.
- A new reading room is being set up and you want staff to assign seats at sign-in.
- Your reading room's seating changed — you added tables, renamed carrels, or pulled a seat out of service.
- Staff are signing researchers into a room but the Location dropdown is empty or missing, and you want to populate it.
The steps below describe the Locations tab on a standard (Appointment) reading room. Walk-in Visit rooms also support locations, but they're edited on a slightly different screen — see Visit Rooms (Walk-In Reading Rooms). The concept (a code plus a display name) is identical in both places.
Opening the Locations tab
- Go to the Customization Manager and open Reading Rooms.
- Select the reading room you want to configure — for example, Main Reading Room — from the list on the left. Its configuration opens on the right.
- Click the Locations tab. (The tabs across the top are Overview, General, Locations, Open Hours, Exceptions, Policies, and Sites.)
The Locations tab shows the room's current seats, one row each. If none are defined yet, you'll see:
No locations defined. Researchers will not see a location dropdown during sign-in for this room.
That message is the normal, intended state for a room you sign people into without assigning a seat.
Adding a location
Each location has two parts:
| Field | What it is | Example |
|---|---|---|
| Name | The label staff see in the Location dropdown at sign-in. | Table 1 |
| Code | The value recorded with the sign-in in the reading-room history. | T1 |
The Name is what people read; the Code is what gets stored. They can be the same value if you don't need them to differ — many sites use the same text for both (for example, Seat 1 and Seat 1).
To add a seat to Main Reading Room:
- On the Locations tab, click Add Location. A new empty row appears.
- In Name, type the label staff will see — for example,
Table 1. - In Code, type the value to record — for example,
T1. - Add the rest the same way. The rows work like a spreadsheet: press Enter in a cell to drop a new row below and jump to it, or Tab out of the last row's Code cell to add another — so you can key in
Table 2/T2,Table 3/T3, and so on without reaching for the mouse. (The Add Location button does the same thing.) - Click Save at the top of the panel.
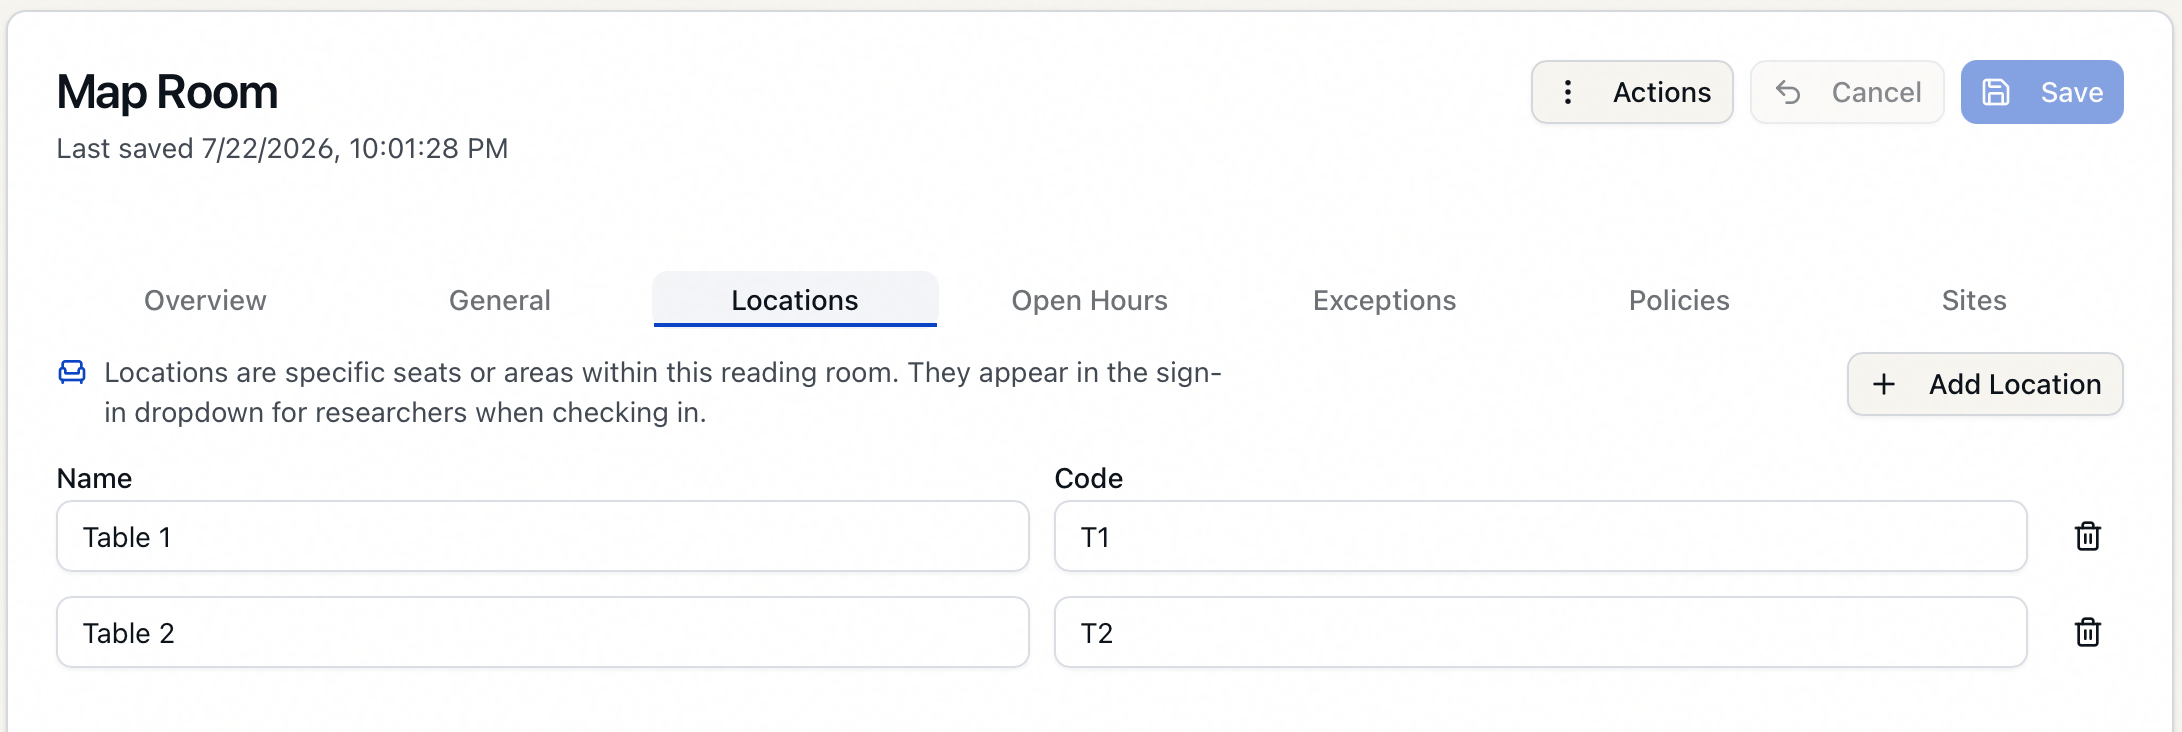
There's no separate save button for the Locations tab. Adding, editing, and removing locations are all part of the room's single Save. The same applies to Cancel, which discards every unsaved change across all tabs — not just the one you're looking at. Until you save, the panel header reads Unsaved changes.
Editing or removing a location
- Rename a seat or change its code: edit the Name or Code field on that row directly, then Save.
- Remove a seat from service: click the trash-can icon at the end of its row, then Save.
Removing a location only takes it out of the sign-in dropdown going forward. Past sign-ins that recorded that seat keep their history — the record of who sat where isn't rewritten.
Validation rules
Aeon enforces a few rules when you save:
- Both fields are required on every row. A row with a blank Name or blank Code is rejected with "Location name is required." or "Location code is required." (If you add a row and leave it completely empty, it's simply dropped on save rather than blocking you.)
- Names must be unique within the room. Two seats can't share the same Name — you'll see "Location names must be unique." (matching is case-insensitive, so
Table 1andtable 1collide). - Length limits: a Name can be up to 200 characters and a Code up to 255.
What researchers and staff see
Once a room has at least one location and you've saved:
- At sign-in, after a staff member chooses the room, a Location dropdown appears listing every seat by its Name. Picking one records that seat with the sign-in.
- If a room has no locations, no Location dropdown appears — staff sign the researcher into the room with no seat.
So adding the first location to a room turns the seat picker on; removing the last one turns it off.
Configuring locations requires the Operations configuration capability — the one that also covers sites, site groups, reading rooms, and system settings. Without it, Reading Rooms doesn't appear in the Customization Manager, and opening the page directly shows "You don't have permission to access this customization section." There's no view-only mode. With the capability, you can add, edit, and remove locations; the save is also enforced on the server against the same capability.
This page is about defining the seats. Moving an already-signed-in researcher from one seat to another is a daily-work task, not a configuration change — see Assigning Seating and Locations.