Creating and Editing Appointments
An appointment reserves a block of time for a researcher in a reading room. Most appointments are booked by the researcher through the web request form, so day to day you'll spend more time viewing and adjusting appointments than creating them from scratch. But you'll create one whenever you book a visit for someone over the phone or at the desk, and you'll edit one whenever a researcher needs a different day, a longer slot, or a different room.
Both jobs run through small dialogs rather than a full form. You create from the New Appointment button (or by double-clicking an open slot in Day view), and you edit from the appointment's detail panel after you open it from the calendar.
- A researcher calls or walks up and asks you to book a reading room visit — use New Appointment.
- A researcher needs to move an existing visit to a different time, day, or room — open the appointment and click Edit, then choose whether to email them the change.
- You're booking a visit for a specific person whose record you already have open — start the appointment from their user record so you don't have to search for them again.
An appointment must start and end on the same calendar date. To book a researcher for several days, create a separate appointment for each day.
Creating an appointment
From the appointment calendar
This is the usual path when you're working the reading room schedule.
-
Open the Appointments calendar.
-
Click New Appointment in the top toolbar. (You can also double-click an open time slot in Day view to start a new appointment with that date, time, and room already filled in.)
-
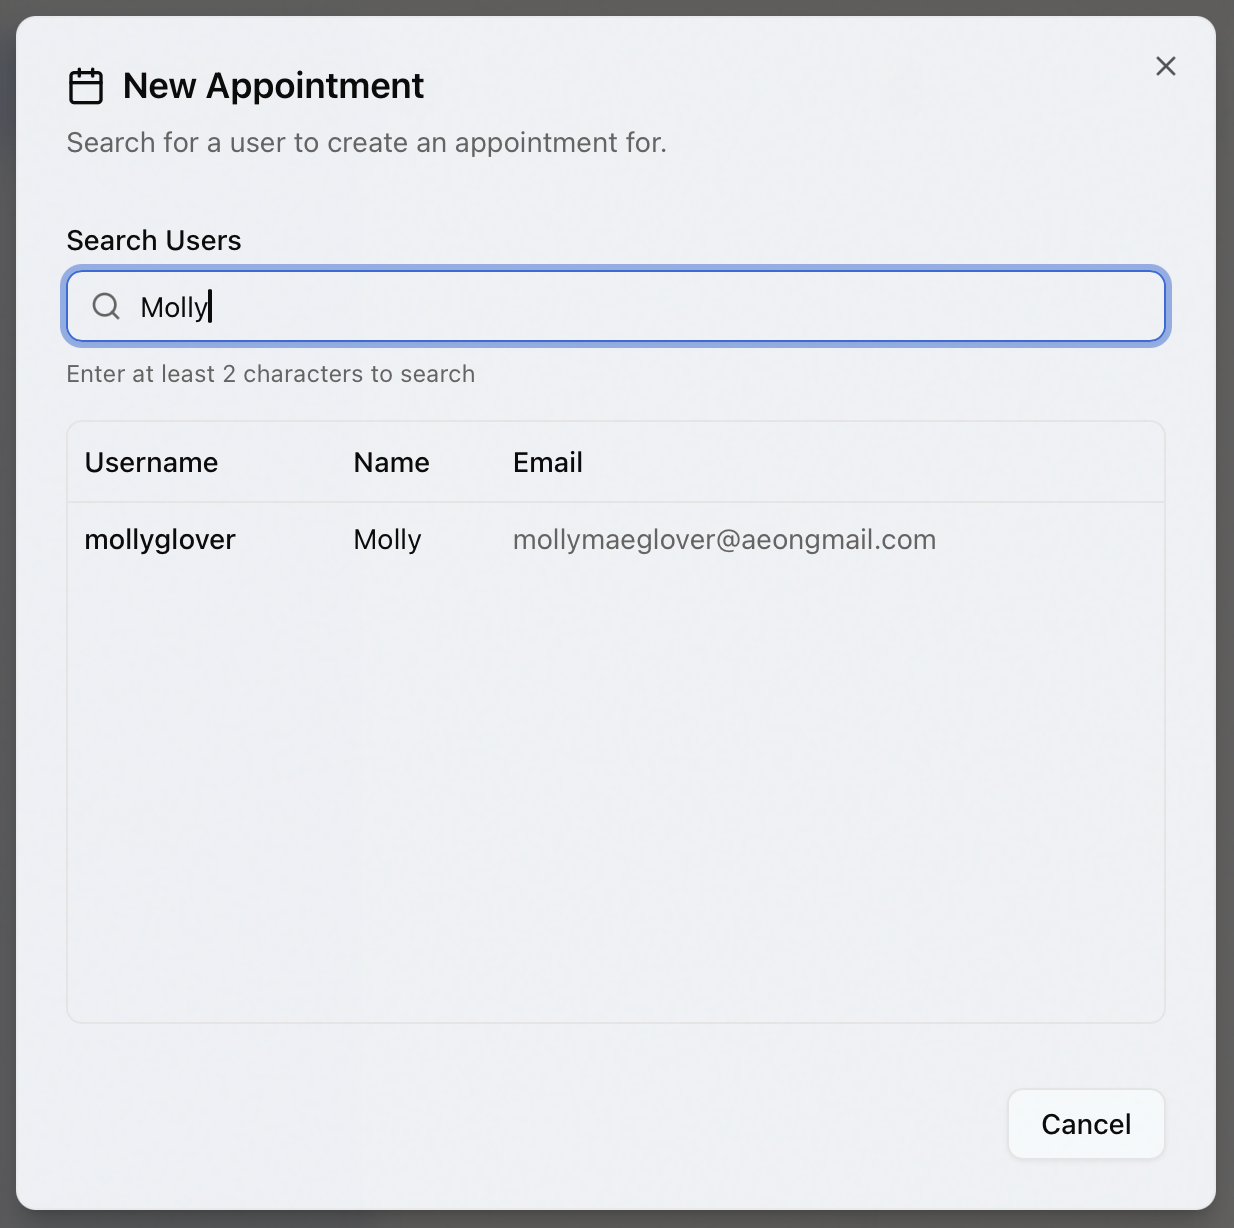
The New Appointment dialog opens on the Search Users step. Type at least two characters of a username, first name, or last name. Matching users appear in a list with their username, name, and email.
-
Click the researcher's row to select them. The dialog advances to the appointment form.
-
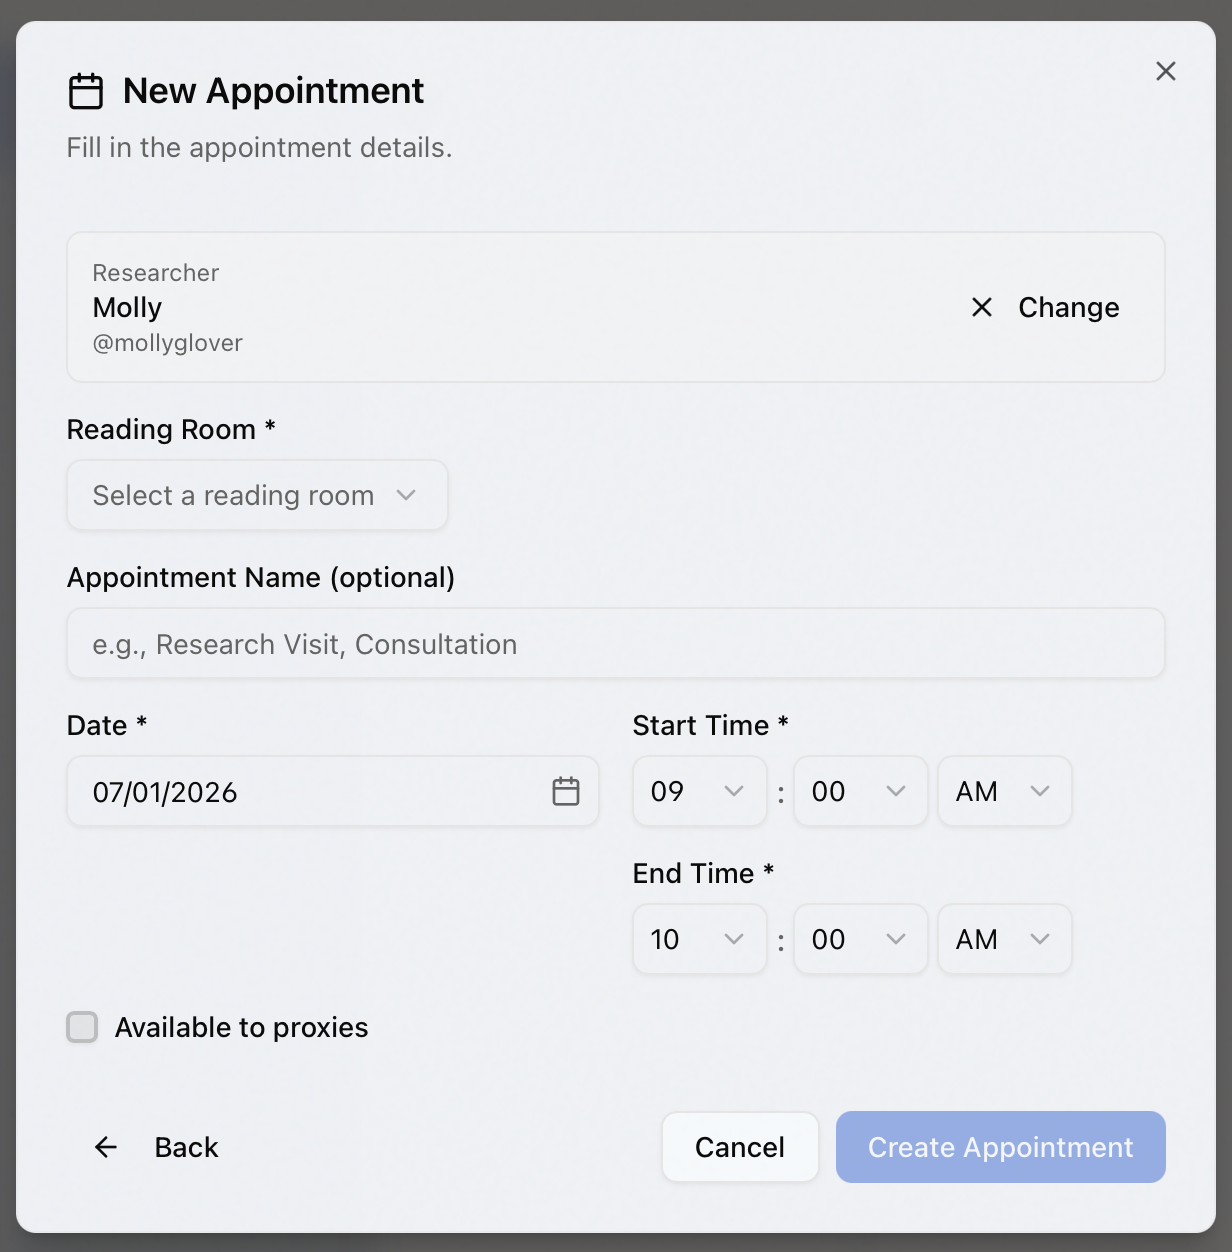
Fill in the details (see Appointment fields below).
-
Click Create Appointment.
A confirmation appears and the new appointment opens in the detail panel.
On the appointment form, the researcher is shown in a panel at the top. Click Change (or Back) to return to the search step and pick someone else. You can't change the researcher after the appointment is created — you'd have to cancel it and book a new one.
From a user record
When you already have the researcher's record open, start the appointment there and Aeon skips the search step.
- Open the user's record. In the toolbar, open the New menu and choose New Appointment. (That option appears only when your site has at least one reading room.)
- The New Appointment dialog opens straight on the appointment form with that researcher already filled in — no search needed.
- Fill in the details and click Create Appointment.
You can also start an appointment from a request you're working on, which links the new appointment to that request. See Appointment Request Association for how requests and appointments connect.
Appointment fields
The appointment form is the same whether you're creating or editing. Required fields are marked with an asterisk.
| Field | Notes |
|---|---|
| Reading Room * | The room the visit is booked into. Choosing a room sets a default end time based on that room's minimum appointment length. |
| Appointment Name (optional) | A short, descriptive label — for example, "Research Visit" or "Consultation." It helps the researcher recognize the appointment and appears if they import it into their own calendar. Limited to 50 characters. |
| Date * | The calendar date of the visit. |
| Start Time * | When the visit begins. Changing the start time shifts the end time to keep the same length. |
| End Time * | When the visit ends. Must be later than the start time, on the same date. |
| Available to proxies | If checked, the appointment is made available to the researcher's proxies (so a proxy can act against it on the researcher's behalf). Leave unchecked to keep it to the researcher alone. |
The date and time you enter are interpreted in the reading room's own time zone, not your browser's. The detail panel and calendar show the room's time zone next to each appointment so there's no ambiguity.
An appointment you create as staff always starts in the Confirmed status. Whether an appointment a researcher books for themselves starts Confirmed or Unconfirmed depends on the reading room's auto-confirm appointments setting: with auto-confirm on (the default), their booking is confirmed automatically; with it off, it starts Unconfirmed and shows up in the dashboard's Appointments to Confirm list for staff to review. To learn how confirmation works, see Confirming Appointments.
Editing an appointment
You edit an appointment from its detail panel, which opens when you select the appointment on the calendar.
-
On the Appointments calendar, click the appointment you want to change. Its Appointment Details panel slides in from the right.
-
In the action bar at the top of the panel, click Edit.
-
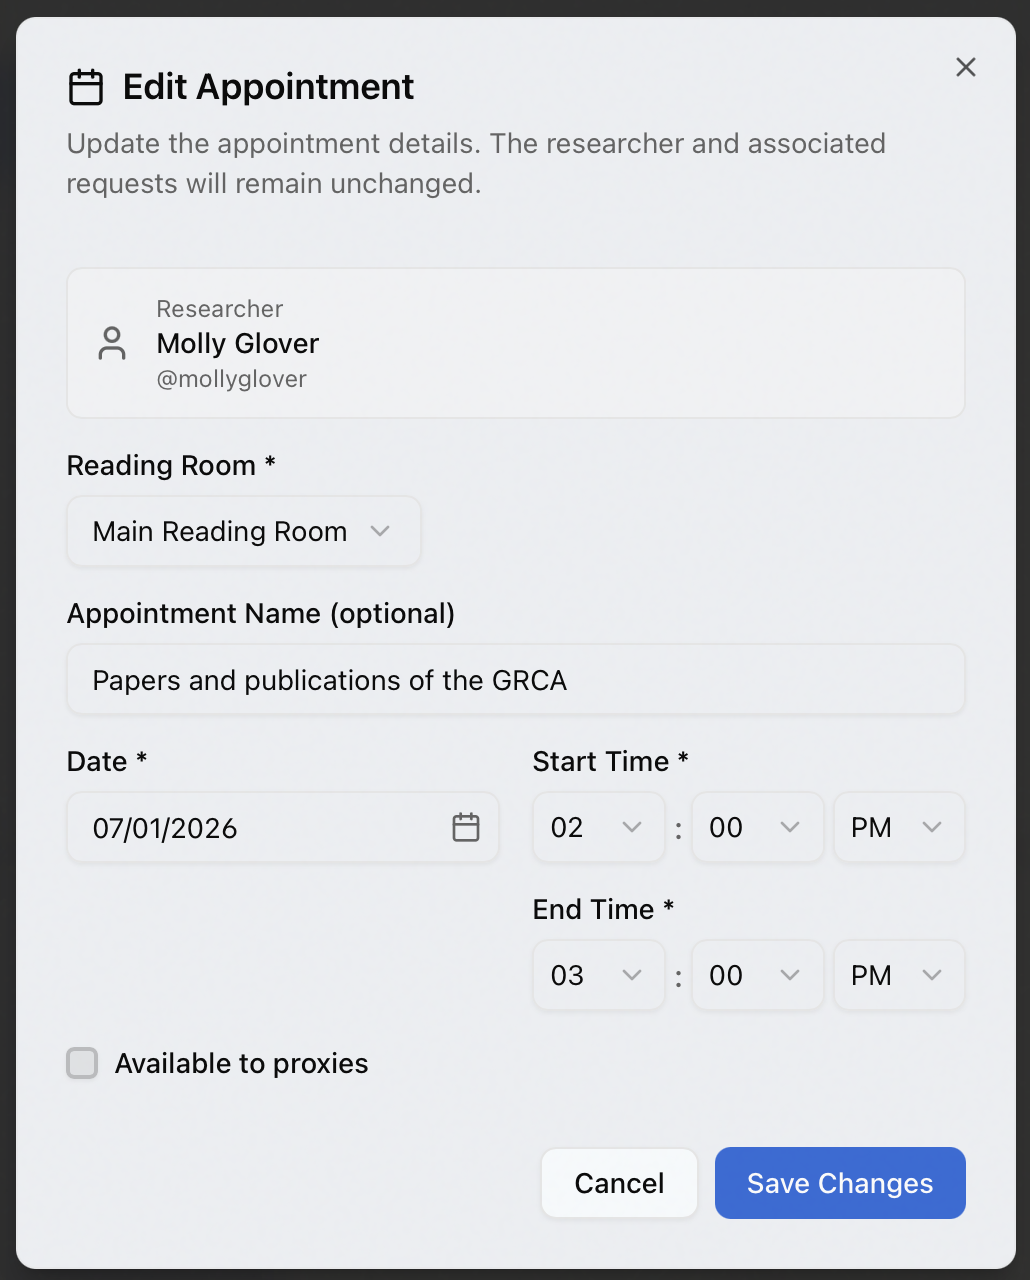
The Edit Appointment dialog opens with the current values filled in. The researcher and any associated requests are shown but can't be changed here — only the schedule and details.
-
Adjust the Reading Room, Date, Start Time, End Time, Appointment Name, or Available to proxies as needed.
-
Click Save Changes.
Editing covers the appointment's schedule, room, name, and proxy setting. It does not change the researcher or directly add and remove requests — those stay attached as they were. To move an appointment to a different person, cancel it and create a new one.
Rescheduling and the notification email
Whenever you save a change to the date, time, or reading room, Aeon treats it as a reschedule and asks whether to tell the researcher:
-
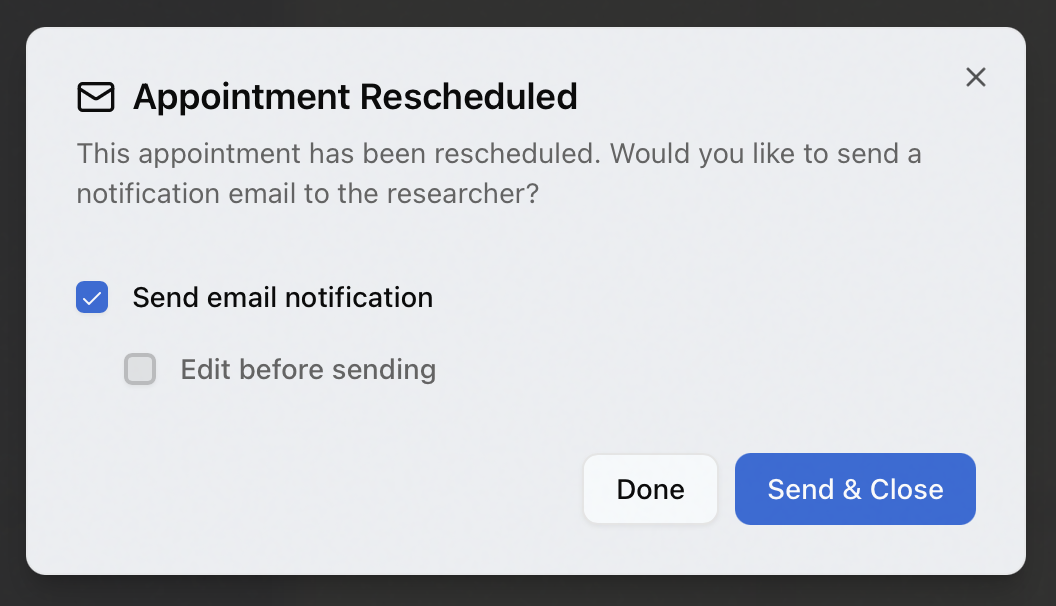
After you click Save Changes on a schedule change, the Appointment Rescheduled prompt appears. (The change is already saved at this point — this step is only about the notification.)
-
Decide whether to notify the researcher:
- Leave Send email notification checked to send the Appointment Rescheduled email.
- Optionally check Edit before sending to review and tweak the email first.
- Uncheck Send email notification to close without sending any email.
-
Click Send & Close to send the email (the button reads Close if you turned the email off). To dismiss the prompt without sending — the change stays saved either way — click Done.
If you chose Edit before sending, the email opens in an editor pre-filled from the Appointment Rescheduled template; make your changes and send it from there.
Changing just the appointment name or the "available to proxies" setting saves immediately with no email prompt — Aeon only offers the reschedule email when the date, time, or room actually moved. Your Send email notification / Edit before sending choices are remembered for next time.
Once an appointment is cancelled, its details are locked — the Edit action is hidden and the API rejects changes to a cancelled appointment. To cancel an appointment (with its own optional notification email), see Cancelling Appointments.
What the form doesn't enforce
Creating and editing appointments as staff is deliberately flexible so you can make exceptions a researcher couldn't make themselves.
When you book or edit an appointment in the staff client, Aeon only checks that a researcher is assigned and that the end time is after the start time on the same day. The reading room's open hours, maximum appointment length, and capacity limits are not enforced — that lets you make a legitimate exception, but it also means it's on you to know the room's policies before you override them.
- Creating, editing, and rescheduling appointments requires the Edit level of the Appointments permission. With only View, you can open the calendar and read appointment details, but New Appointment and Edit are disabled.
- Cancelling and confirming appointments require the higher Full level of the Appointments permission. See Cancelling Appointments and Confirming Appointments.