Multi-Tab Workflow and Pinned Items
Most of the time you work one request (or one user) at a time: click a row in a queue, its detail opens on the right, you finish, you move to the next one. The detail panel always shows whatever you last clicked — that single item is called the live tab, and it gets replaced the moment you click something else.
Pinning is for the times when that isn't enough. Pin a request and it stays put as its own tab even after you click away to look at something else. You can pin several requests, jump between them with one click, and — once you have two pinned — show two of them on screen at the same time in split view. Pins are remembered in your browser, so the requests you pinned this morning are still there after lunch, or after you close and reopen the tab.
Requests and users each keep their own separate set of pins, on the Requests page (/requests) and the Users page (/users).
- You're juggling several requests at once — pin each one so you can flip between them without losing your place in the queue.
- You want to compare two requests (or two users) field-by-field — pin both, then turn on split view.
- You're stepping away and want a request to still be open when you come back — pin it; it survives a page reload and a closed tab.
The tab bar and split view appear only on a desktop-width screen. On a phone or a narrow window the detail opens full-screen one at a time, so the tab bar is hidden and split view turns itself off automatically. Your pins are still saved — they reappear when you widen the window.
The tab bar
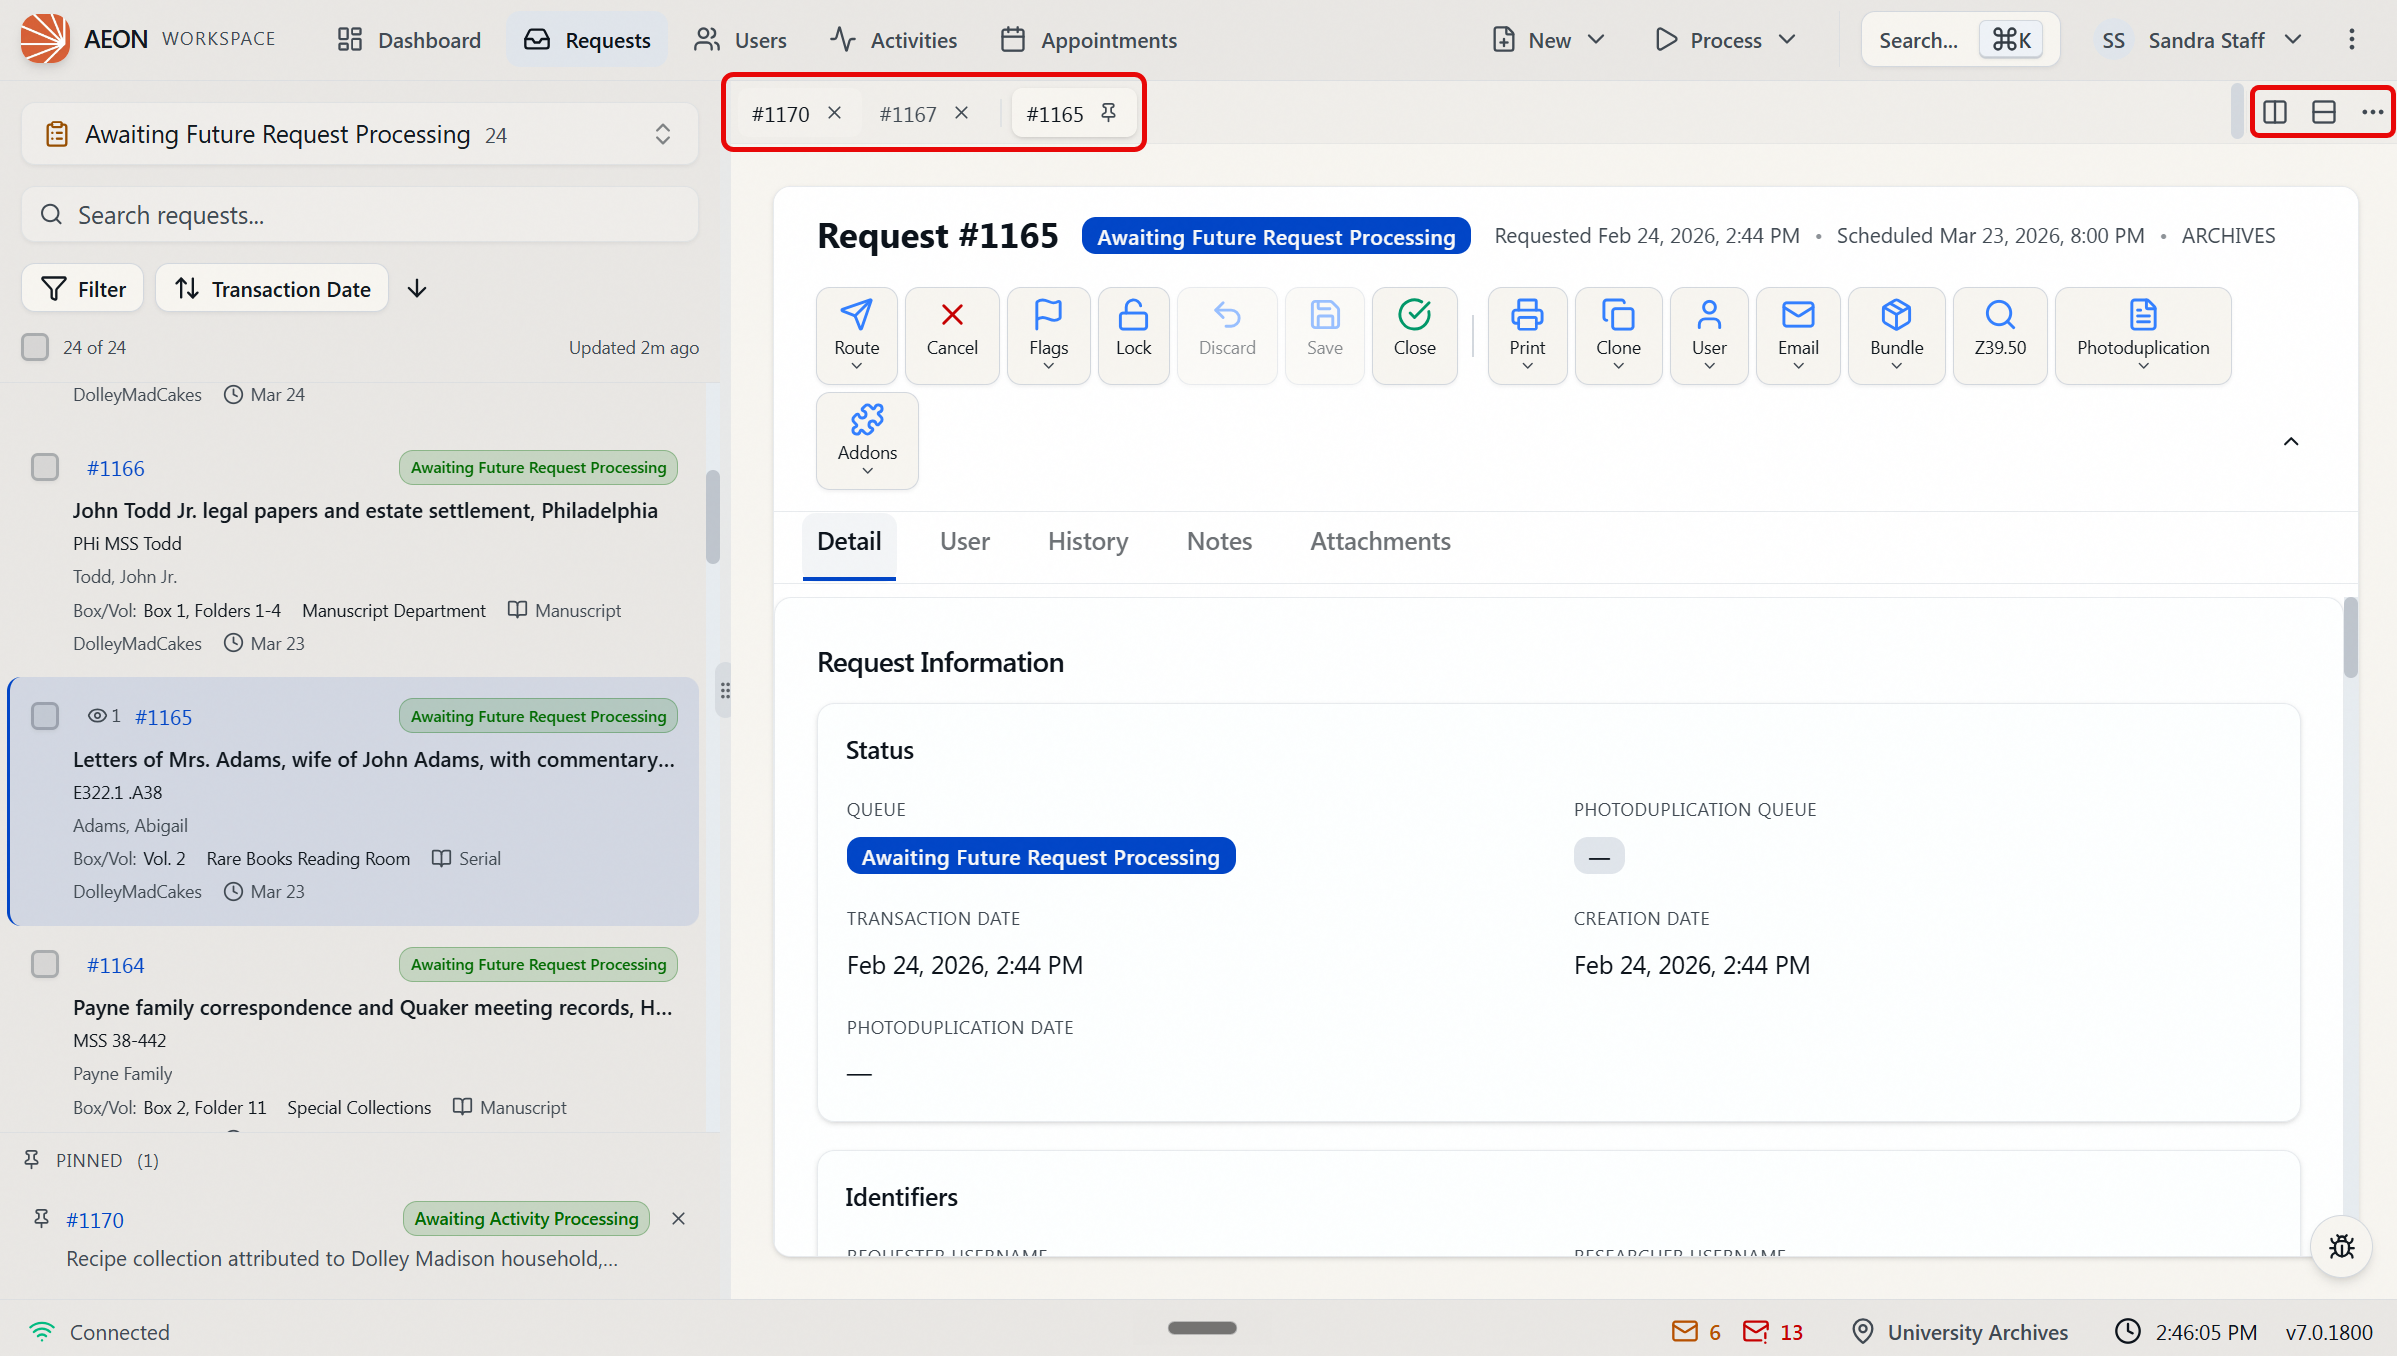
When a request is open, a thin tab bar runs across the top of the detail panel. It holds:
- Pinned tabs — one per request you've pinned, each labelled with its transaction number (for example, #12345).
- A short divider, then
- The live tab — the request you most recently clicked in the list, if it isn't already pinned. There's only ever one live tab, and it's replaced each time you click a different row.
The tab you're currently viewing is highlighted. Click any tab to switch the detail panel to it.
Pinning a request
- In a queue, click request #12345 to open it. It appears as the live tab.
- Hover the live tab and click the pin icon on it (tooltip: "Pin this request").
- The tab becomes a permanent pinned tab. Now click request #67890 in the list — #12345 stays pinned in the bar while #67890 takes over the live slot.
Repeat for as many requests as you need. Each pinned tab stays until you close it.
On the Users page, open a user and click the pin icon on the live tab (tooltip: "Pin this user"). User tabs are labelled with the username (for example, @jdoe) rather than a number. User pins are kept in a list separate from request pins — pinning users never affects your pinned requests, and vice versa.
Switching between, and closing, pinned tabs
- Switch — click a pinned tab, or use the left/right arrow keys when a tab is focused (Home/End jump to the first/last). Press Enter or Space to open the focused tab.
- Close one — click the X on a pinned tab (tooltip: "Close"). Closing a tab only removes it from the bar; it does not change, cancel, or delete the request itself.
- Close all — click the ⋯ (more) button at the right end of the tab bar and choose Close all pinned tabs.
Pinning and closing tabs is purely about what's open in front of you. If you were editing a request, its record lock is governed separately — by saving, discarding, or the inactivity timeout — not by whether the tab is pinned or closed.
Finding a pinned item in the list panel
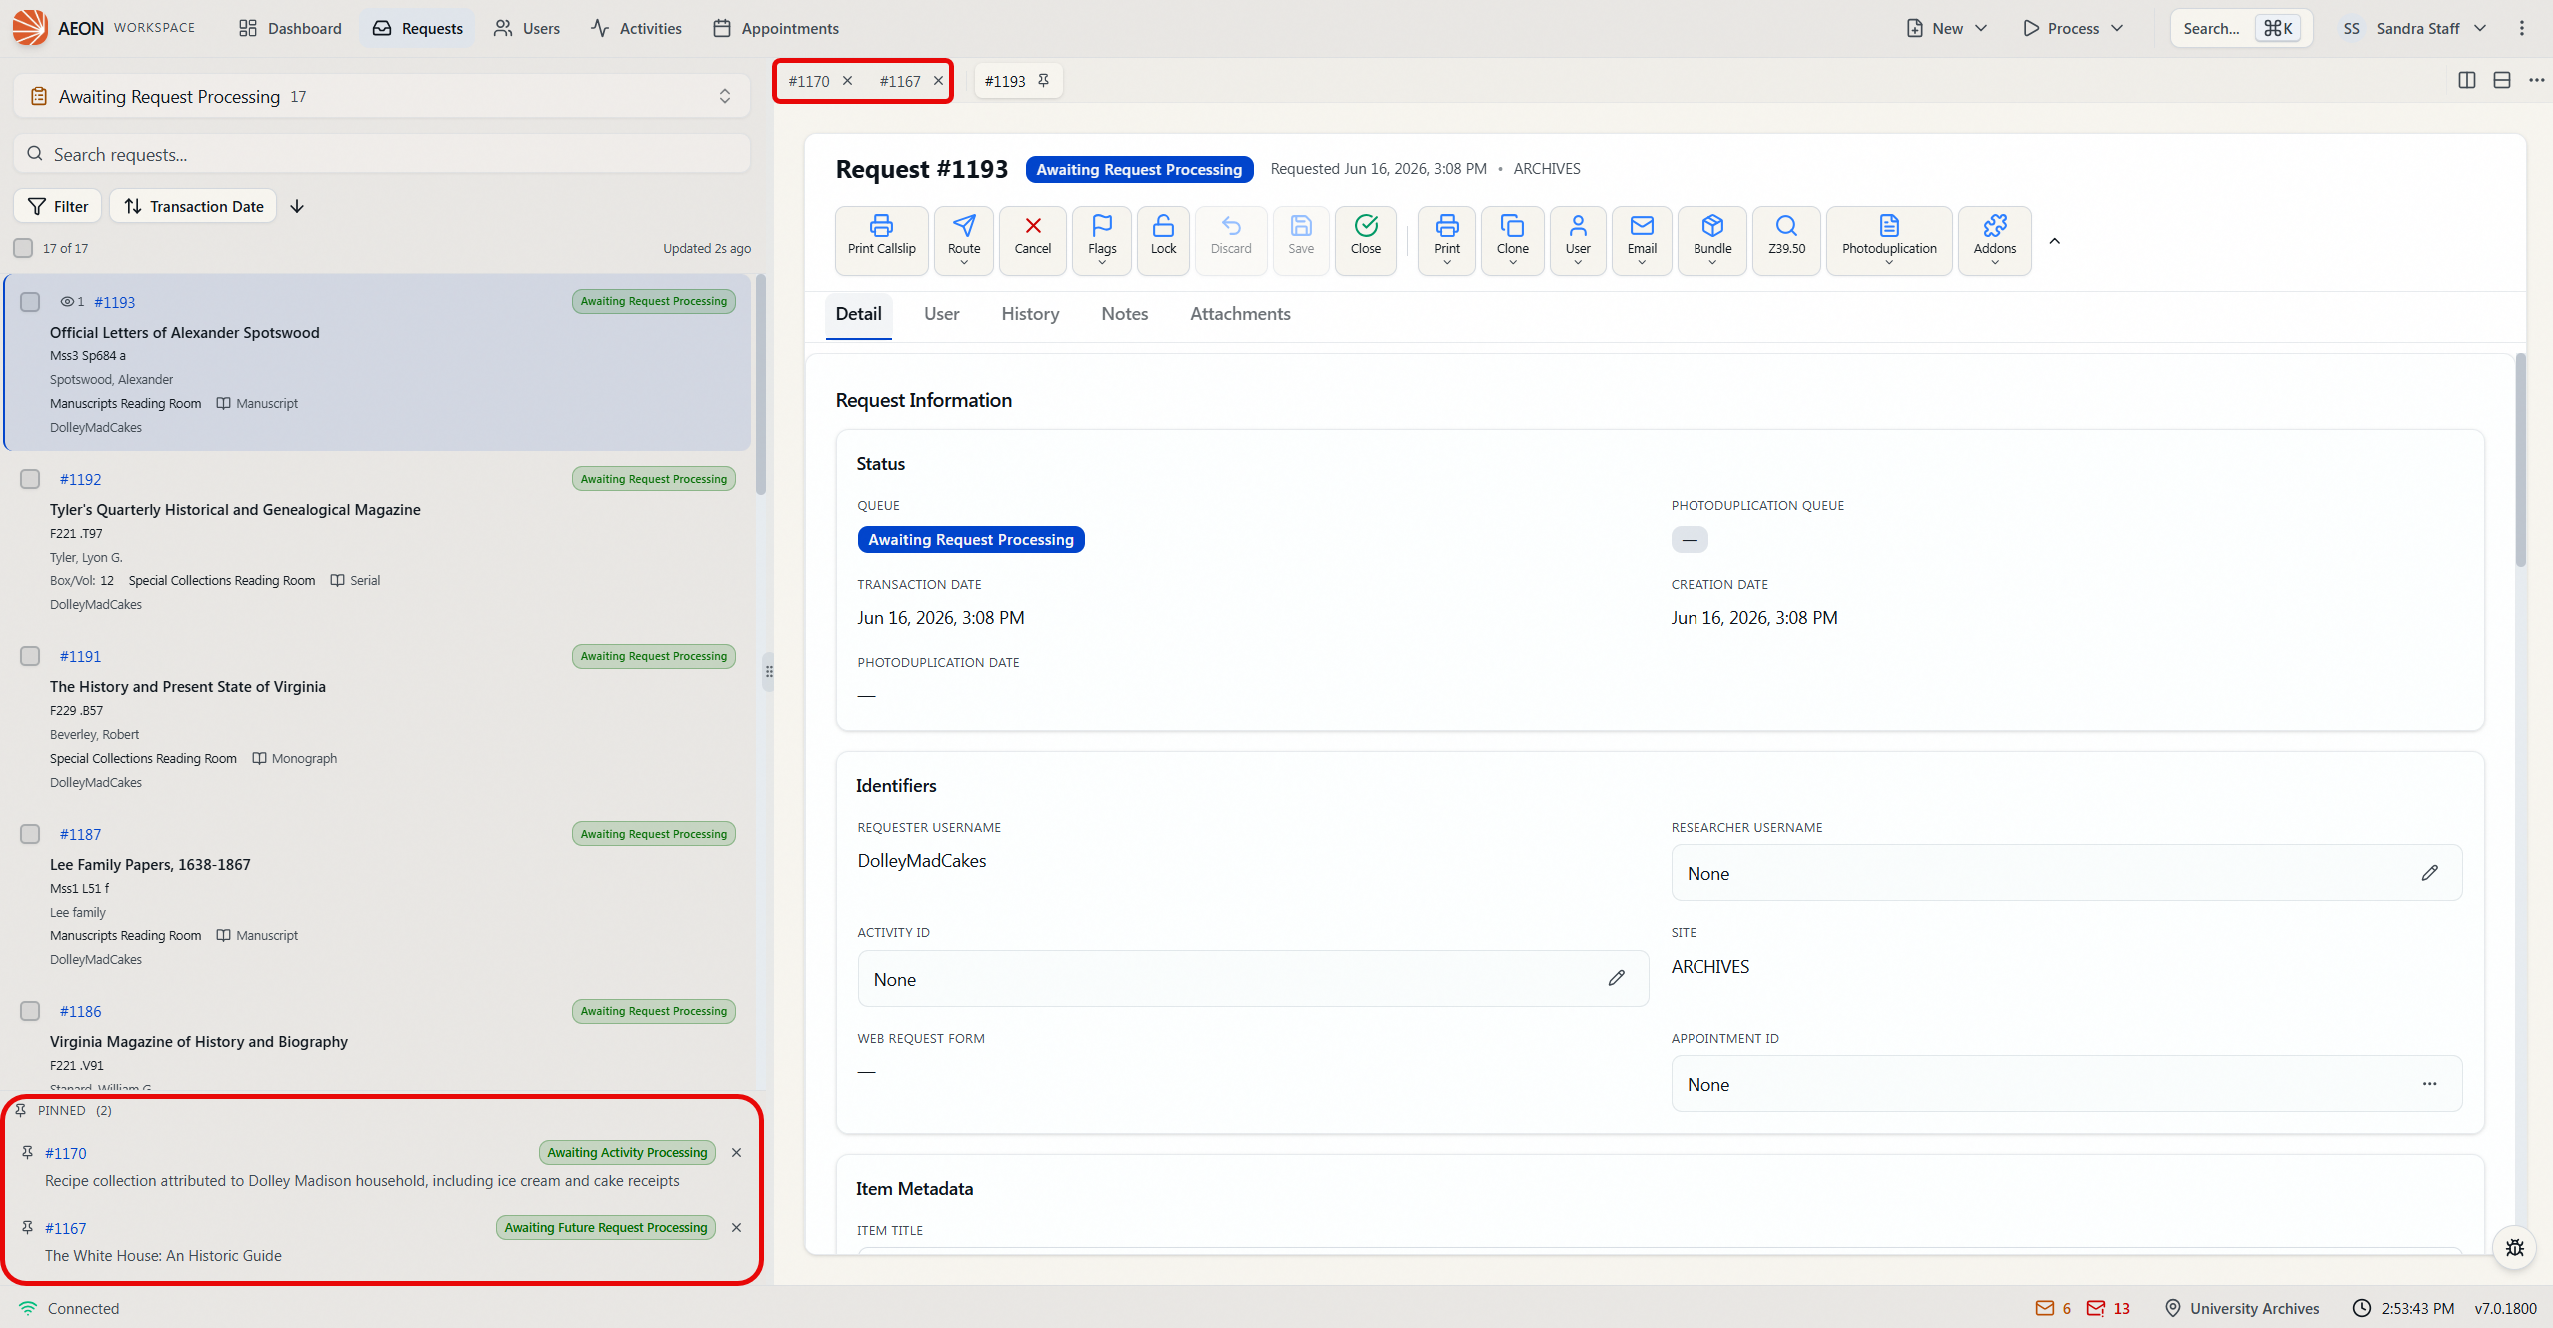
Pinned items also surface in a Pinned section at the bottom of the left-hand list panel, under a heading with a pin icon and a count (for example, Pinned (2)). This is what keeps a pinned item reachable even when it isn't in the rows you're currently looking at.
On the Requests page, the Pinned section lists only the requests not already in the current list — for example, a request you pinned and then routed to another queue, or one that falls outside the queue or category you've switched to. Each entry shows the transaction number, the item title, and a status badge so you can see where the request has ended up. Click the entry to open it in the detail panel, or click its X to unpin it (tooltip: "Unpin").
Because the section only holds pins that aren't in the current list, the count in the heading can be lower than the number of tabs you've pinned. A request you've pinned that's also sitting in the queue or search results you're viewing stays in the list (and in the tab bar) and isn't repeated here — so with two requests pinned, you'll see Pinned (1) when one of them is already in the list you're looking at, and no Pinned section at all when both are.
On the Users page, the Pinned section lists all your pinned users (whether or not they're in the current results). Each entry shows the user's name and status. To unpin a user, use the X on its tab in the tab bar.
Pin a request, route it onward, and it follows you into the Requests Pinned section — handy for keeping an eye on something you just sent to another queue without hunting for it again.
Comparing two items in split view
Once you have two or more pinned tabs, you can show two at the same time.
- Pin at least two requests (for example, #12345 and #67890).
- In the tab bar, click one of the split-view buttons:
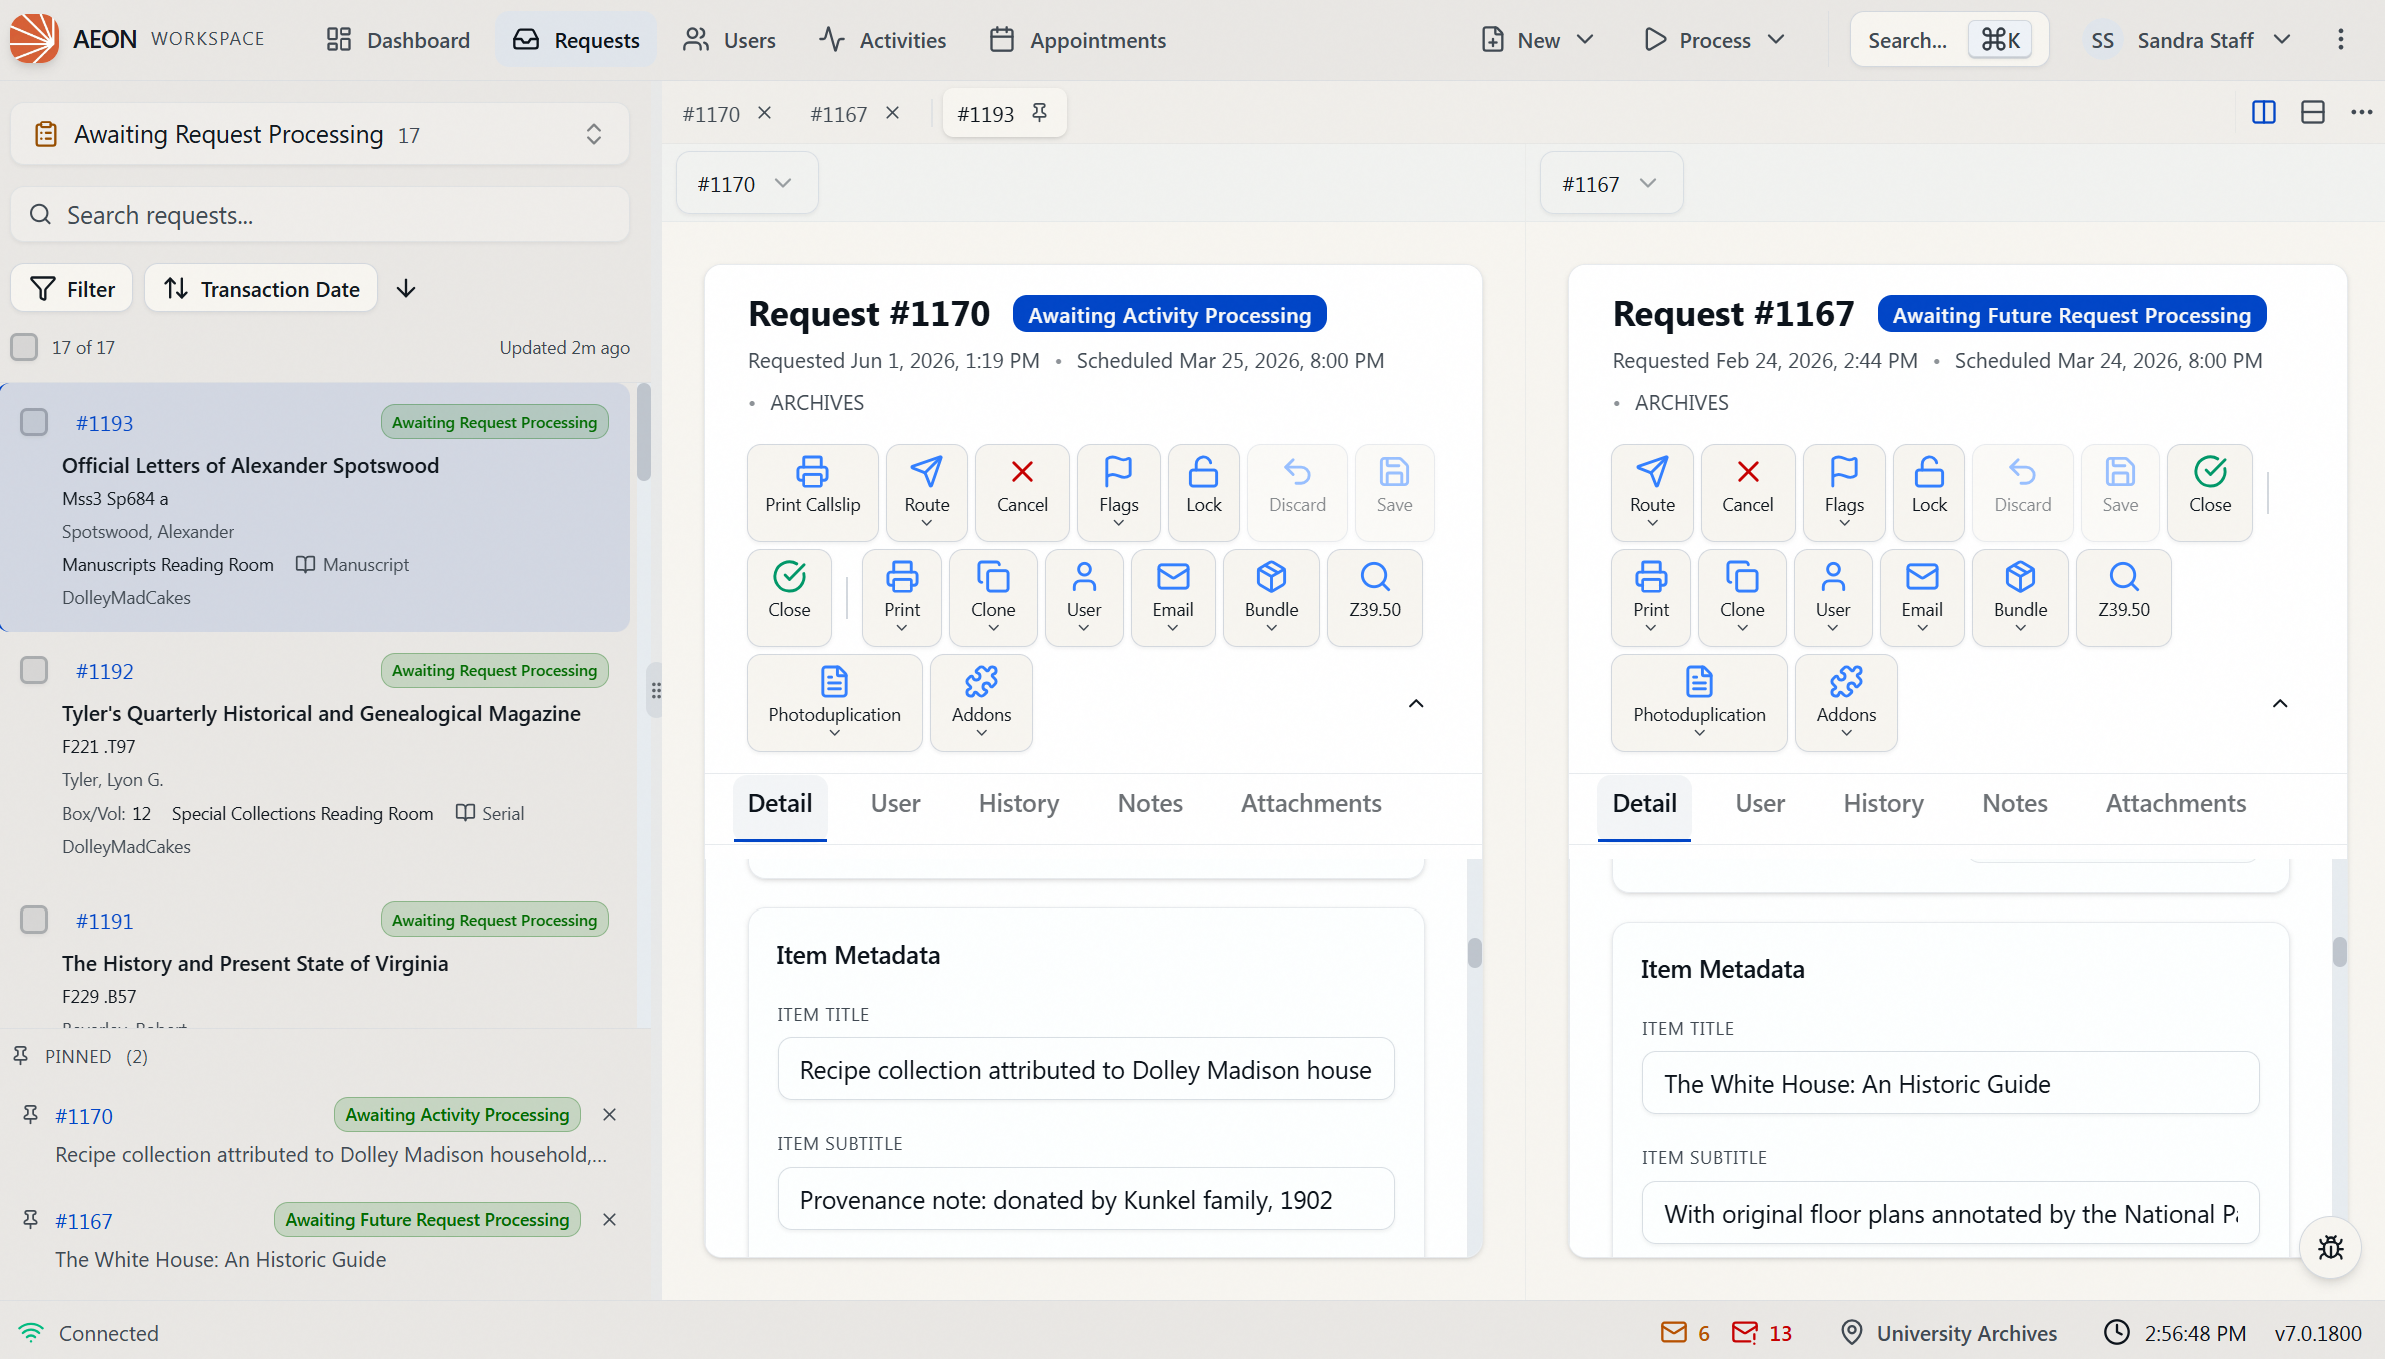
- Split side by side (the two-columns icon) — panes left and right.
- Split top/bottom (the two-rows icon) — panes stacked.
- The detail panel divides into two panes, each pre-filled with one of your pinned items. Above each pane is a dropdown — use it to choose which pinned item that pane shows.
- To go back to a single view, click the active split button again (tooltip: "Exit split view").
Until you've pinned two items, the split buttons are greyed out and inactive — they only do anything once you have two or more pins. If you drop back below two pins (or shrink the window to mobile size) while split view is on, Aeon exits split view on its own.
Each pane in split view keeps its own sub-tab (Detail, History, Billing, and so on) independently, so you can sit on one request's History while reading another request's Detail.
What's remembered, and where
Your pins live in your own browser (in its local storage), not on the server:
- They persist across page reloads and across closing and reopening the browser tab — pin something today and it's still pinned tomorrow on the same browser.
- They are per-browser and per-device. Pins you set on your office machine won't appear if you sign in from a different computer or a different browser, and they aren't shared with other staff.
- Requests and users are tracked in separate pin lists, as is the tab you last had active in each.
Because pins are local to your browser, they're not the way to hand a request to someone else. To point a colleague at an exact request or user, copy the address from your browser's URL bar instead (for example, /requests/12345) — see URL-First Navigation and Shareable Links.
There's no separate permission for pinning — it's part of viewing. If you can open the Requests page you can pin requests (this needs the View level of the Requests capability), and if you can open the Users page you can pin users (the View level of the Users capability). Pinning, switching tabs, and split view never change a record, so they don't require edit-level access.