Browsing & Filtering a Queue
Almost everything you do with requests starts the same way: you open a queue and look at the requests waiting in it. A queue is a group of requests that share the same point in the workflow — Awaiting Request Processing, In Item Retrieval, Item Checked Out, and so on. Aeon routes each request into the right queue automatically as it moves through the workflow, so working a queue front to back is the normal rhythm of the day.
The Requests page is built for that rhythm. The left side is the list of requests in whatever queue or flag you've chosen; the right side shows the details of the request you select. This page covers the left side — picking what to look at, then narrowing it down to the requests you actually need.
Any time you sit down to process work. Open the queue your role is responsible for, scan the list, and start working requests from the top. If a queue is long, use search and filters to jump straight to the ones that matter — a particular researcher, a call number, items scheduled for today.
Open a queue
-
Go to Requests in the workspace (or press the requests shortcut from the dashboard).
-
At the top of the list, click the queue selector — the button showing the current queue name and its request count.
-
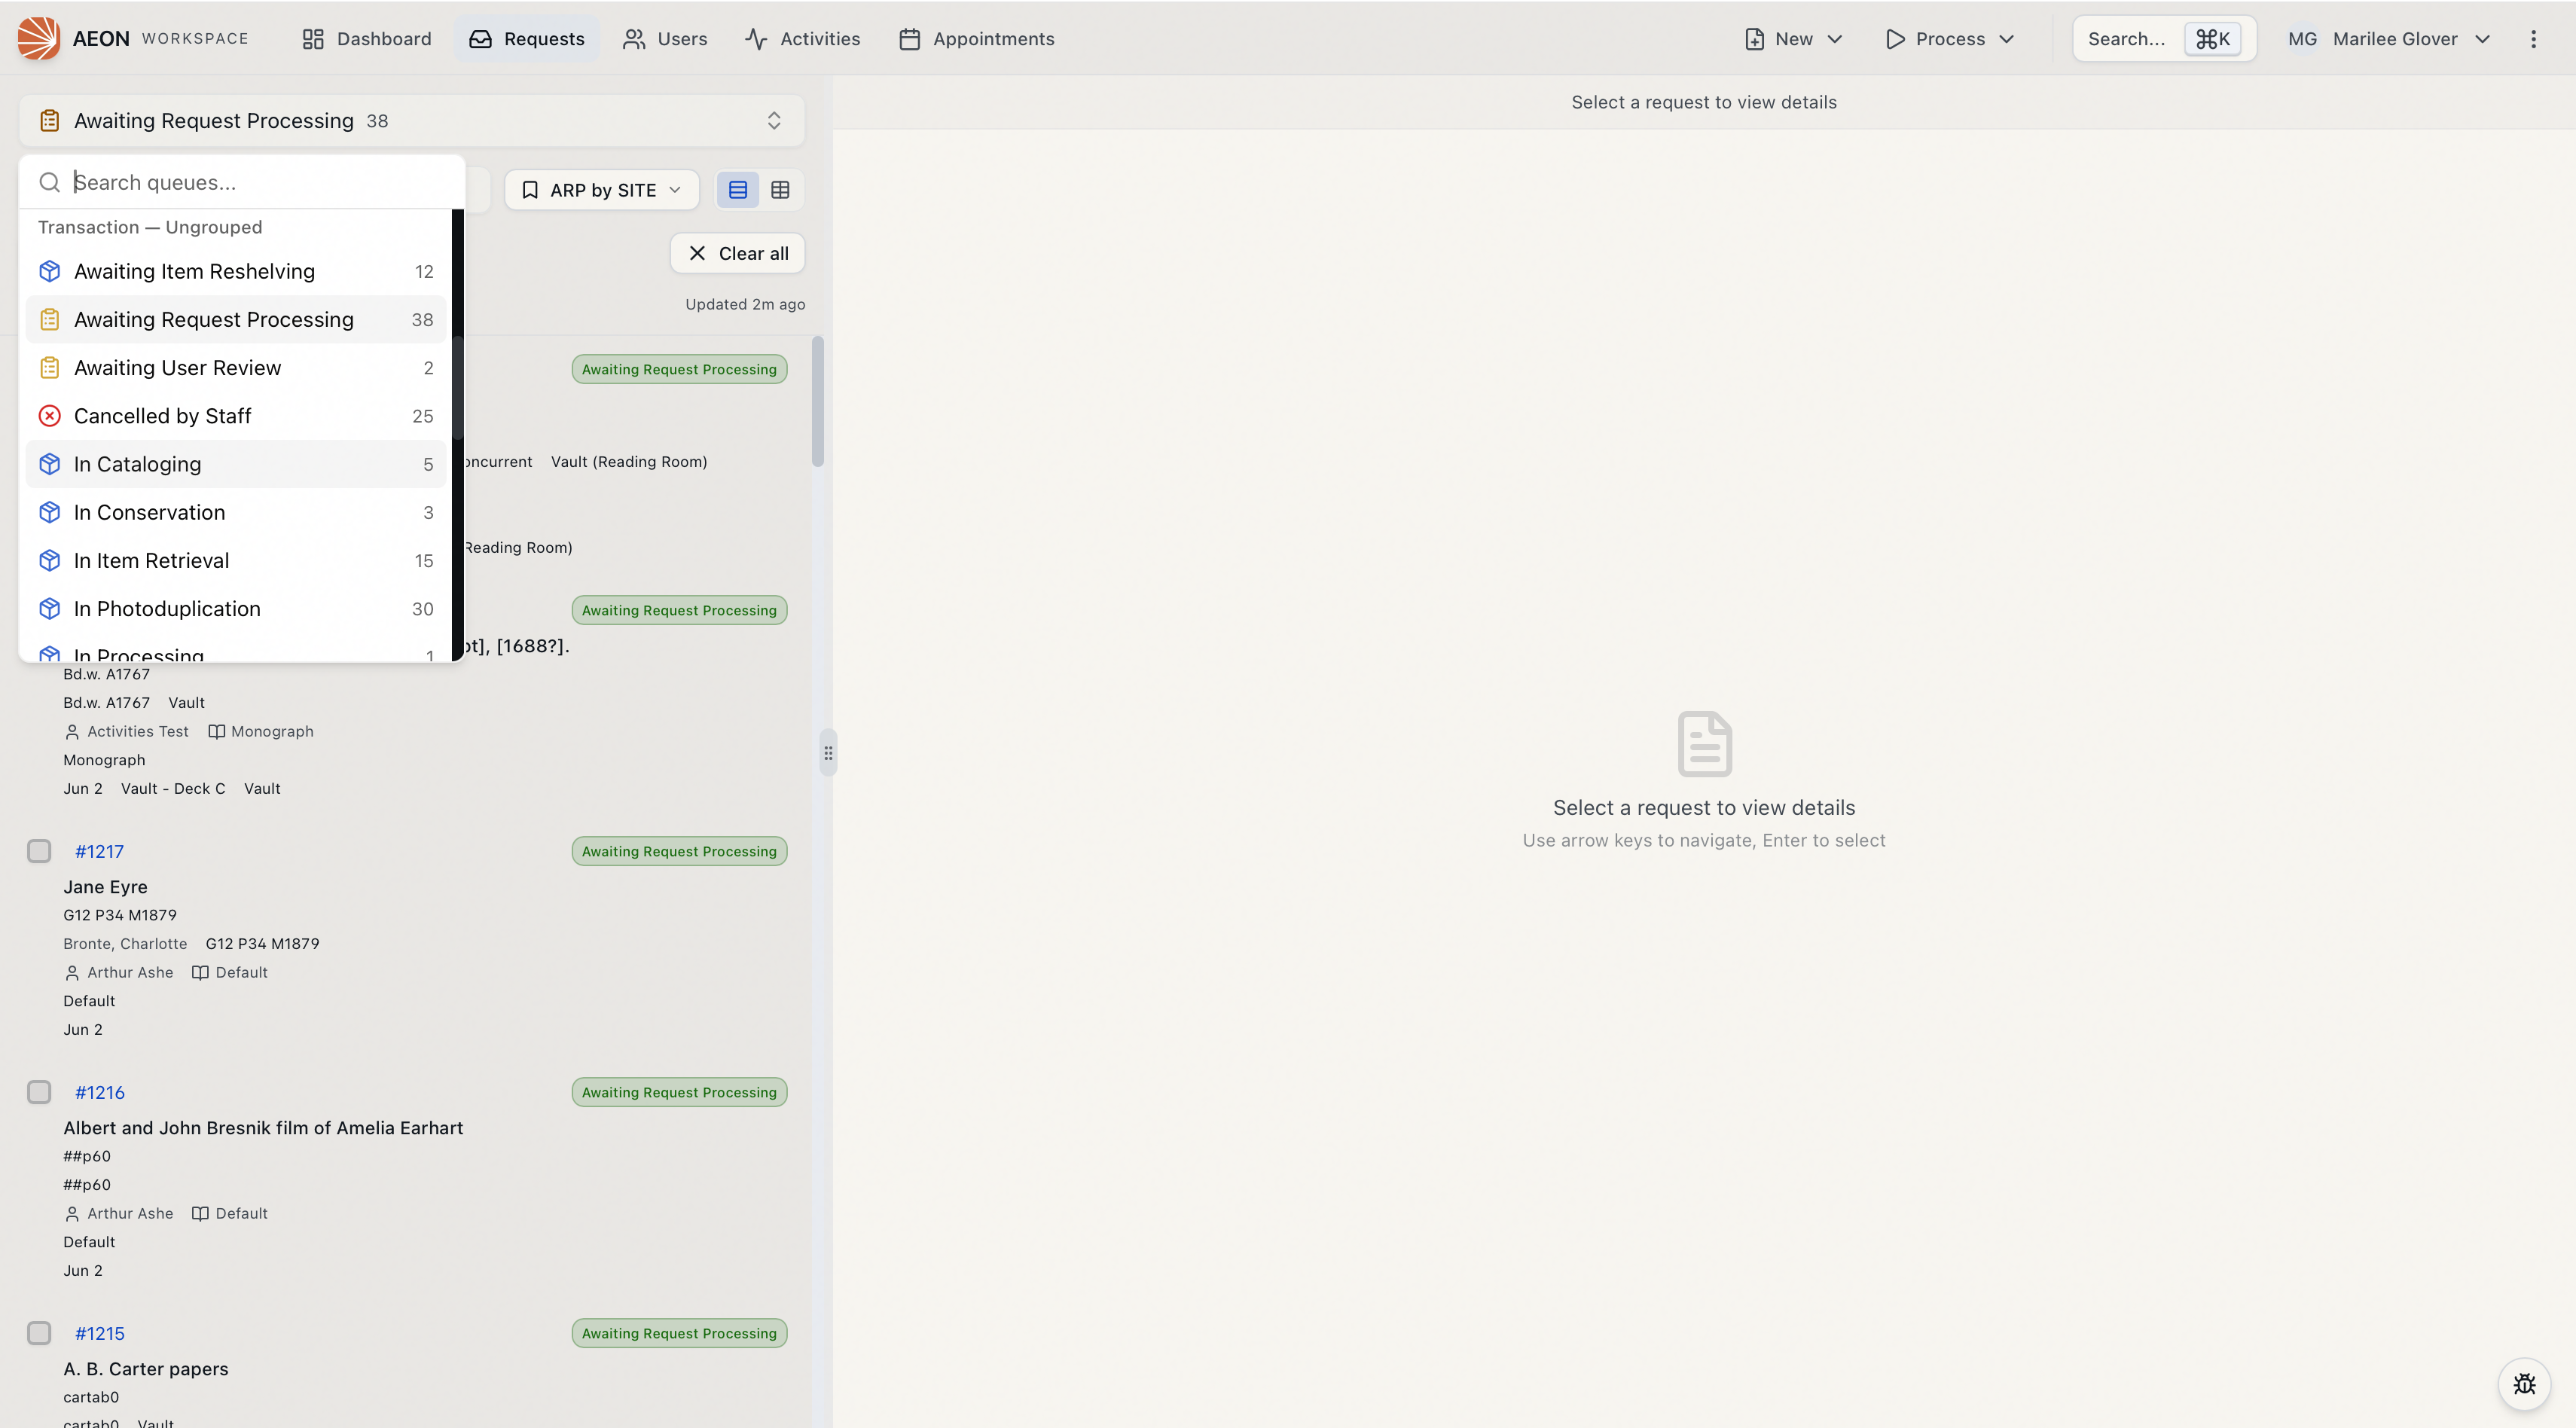
The picker opens with a Search queues... box and the queues grouped by type, Transaction and Photoduplication. If your site has organized queues into menu groups, those headings appear here too.
-
Click a queue. The list reloads with that queue's requests, and the URL updates (for example,
/requests?queue=5) so you can bookmark or share it.
The number beside each queue name is its current request count. Aeon only lists queues that actually have requests in them, so an empty queue won't clutter the picker. If you open the Requests page without choosing a queue, Aeon starts you on Awaiting Request Processing when it has requests, or the first active queue otherwise.
Each row is one request, showing its transaction number, title, researcher, and current status. What fields appear — and in what order — is controlled by your site's Request Card layout, so two sites may show slightly different details in the list.
This list is also available as a spreadsheet-style Grid — a Cards / Grid toggle at the top switches between the request cards and a grid where you can arrange columns and save the layout as a named View. See Using the Grid and Saved Views.
Find a request with search
The Search requests... box sits just below the queue selector and narrows the list as you type. Type a researcher's name, a few words of a title or author, or a transaction number like 12345, and the list filters down to matching requests.
Search applies on top of whichever queue or flag you're viewing — it doesn't reach across all requests. To search the entire system regardless of queue, use the command palette or a custom search instead.
Filter and sort the list
For anything more specific than a text match, use the filter and sort controls beneath the search box.
Add a filter
-
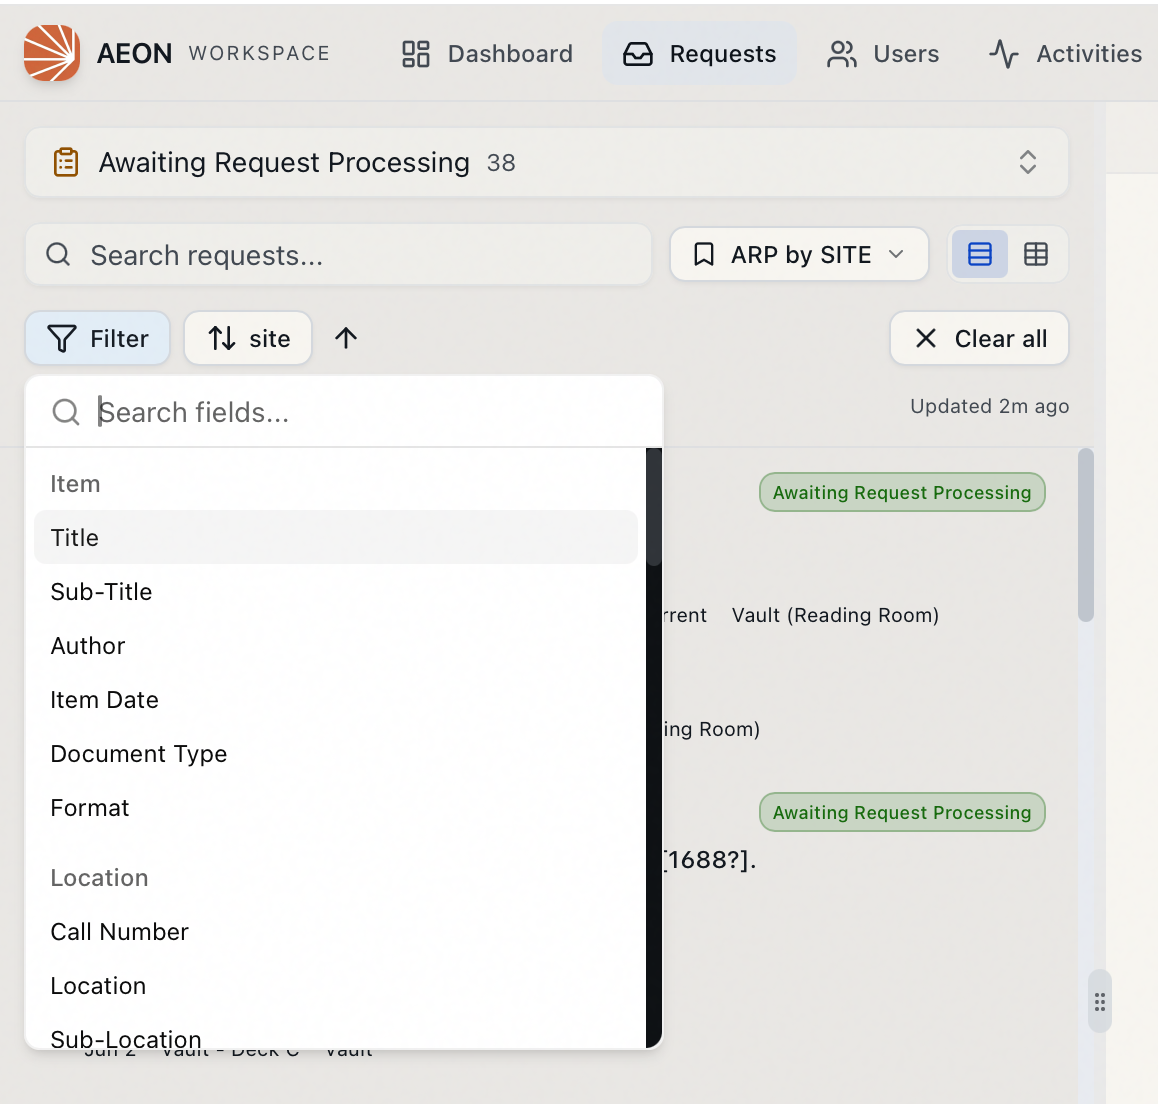
Click the filter button to open the field picker.
-
Choose a field. Fields are grouped to make them easy to find:
- Item — Title, Sub-Title, Author, Item Date, Document Type, Format
- Location — Call Number, Location, Sub-Location, Container ID, Reference Number, EAD Number, System ID
- Dates — Transaction Date, Creation Date, Scheduled Date, Photoduplication Date
- Service — Service Level, Shipping Option, Special Request, For Publication
- User — Name, Email, Username, User Status, Department, Organization, Cleared, and more
- Associations — Transaction #, Bundle ID, Activity ID, Appointment ID
- Custom Fields — your site's Item Info 1–5 (shown with your custom labels if they've been named)
-
Pick a comparison and enter a value.
-
The filter is added as a removable chip below the controls. Add as many as you need — they combine, so each one narrows the list further.
To remove a single filter, click the × on its chip. To clear every filter and reset sorting at once, click Clear all.
Change the sort order
Click the sort button to choose a field to sort by — Transaction Date, Creation Date, Scheduled Date, Transaction #, Title, Author, Call Number, and others. Use the arrow beside it to flip between ascending and descending. By default a queue is sorted by Transaction Date, newest first.
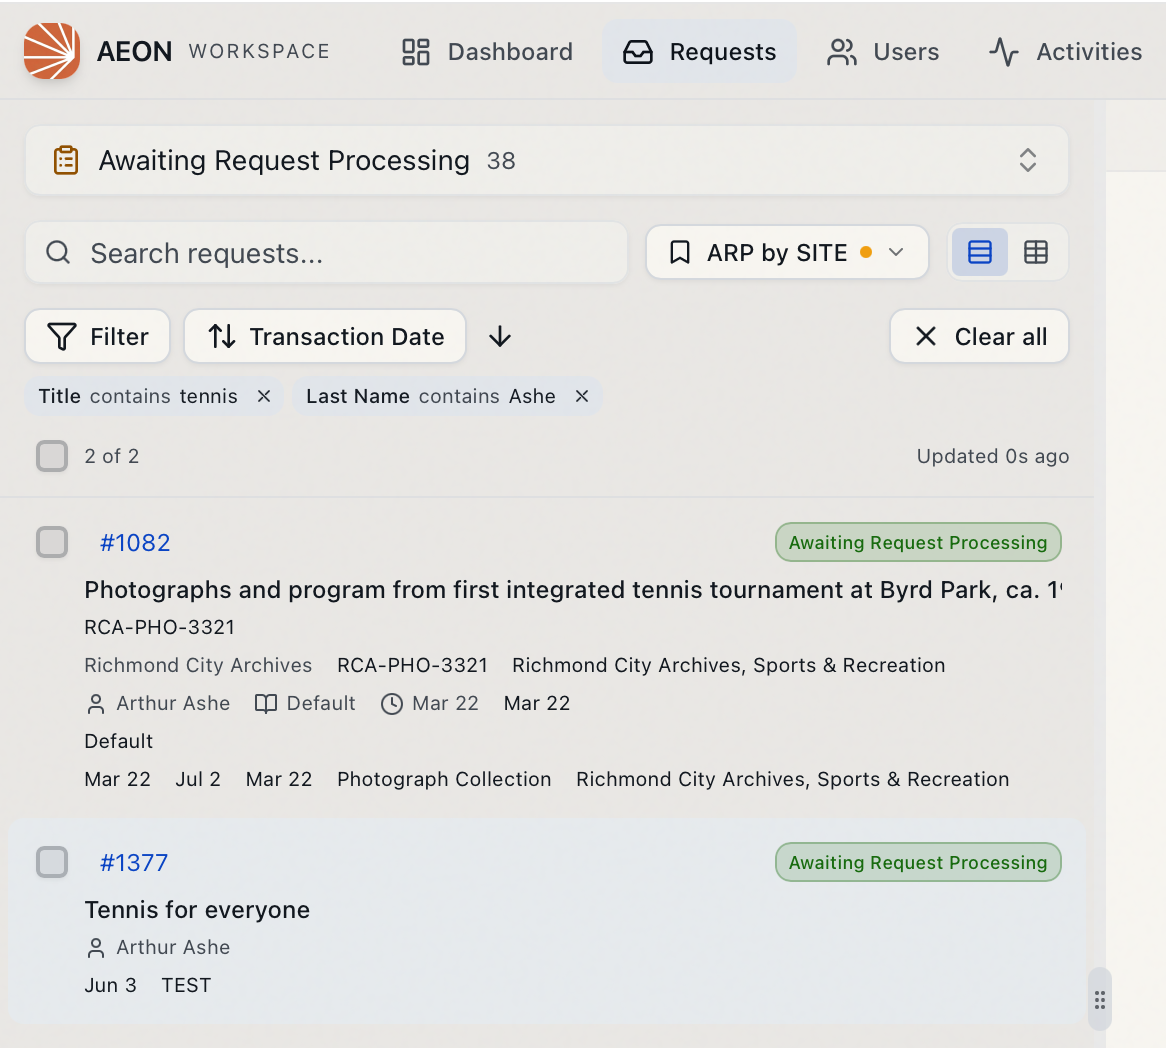
The bar at the bottom of the list shows how many requests are displayed against the queue's total (for example, 30 of 412), and an Updated timestamp telling you how recently the list refreshed. Long queues load more rows automatically as you scroll. Aeon also keeps the list current in the background as other staff route and process requests, so the count can change while you work.
Browse by flag
Sometimes you don't want a single queue — you want every request carrying a particular flag. Flags mark requests that need special attention — rush handling, a note for another department, whatever your site defines. In a flag view, the header becomes a flag selector showing each flag and how many requests carry it. Choose a flag to see just those requests, across all queues. Only flags that are currently applied to at least one request appear in the list.
Open a request from the list
- Single-click a row to select it and show its details on the right. This is a quick look — it doesn't lock the request.
- Double-click a row to process it: Aeon locks the request to you so you can edit and route it, and shows a "Processing request #12345" confirmation. If someone else already has it open, you'll see "Request #12345 locked by …" instead.
See Opening & Locking a Request for how locking works, and Editing a Request and Routing a Request for what to do next.
Hold Ctrl (or Cmd on a Mac) and click rows to check off more than one request, or Shift+click to select a range. A selection bar appears at the bottom for acting on them together — routing, flagging, printing, and more. See Bulk Operations.
The Requests page requires the View level of the Requests permission. If your role doesn't have it, the page won't open. Browsing, searching, and filtering need only View; locking and editing a request require Edit, and manual routing requires Full.