Creating a Custom Role
Aeon includes two built-in roles — Administrator and Staff — and for many sites those are enough. A custom role is what you create when you need a permission set that sits between those two, or anywhere else: a Reading Room Supervisor who can run appointments but not touch configuration, a student worker who can only view requests, a billing clerk who sees financial fields that others don't. You build the role once, then assign staff to it.
Creating a role is just the first step. The Create Role dialog only captures the name, an optional description, and (optionally) a role to copy from. Everything that actually defines what the role can do — operational capabilities, configuration access, field restrictions, and layout assignments — is set afterward in the role editor, which Aeon opens for you as soon as the role is created.
- You need a permission set that neither Administrator nor Staff provides.
- You want to take an existing role that's almost right and adjust a few things — clone it instead of starting from scratch.
- You're setting up a new category of staff (front-desk-only, reading-room-only, view-only) and want to grant exactly the access they need and nothing more.
Before you start
Creating, editing, and deleting roles lives behind the Roles & Permissions configuration area. You can only get here if your own role has Roles & Permissions configuration access — the same access that protects the rest of the admin permission UI.
The entire Roles & Permissions area, including creating a role, requires the Roles & Permissions configuration capability on your role. If your role doesn't have it, this section won't appear in the Customization Manager. (The built-in Administrator role has it; the built-in Staff role does not.)
Opening the Roles area
- Open the Customization Manager.
- In the left navigation, expand Roles & Permissions.
- Choose Roles (alongside Overview, Staff, and Field Groups).
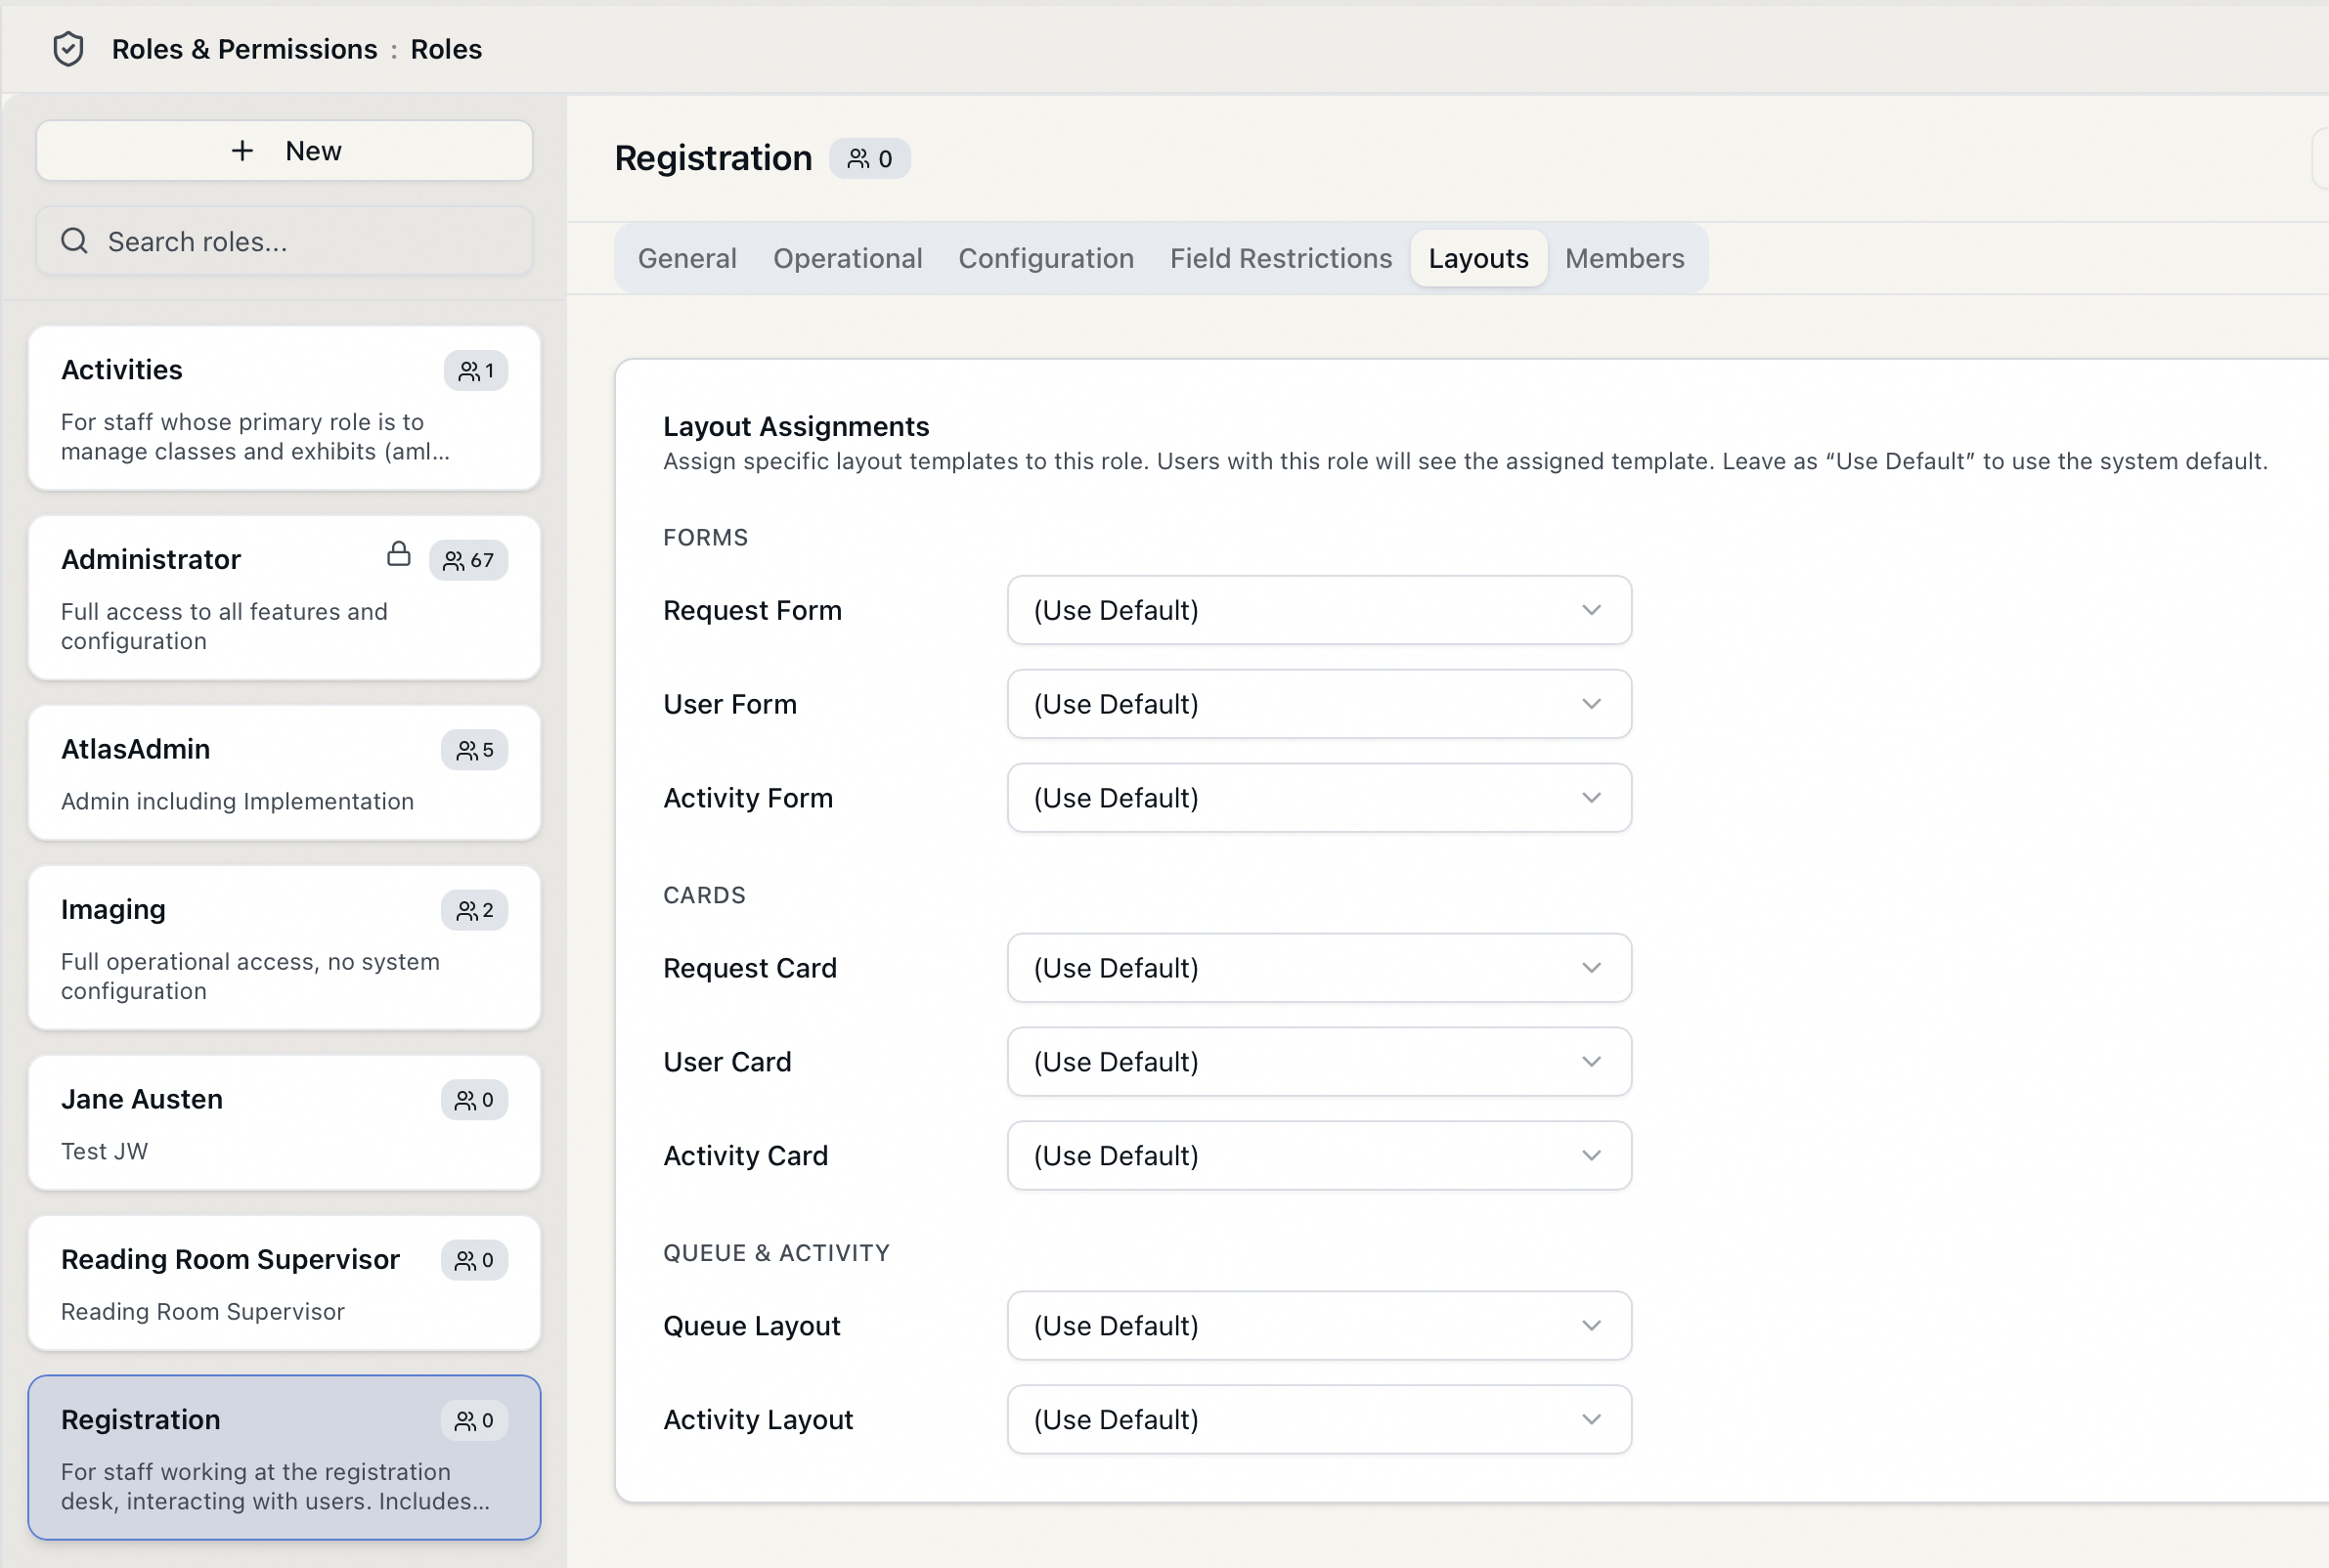
You'll see the list of existing roles down the left side. Built-in roles (Administrator, Staff) show a small lock icon, and every role shows a badge with the number of staff currently assigned to it.
Creating a role
-
At the top of the role list, click New.
-
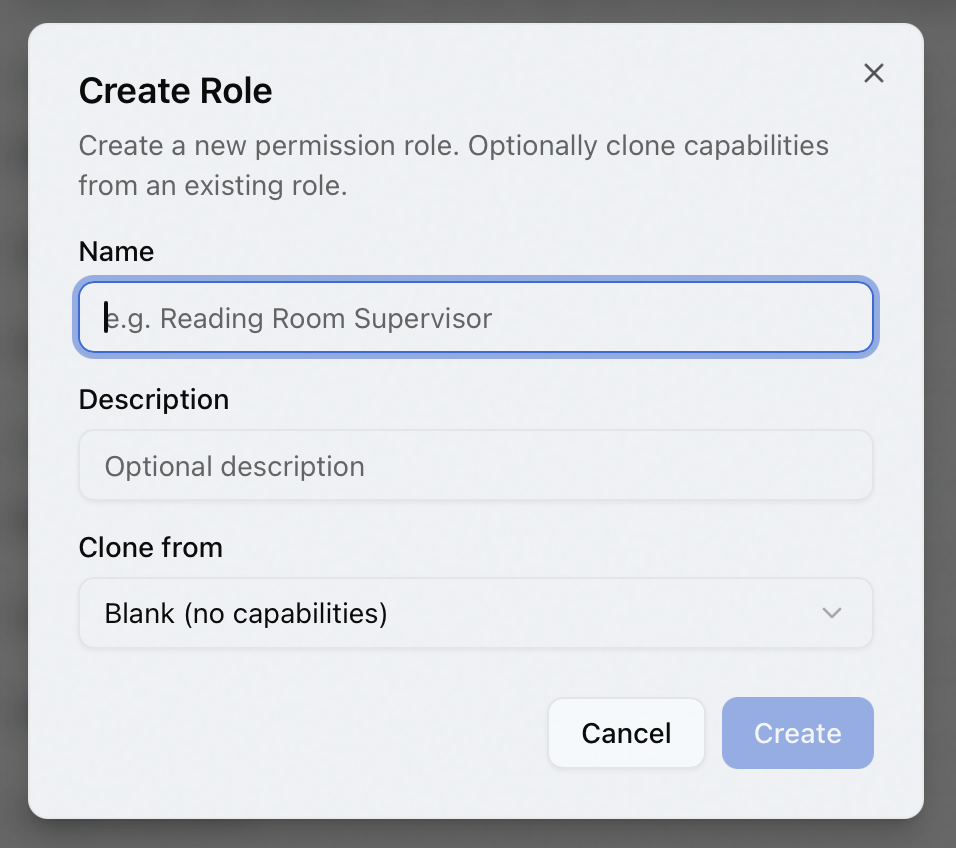
The Create Role dialog opens, with the prompt "Create a new permission role. Optionally clone capabilities from an existing role."
-
Fill in the fields:
Field Required? Notes Name Yes What the role is called, e.g. Reading Room Supervisor. Names must be unique. Description No A short note about who the role is for. Helpful when the list grows. Clone from No Leave on Blank (no capabilities) to start empty, or pick an existing role to copy. See below. -
Click Create. (To back out, click Cancel — nothing is saved.)
When the role is created, Aeon confirms with "Role "Reading Room Supervisor" created." and immediately opens it in the role editor, ready for you to set its capabilities.
Blank vs. cloned — which to choose
The Clone from dropdown decides what the new role starts with:
- Blank (no capabilities) (the default) — the role is created with no access to anything: every operational area is set to None, and every configuration group is turned off. This is the safe, locked-down starting point. You then open each tab in the editor and grant only what the role needs.
- An existing role — the new role starts as a full copy of that role's operational capabilities, configuration access, field restrictions, and layout assignments. Pick this when an existing role is close to what you want and you'd rather subtract a few things than build up from nothing.
Choosing a role under Clone from copies that role's settings into a brand-new role you're naming right now. That's different from the separate Clone action on an existing role (right-click a role, or use its menu), which produces a copy named "
For a role that should be tightly scoped, start Blank and grant access deliberately. It's easier to reason about "this role can do X and Y" than to start from a powerful role and try to remember everything you need to take away.
What happens next
Creating the role drops you straight into the role editor, where the real configuration happens. The editor is organized into tabs:
- General — the name and description you just entered (editable here too).
- Operational — what the role can do with requests, users, activities, appointments, and so on (None / View / Edit / Full per area). See Editing a Role: Operational Capabilities.
- Configuration — which admin/Customization Manager areas the role can reach. See Editing a Role: Configuration Capabilities.
- Field Restrictions — which sensitive field groups (e.g. personal identifiers, financial data) the role is not allowed to see. See Editing a Role: Field Restrictions.
- Layouts — which custom form and card layouts the role gets. See Editing a Role: Layout Assignments.
- Members — the staff assigned to the role. See Editing a Role: Members & Assigned Staff.
Make your changes across the tabs, then click Save in the role editor (or Discard to throw away unsaved edits). A new role has no members until you assign staff to it — see Assigning Roles to Staff.
If you enter a name that already belongs to another role, Aeon rejects it with "A role with this name already exists." The check ignores capitalization, so "Reading Room" and "reading room" count as the same name.
Any role you create is a normal, editable, deletable role — only the two built-in roles (Administrator and Staff) are marked as system defaults and protected from deletion. See System Default Roles: Administrator and Staff.