Creating a New Staff Account
When a new colleague joins your unit, you give them a staff account so they can sign in to Aeon. Creating the account is the first half of the job: you set a username, a starting password, and — if your library runs more than one site — which site they work in. That gets them in. What they can actually do once they're in is controlled by their role, which you assign in the second half, right after the account exists.
In the web client this all lives in one place: Customization Manager → Roles & Permissions → Staff tab. You add the account from a short dialog, and the new staff member then opens in the detail pane where you fill in their name, description, and role.
- A new staff member needs to log in to Aeon for the first time.
- You're setting up an account for a new student worker or front-desk staffer.
- If the new person should have the same permissions as someone who already exists, don't start from scratch — copy that account instead, which carries over the role and site access (see the Copying a Staff Account page in this section).
Creating staff accounts requires the Staff configuration capability on your role. If your role doesn't include it, the Roles & Permissions section — and its Staff tab — won't be available to you. Ask an administrator (anyone whose role has the Staff configuration capability) to create the account or grant you access.
Open the Staff tab
- Open the Customization Manager.
- Go to Roles & Permissions.
- Select the Staff tab.
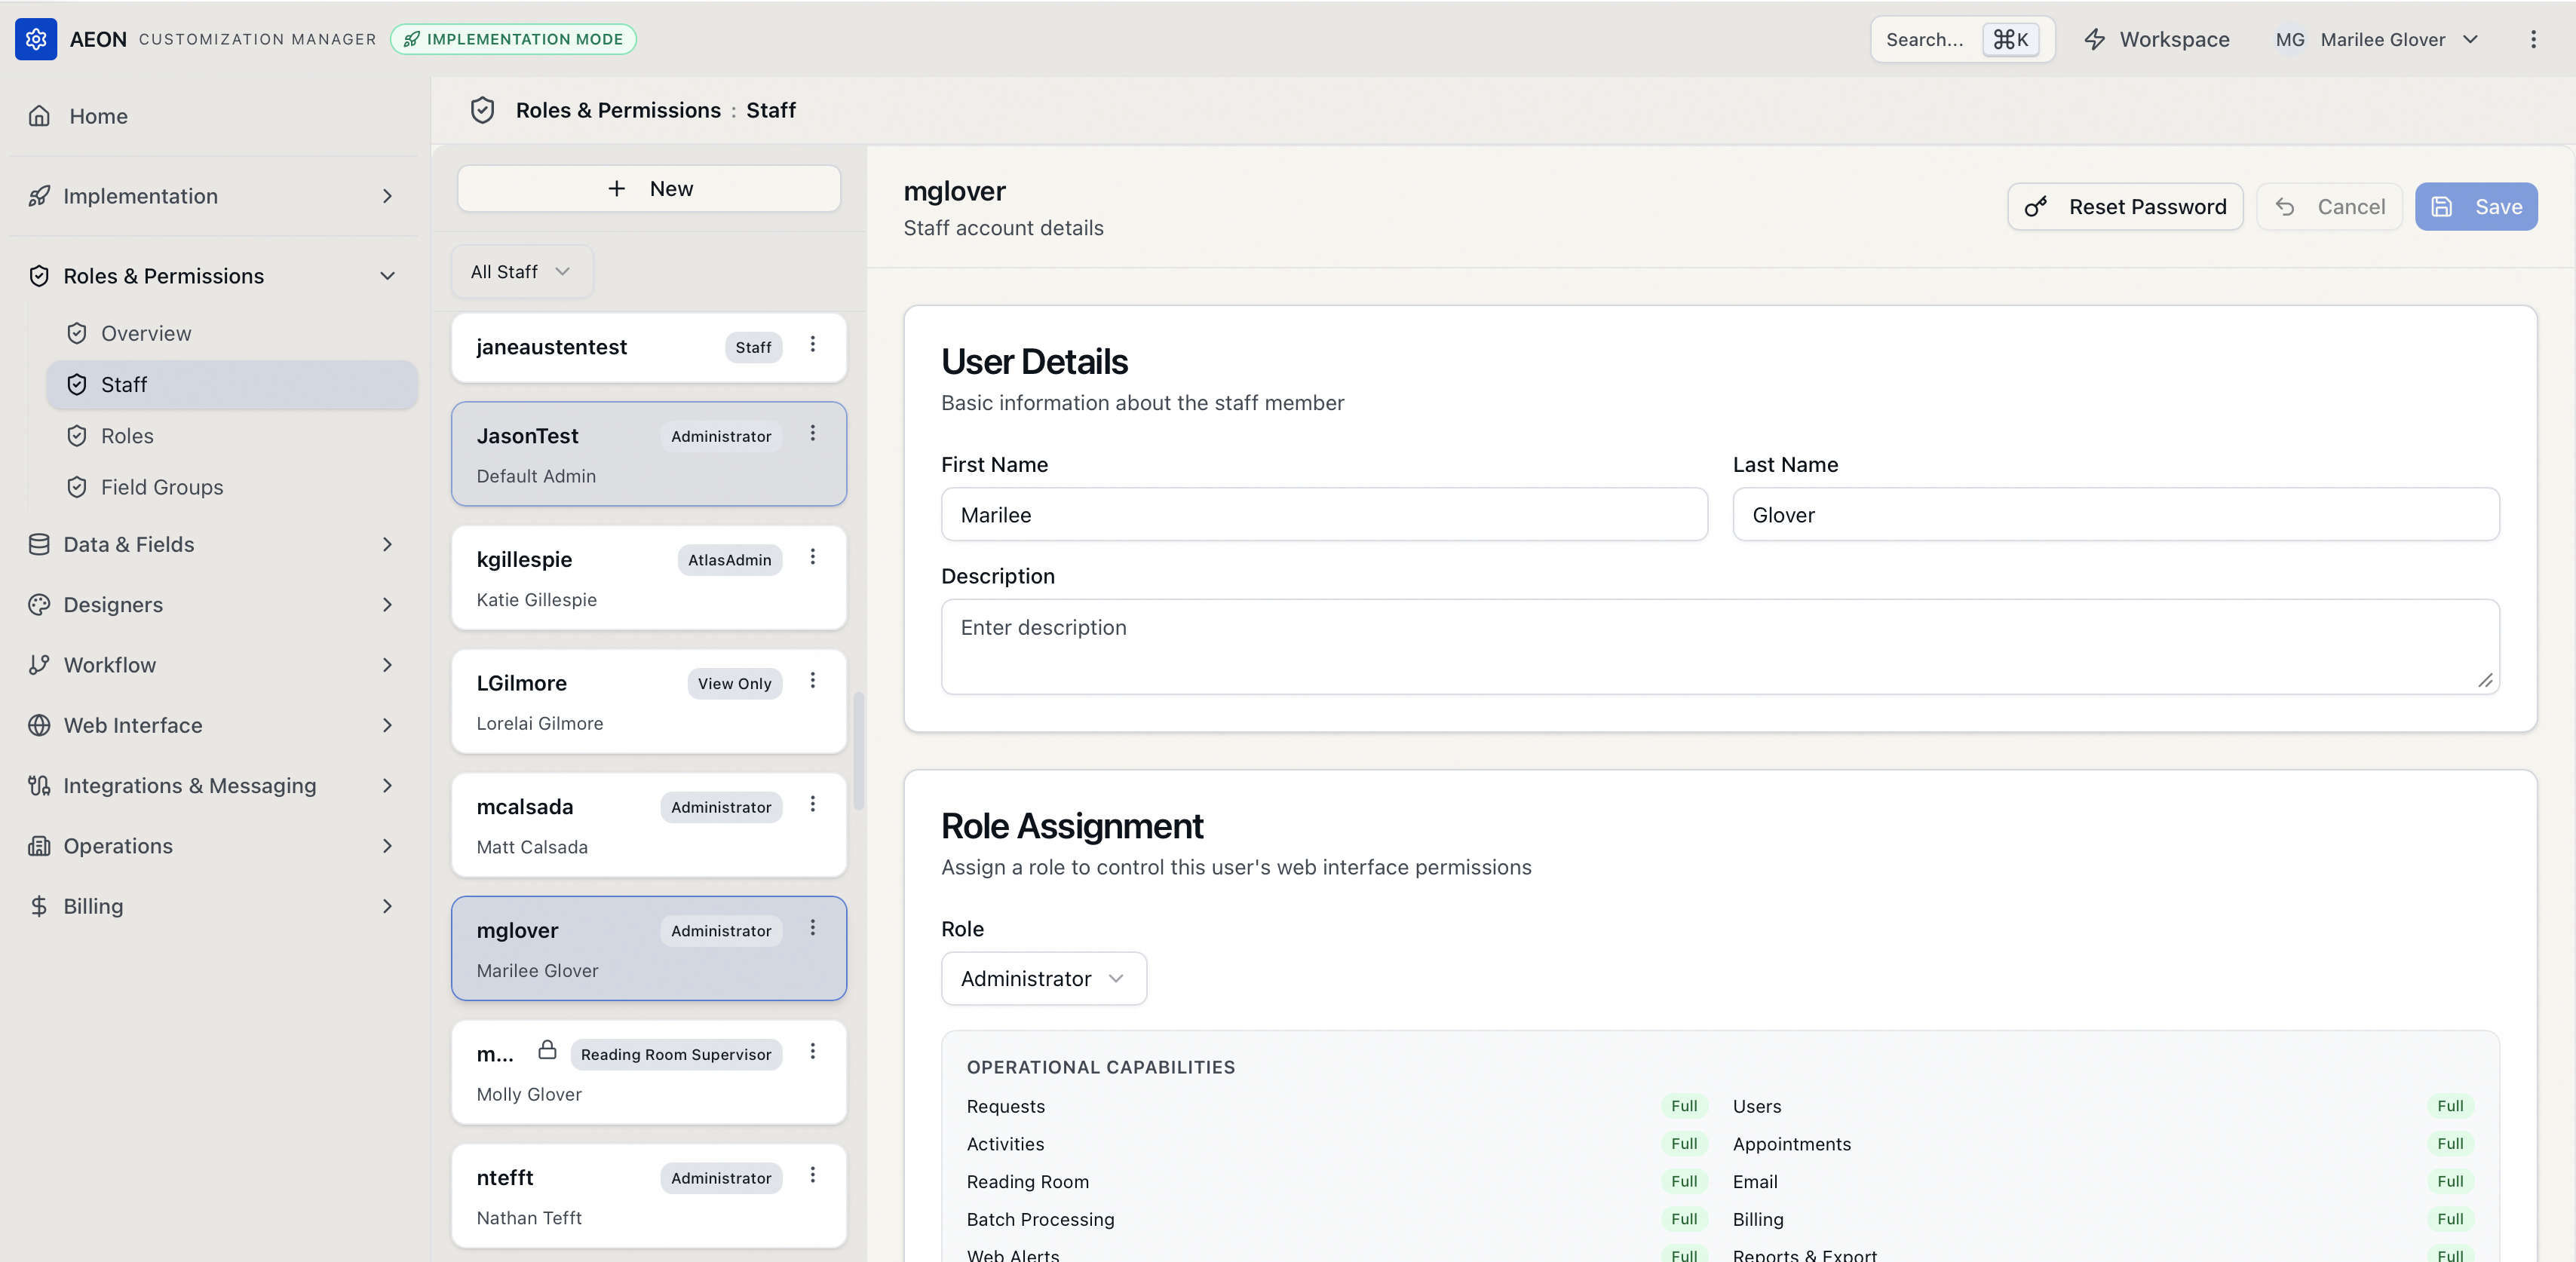
The Staff tab is a split view: a list of existing staff on the left, and a detail editor on the right. At the top of the left-hand list is a New button.
Create the account
-
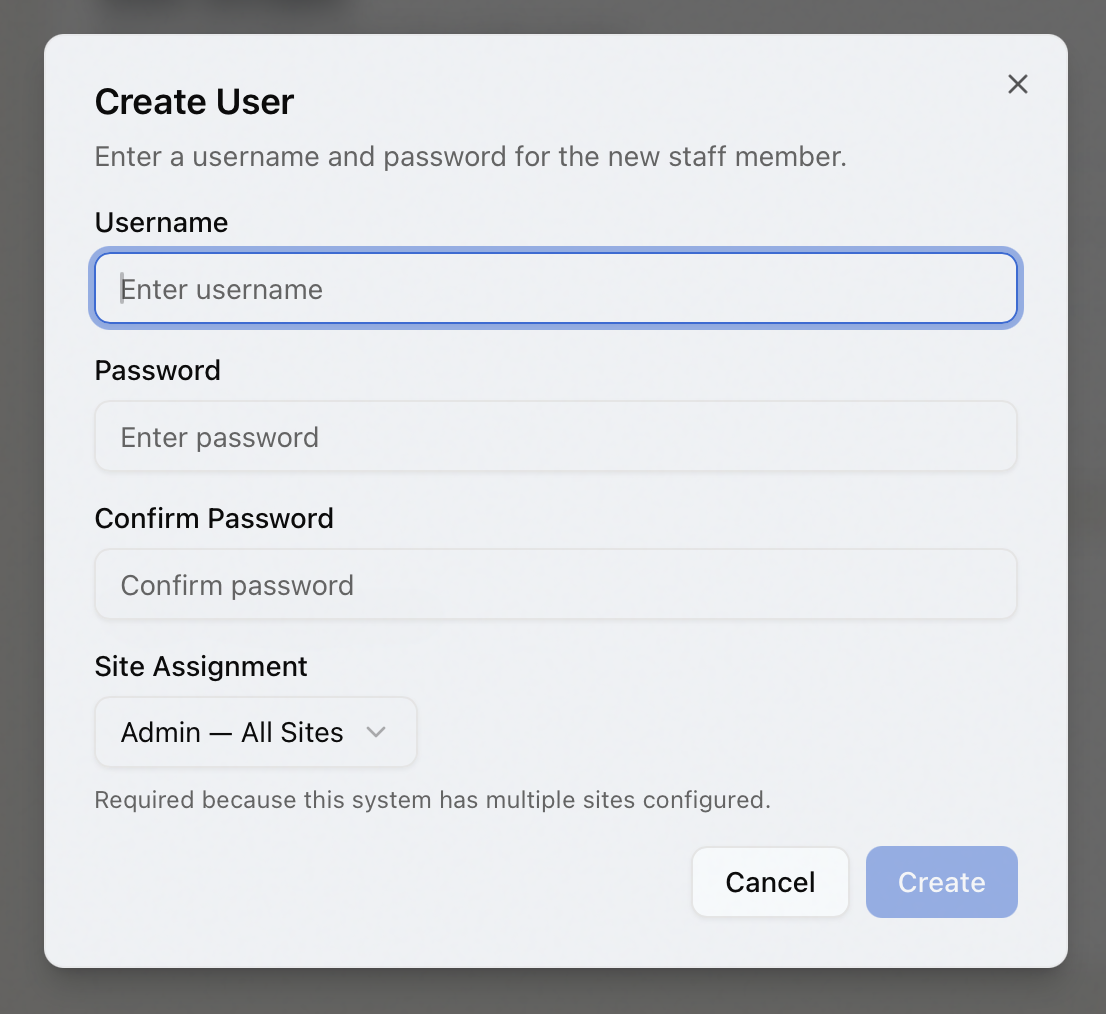
Click New. The Create User dialog opens, asking for a username and password for the new staff member.
-
Type a Username.
- Aeon checks availability as you type. You'll see "Checking availability…" briefly, then either "Username is available" (in green) or "Username already exists" (in red) if the name is taken.
- The username can be up to 50 characters; a counter shows how many you've used.
- You can't finish until the username is available.
-
Enter a Password, then re-enter it under Confirm Password.
- Aeon confirms the two match: "Passwords match" in green, or "Passwords do not match" in red if they differ.
-
If your system has more than one site, a Site Assignment field appears. Pick the site or site group the new staff member should work in.
- The dropdown is split into Site Groups and Sites. Choose a group to give access to several sites at once, or a single site for one location.
- This is required on multi-site systems — the dialog tells you "Required because this system has multiple sites configured." Without a site assignment, the new account has no site access and the person won't be able to log in.
- On a single-site system this field doesn't appear at all; there's nothing to choose.
-
Click Create. (The button stays disabled until the username is available, the passwords match, and — if applicable — a site is selected.)
Aeon confirms with "Staff member "jsmith" created successfully." and opens the new account in the detail pane on the right, ready for the next step.
A freshly created account can sign in, but it starts with no role assigned — you'll see a No Role badge next to it in the list. The account is granted Aeon client access by default, but until you give it a role it has no operational or configuration permissions. Finishing the role assignment (below) is what makes the account useful.
Finish setup: name and role
Creating the account only captured the essentials. The detail pane on the right is where you fill in the rest for the new staff member:
- Under User Details, add the First Name and Last Name so the person is easy to recognize in lists and on locked records.
- Optionally add a Description — a handy place to note a group like "Student employee" so you can tell similar accounts apart.
- Under Role Assignment, pick a Role. This is the important one: the role determines what the staff member can see and do in the web client. With no role, the detail pane reminds you "No role assigned — this user has no permissions in the web interface." See the Assigning Roles to Staff page in this section for how roles map to capabilities.
- Click Save to apply your changes.
When you assign or change a staff member's role, Aeon invalidates their existing sign-in session in the background, so the new permissions apply right away — the person doesn't have to wait for anything to expire. If they're signed in at the time, they may be prompted to sign in again.
Further down the detail pane is a Legacy Desktop Client card (Client Access, Customization Manager Access, Staff Manager Access, and so on). As the card itself notes, these settings are for the old Windows desktop client only — they do not affect what the staff member can do in the web client. Web permissions come entirely from the role you assigned above. You can leave these at their defaults unless your site still runs the desktop client.
After creation
The new staff member can now sign in with the username and password you set. A few things worth knowing:
- Changing the starting password later. If you need to reset it — for example, the person forgot it, or you want them to choose their own on first login — use the Reset Password button in the detail pane. See the Resetting a Staff Member's Password page in this section.
- Turning an account off without deleting it. If someone leaves temporarily, you can lock the account (the Account is Locked setting) rather than delete it. See the Deactivating and Re-activating Staff Accounts page in this section.
- Setting up several similar accounts. Rather than repeating this whole process, create one account, finish its role and site access, then copy it. See the Copying a Staff Account page in this section.