Creating a Custom Field Restriction Group
A field restriction group is a named bundle of fields you want to treat as sensitive — for example, a patron's date of birth and government ID number, or the cost and payment figures on a request. On its own a group hides nothing. It's the building block: once a group exists, you attach it to a role's Field Restrictions, and from then on anyone in that role sees those fields blanked out.
Aeon includes three system default groups — Personal Identifiers, Contact Information, and Financial — and for most sites those cover the common cases. You create a custom group when the built-in three don't match how you think about sensitive data: you want to restrict a field they don't include, or you want a tighter, differently-named bundle (say, "Reading Room Student Workers — Hide IDs") to assign to one specific role.
This page covers creating the group and filling it with fields. Attaching a group to a role is a separate step, covered in Editing a Role: Field Restrictions.
- The system default groups (Personal Identifiers, Contact Information, Financial) don't cover a field you need to hide.
- You want a purpose-named group to assign to one particular role — for example, hiding patron contact details from front-desk student staff.
- You're setting up a least-privilege role and need to define exactly which fields it should never see.
Field groups are managed under Customization Manager → Roles & Permissions → Field Groups (URL /customizations/permissions/field-groups). Everything on this screen — viewing, creating, editing, and deleting groups — requires the Roles & Permissions configuration capability. If your role doesn't have it, you won't be able to reach this area. See Editing a Role: Configuration Capabilities.
Step 1 — Open the Field Groups screen
- Go to Customization Manager → Roles & Permissions, then choose Field Groups from the left navigation.
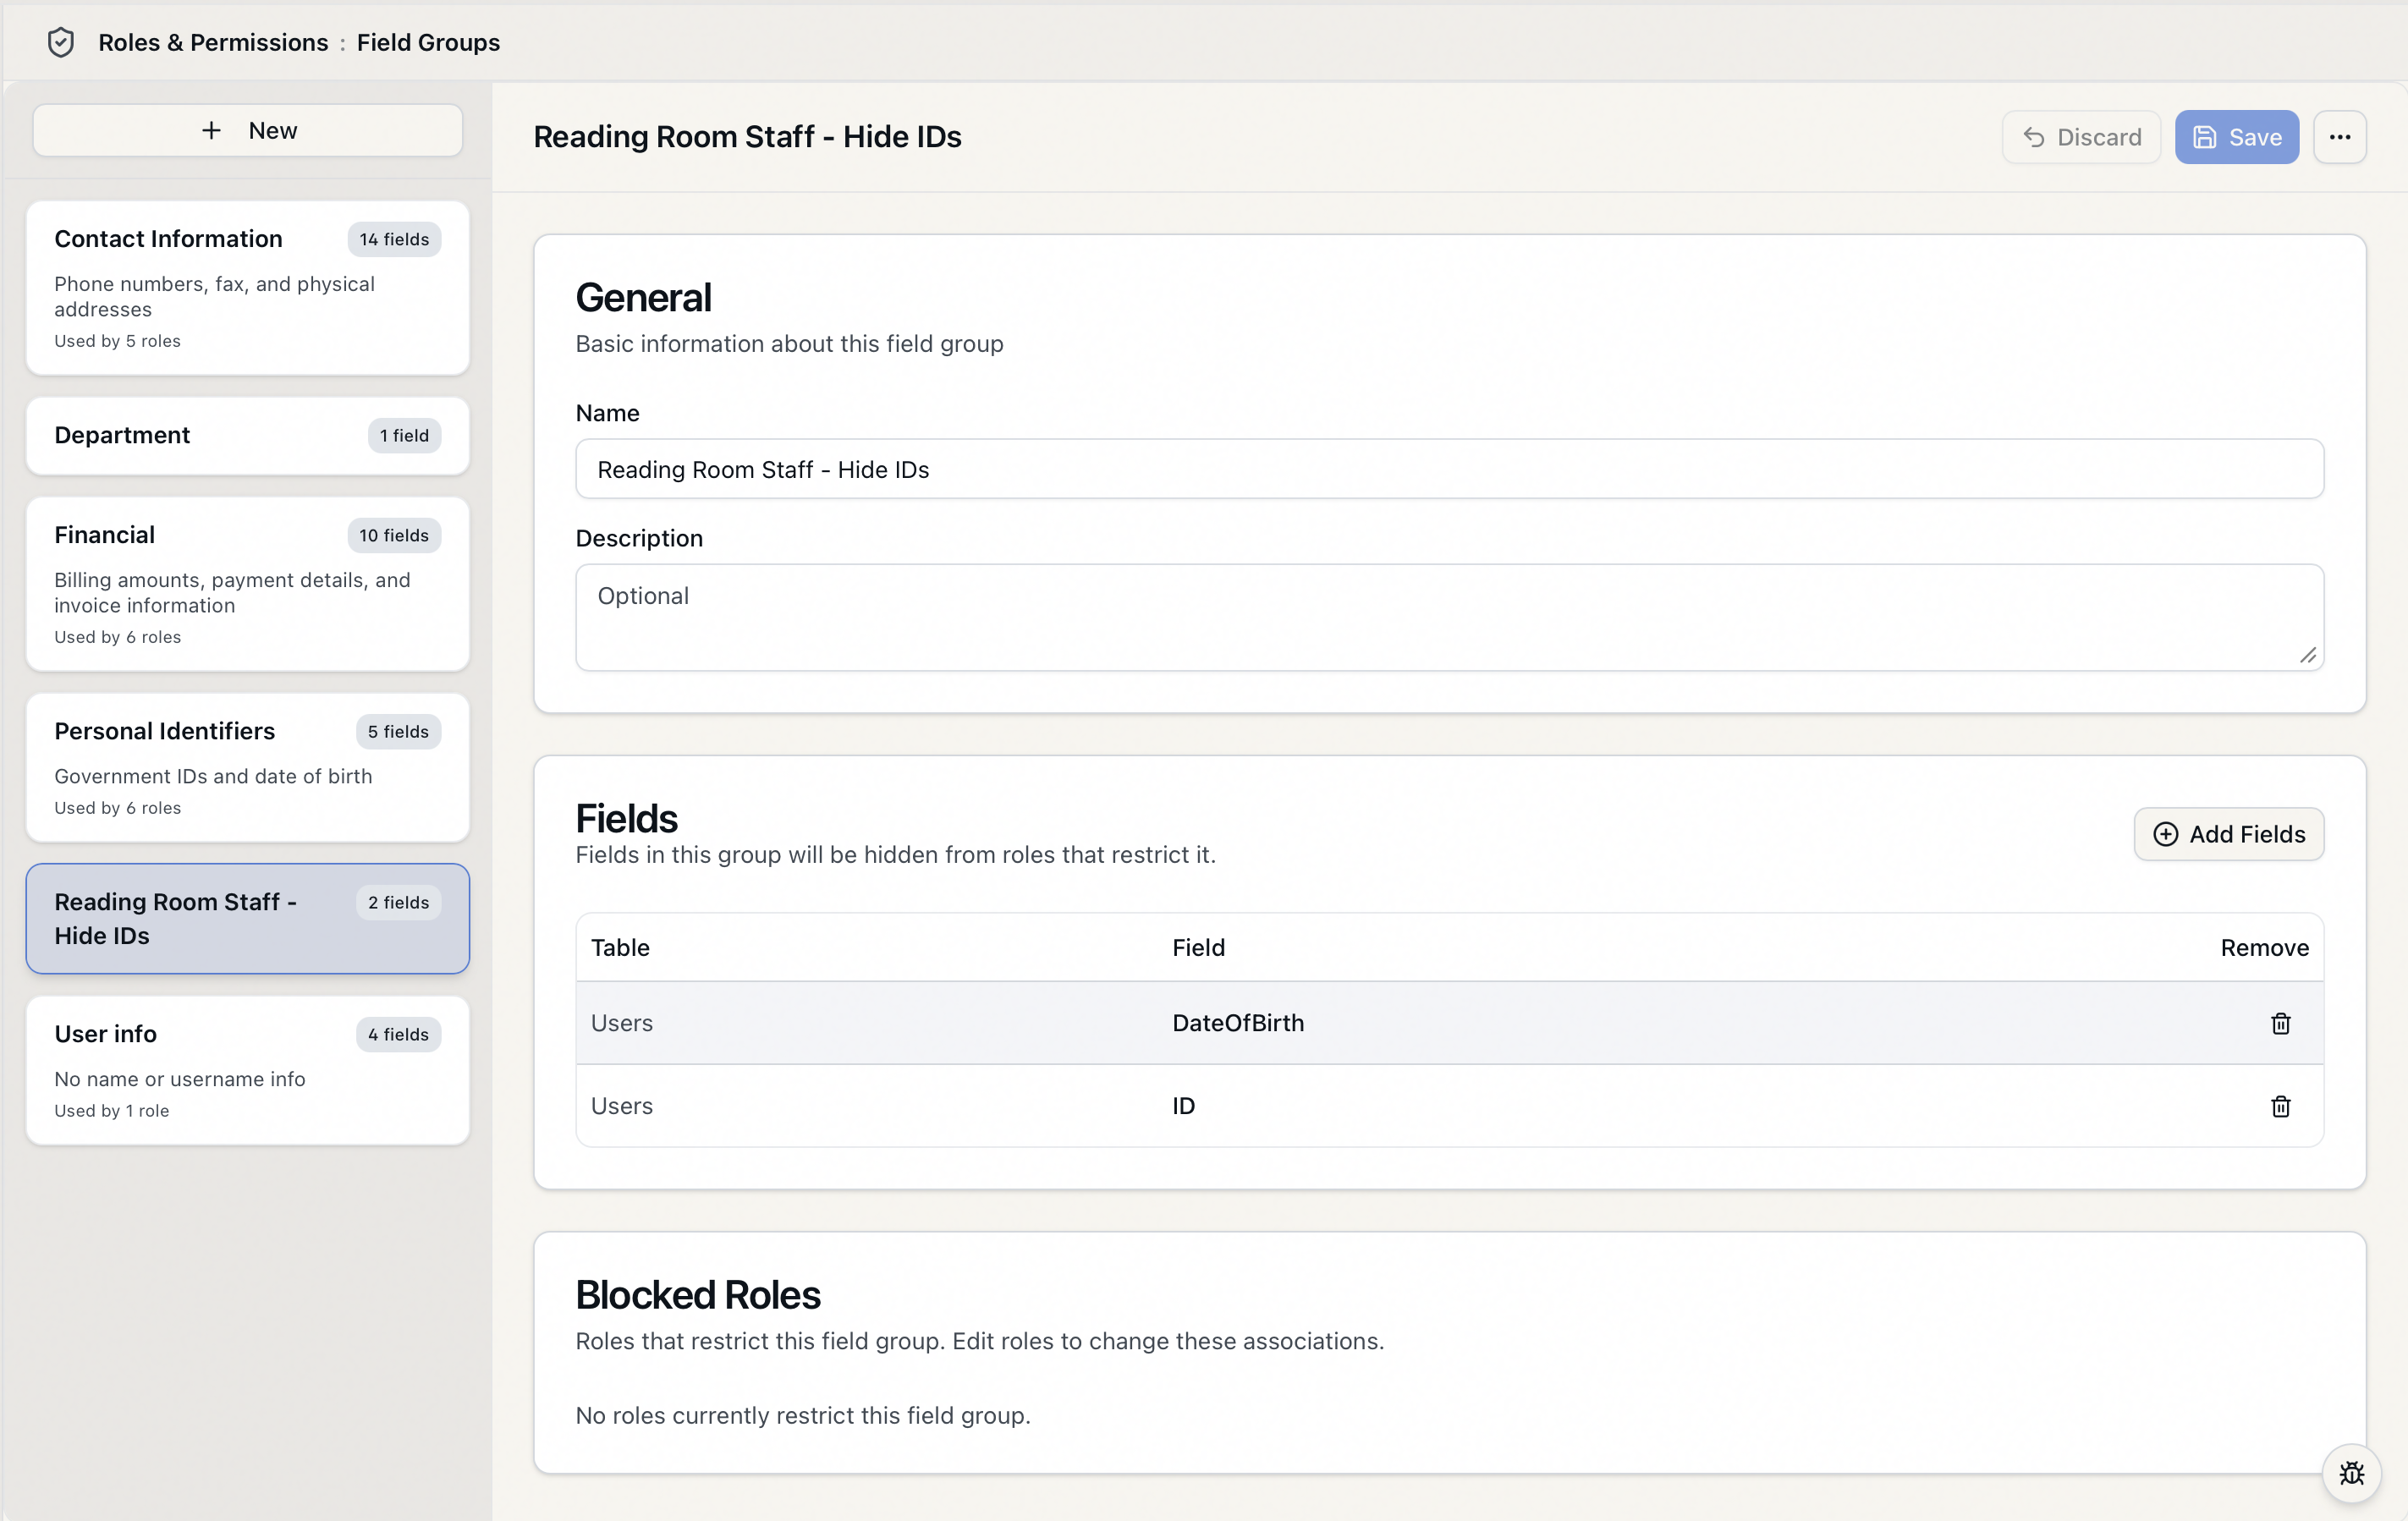
- The screen is a two-pane layout: the left sidebar lists every field group (system default and custom), and the right pane is where you edit the one you select.
- Each group in the list shows its name, a field count badge (for example, 3 fields), and — if any roles restrict it — a small Used by 2 roles note.
Step 2 — Create the group
- At the top of the left sidebar, click New.
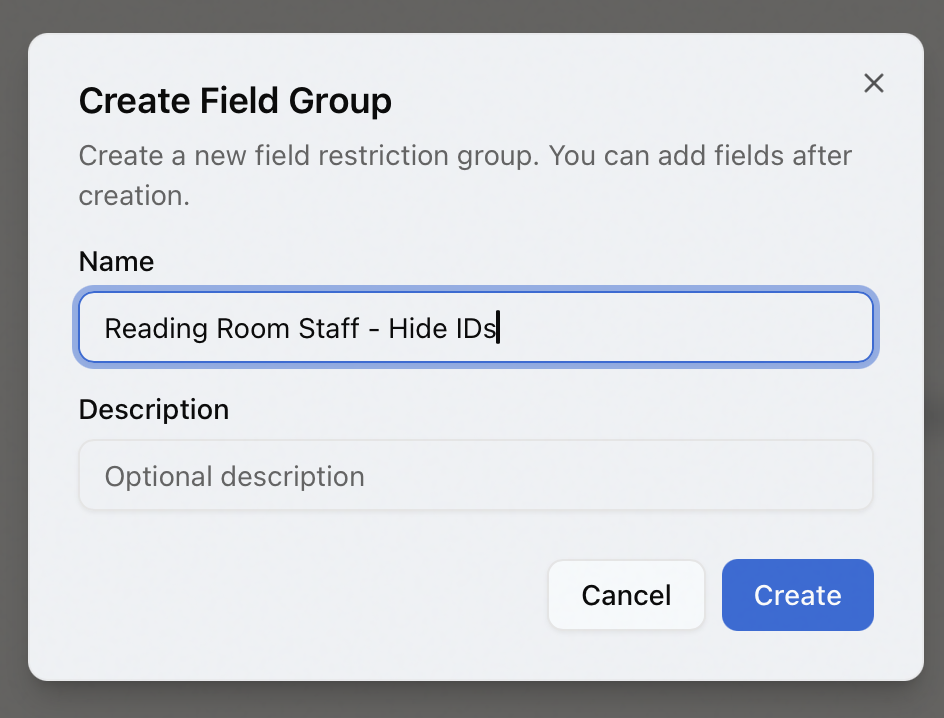
- The Create Field Group dialog opens. Fill in:
- Name (required) — a clear, specific label. Example:
Reading Room Staff - Hide IDs. The placeholder suggests something like Billing Fields. - Description (optional) — a short note on what the group is for and who it's meant to be restricted from. Example: Hides patron ID number and date of birth from front-desk student workers.
- Name (required) — a clear, specific label. Example:
- Click Create.
You'll see a confirmation — Field group "Reading Room Staff - Hide IDs" created. — and the new group is added to the sidebar and selected automatically, so its editor opens in the right pane.
Creating the group only establishes the name and description. It contains no fields yet and restricts nothing until you add fields (Step 3) and attach it to a role. The dialog itself reminds you: You can add fields after creation.
Step 3 — Add fields to the group
With your new group selected, the editor shows three cards: General (name and description), Fields, and Blocked Roles. To choose which fields the group covers:
- In the Fields card, click Add Fields.
- The Add Fields picker opens. Fields are grouped by the database table they come from. Click a table heading to expand or collapse it; the number beside each heading is how many fields it contains.
- Use the Search fields... box at the top to filter by field name across all tables — handy when you know the field but not its table.
- Tick the checkbox next to each field you want. Fields already in the group appear checked and disabled, so you can't add a duplicate.
- The footer button updates with a running count — for example, Add (3). Click it to add your selection.
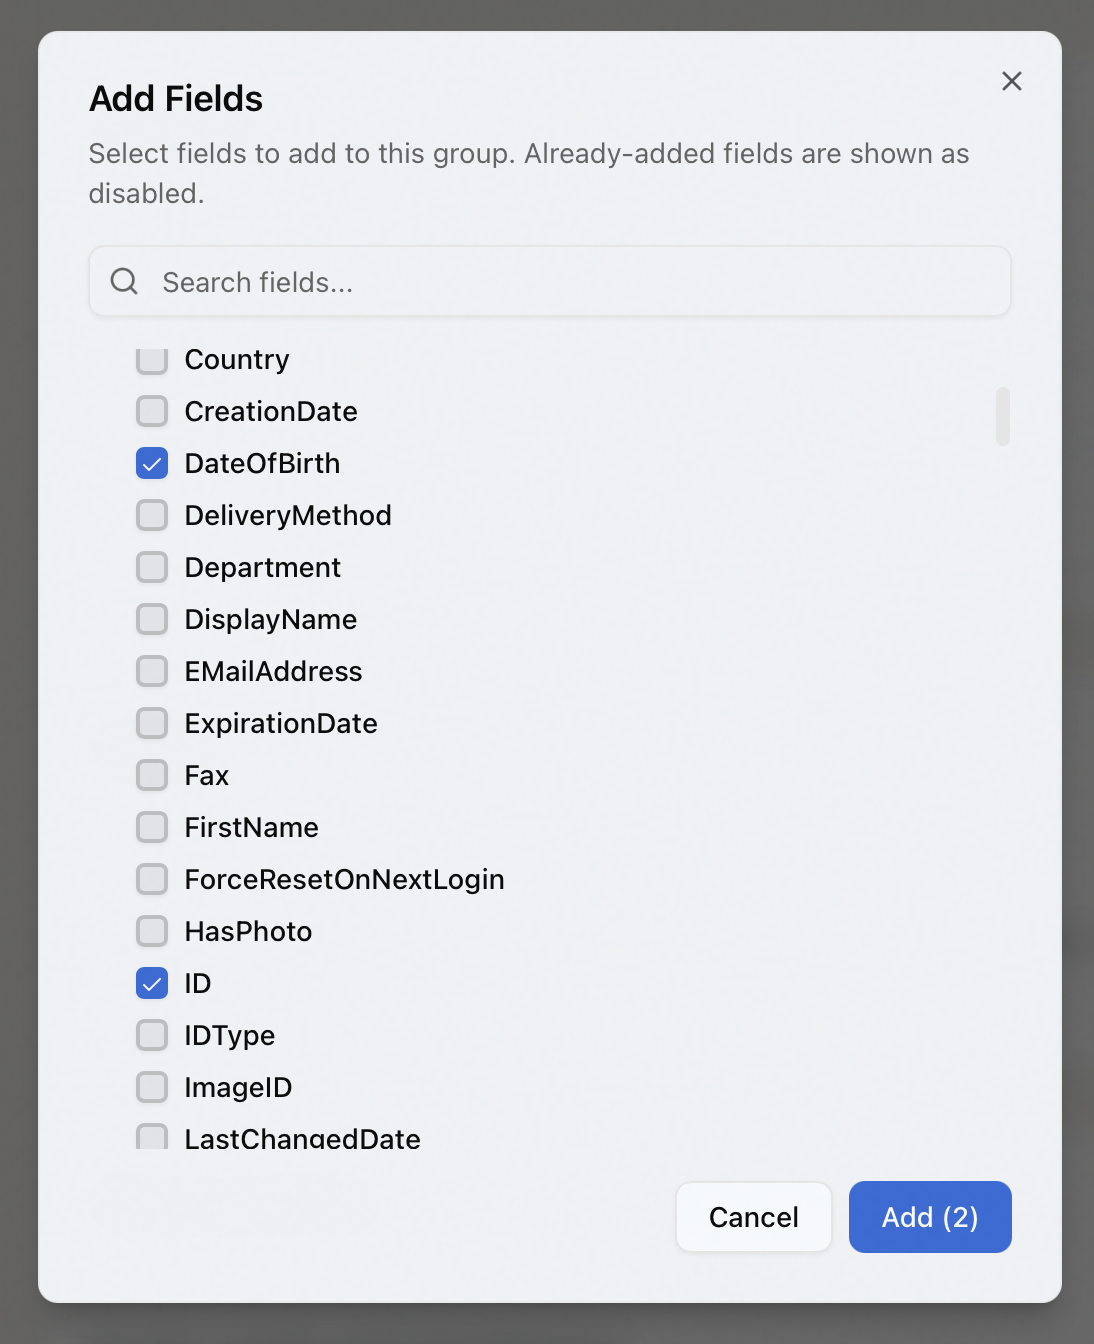
The picker closes and the chosen fields appear in the Fields table, listed by Table and Field. To drop one, click the trash icon in its Remove column. You can reopen Add Fields as many times as you need.
The picker only lists fields Aeon is able to restrict, grouped by their source table:
- Users — patron account and profile data (name, contact details, ID numbers, date of birth).
- Transactions — request fields, including cost figures such as Maxcost and invoice number.
- Activities and Appointments — activity and reading-room appointment fields.
- BillingDetail and BillingPayment — charge and payment fields (fees, tax rate, payment method, amounts).
Any custom fields you've defined on requests, users, or activities show up under their table too. Fields outside these tables aren't offered, because the field-restriction filter only knows how to blank out values that come from a restrictable table.
Step 4 — Save
The editor tracks unsaved changes. As soon as you change the name or description or add or remove a field, the Save and Discard buttons at the top of the editor become active.
- Click Save to commit the group. You'll see Field group "Reading Room Staff - Hide IDs" saved.
- Click Discard to roll back to the last saved version.
Saving the group only defines what could be hidden. Nothing is actually restricted until you open a role, go to its Field Restrictions, and add this group there. Until then the fields stay fully visible to everyone. The group's Blocked Roles card (read-only on this screen) shows which roles currently restrict it — for a brand-new group it reads No roles currently restrict this field group. See Editing a Role: Field Restrictions.
After it's created
- Edit it later — select the group in the sidebar and change its name, description, or field list at any time. See Editing a Field Restriction Group.
- Delete it — right-click the group in the sidebar (or use the ⋯ menu in the editor) and choose Delete. A group that's in use can't be deleted until you remove it from every role first. See Deleting a Field Restriction Group.
- System defaults are locked — the three built-in groups show a small padlock and can't be deleted; you can only create, edit, and delete your own custom groups.