Cloning an Activity
Cloning copies an existing activity into a brand-new one. Instead of rebuilding a recurring class visit, workshop, or instruction session from scratch, you start from one that already exists and carry over its details — name, type, dates, location, custom fields — along with whichever linked users, notes, and requests you choose to bring along. The original activity is never changed; cloning only creates a new activity beside it.
You pick a primary user for the clone (this is the only required field). That user becomes the first linked user on the new activity and owns any requests you copy over. Every other piece — users, notes, requests — is pre-selected for you, so the common case is "clone the whole thing for a new instructor or a new term" with a couple of clicks. You uncheck only what you don't want.
- A class or workshop runs again next term and you want the same setup under a new date range.
- You're handing an activity to a different instructor or coordinator and want a copy linked to them.
- You want a starting point that mirrors an existing activity's requests and notes, then plan to trim it down.
Before you start
- Open the activity you want to copy from the Activities list so it's showing in the detail pane on the right.
- Cloning is an editing action, so you need Edit access for Activities (see Permissions below). If your role is view-only, the Clone button is greyed out.
- You can't clone an activity that a coworker is actively processing — the Clone button is disabled while the activity is locked by another user. Wait until they release it.
Cloning step by step
-
Open the source activity (for example, activity #842 "Intro to Archives — Fall") so it appears in the detail pane.
-
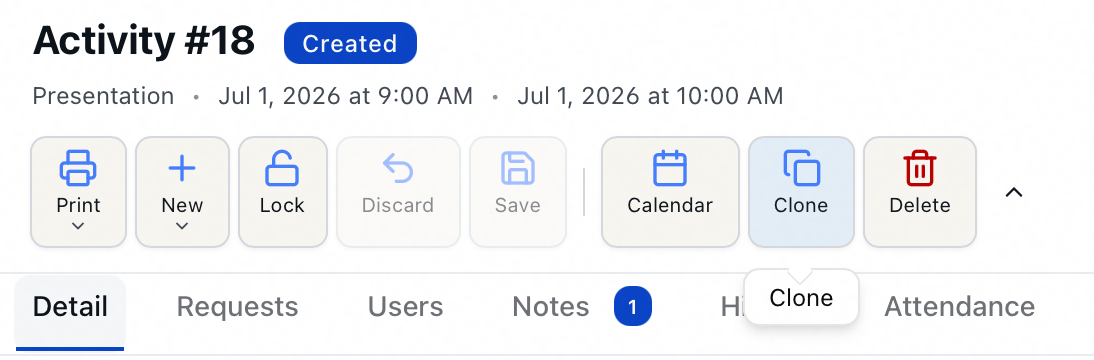
In the activity toolbar, click Clone.
-
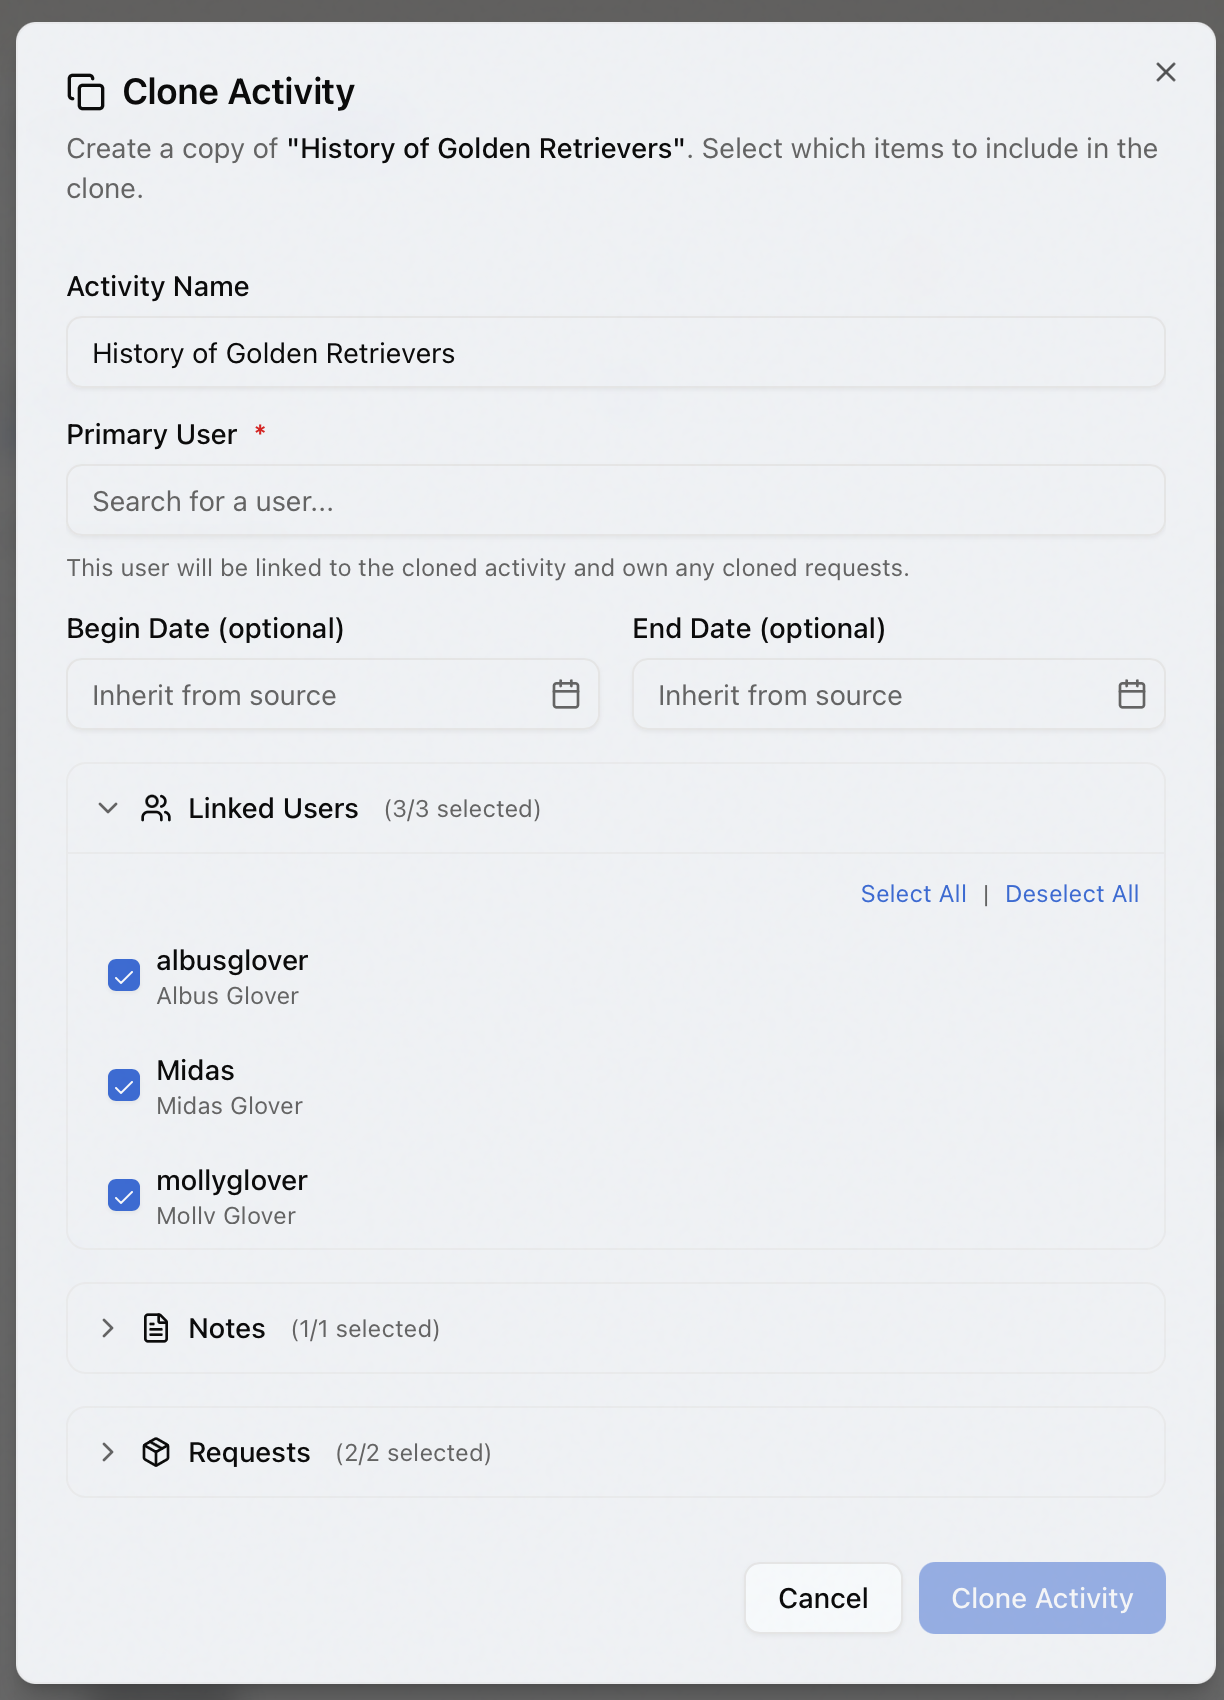
The Clone Activity dialog opens. It loads the activity's linked users, notes, and requests and lists them, ready to copy.
-
Fill in the top fields:
- Activity Name — pre-filled with the original name. Edit it so the copy is easy to tell apart (for example, "Intro to Archives — Spring").
- Primary User (required) — start typing a name or username and pick from the list. Users already linked to the source activity float to the top of the results. This person is linked to the new activity and owns any cloned requests.
- Begin Date (optional) and End Date (optional) — leave them blank to inherit from source (the fields show that as placeholder text), or set new dates for the copy.
-
Choose what to carry over. Each of these sections is collapsed by default and everything in it is already selected — expand a section only if you want to leave something out:
- Linked Users — the users associated with the source activity.
- Notes — the activity's notes.
- Requests — the requests tied to the activity, each shown with its transaction number, title, and current status.
-
Inside any expanded section you can fine-tune the selection: tick or untick individual rows, or use Select All / Deselect All. The section header shows a running count, such as (7/9 selected).
-
Click Clone Activity.
-
Aeon creates the new activity and confirms with "Activity cloned as #903." The dialog closes and you're taken straight to the new activity.
Whoever you choose as Primary User is added to the new activity even if you deselect them (or everyone) in the Linked Users section. That guarantees the clone has at least one user and a clear owner for any copied requests.
What gets copied
The new activity starts as a faithful copy of the source and then pulls in your selections:
| Carried over automatically | Carried over if selected |
|---|---|
| Name (or the new name you type), description, type, status, location | Linked users — only users that were on the source activity when you opened the dialog |
| Begin/End dates (or the new dates you set) | Notes |
| Billing category and the custom ActivityInfo fields | Requests — copied as new requests owned by the primary user |
Cloned requests come over as fresh requests on the new activity. Because they're tied to the clone, Aeon routes each one into the Awaiting Activity Processing queue — the same place new activity requests land — so staff process them like any other request. The original requests stay put on the original activity.
Both activities get a history entry recording the clone: the new activity notes that it was "Cloned from activity #842," and the source activity notes that it was "Activity cloned to #903."
The dialog copies only the users that were linked to the source activity at the moment you opened it. If you realize mid-clone that someone is missing, cancel, add them to the source activity's Users tab first, then start the clone again — a user you add elsewhere while the dialog is open won't be picked up.
Whether the Scheduled Date on each request carries into the clone is governed by the CloneScheduledDateInClient customization (off by default). This is set in the Customization Manager and applies system-wide, not per-clone — if cloned requests aren't keeping their scheduled dates and you expect them to, that's the setting to check.
Permissions
- The activity workspace requires View access for Activities to open at all.
- The Clone button and the clone operation require Edit access for Activities. View-only roles see the button disabled.
- The button is also disabled whenever the activity is locked by another staff member, until they release it.