Managing Activity Members and Attendance
An activity — a class visit, a tour, an instruction session — usually has two things you keep track of as it runs: who is part of it and how many people actually showed up. In Aeon these live on two tabs of the activity detail view: Users (the people linked to the activity) and Attendance (a date-by-date headcount).
Linking a user is what ties a researcher's account to the activity, so the activity appears in their web account and so you can act on the whole group at once (for example, cloning the activity's requests out to every member). Attendance is a manual log: each time the group meets, you record the date and how many people came. The two are independent — you can link ten users and still record a different number at the door, and you can record attendance for an activity that has no linked users at all.
- A researcher joins a class or session — open the activity and link them on the Users tab.
- A meeting wraps up and you want to log turnout — add a dated count on the Attendance tab.
- You need to email everyone in a session, or push the activity's requests out to each member — start from the linked-users list.
Linking members and tracking attendance are done in the Aeon web staff client, on the activity detail view. (Older documentation describing this as desktop-client-only no longer applies.)
Finding the tabs
- Open the activity — for example activity #4821 — from the activities list, search, or any link that carries its ID. (See Opening and Viewing Activities.)
- In the detail view, switch to the Users tab to manage members, or the Attendance tab to log headcounts.
The activity detail tabs are laid out through the Activity form designer, so the exact tab labels and their order depend on your site's layout. This page uses the default names — Users and Attendance.
Managing activity members (Users tab)
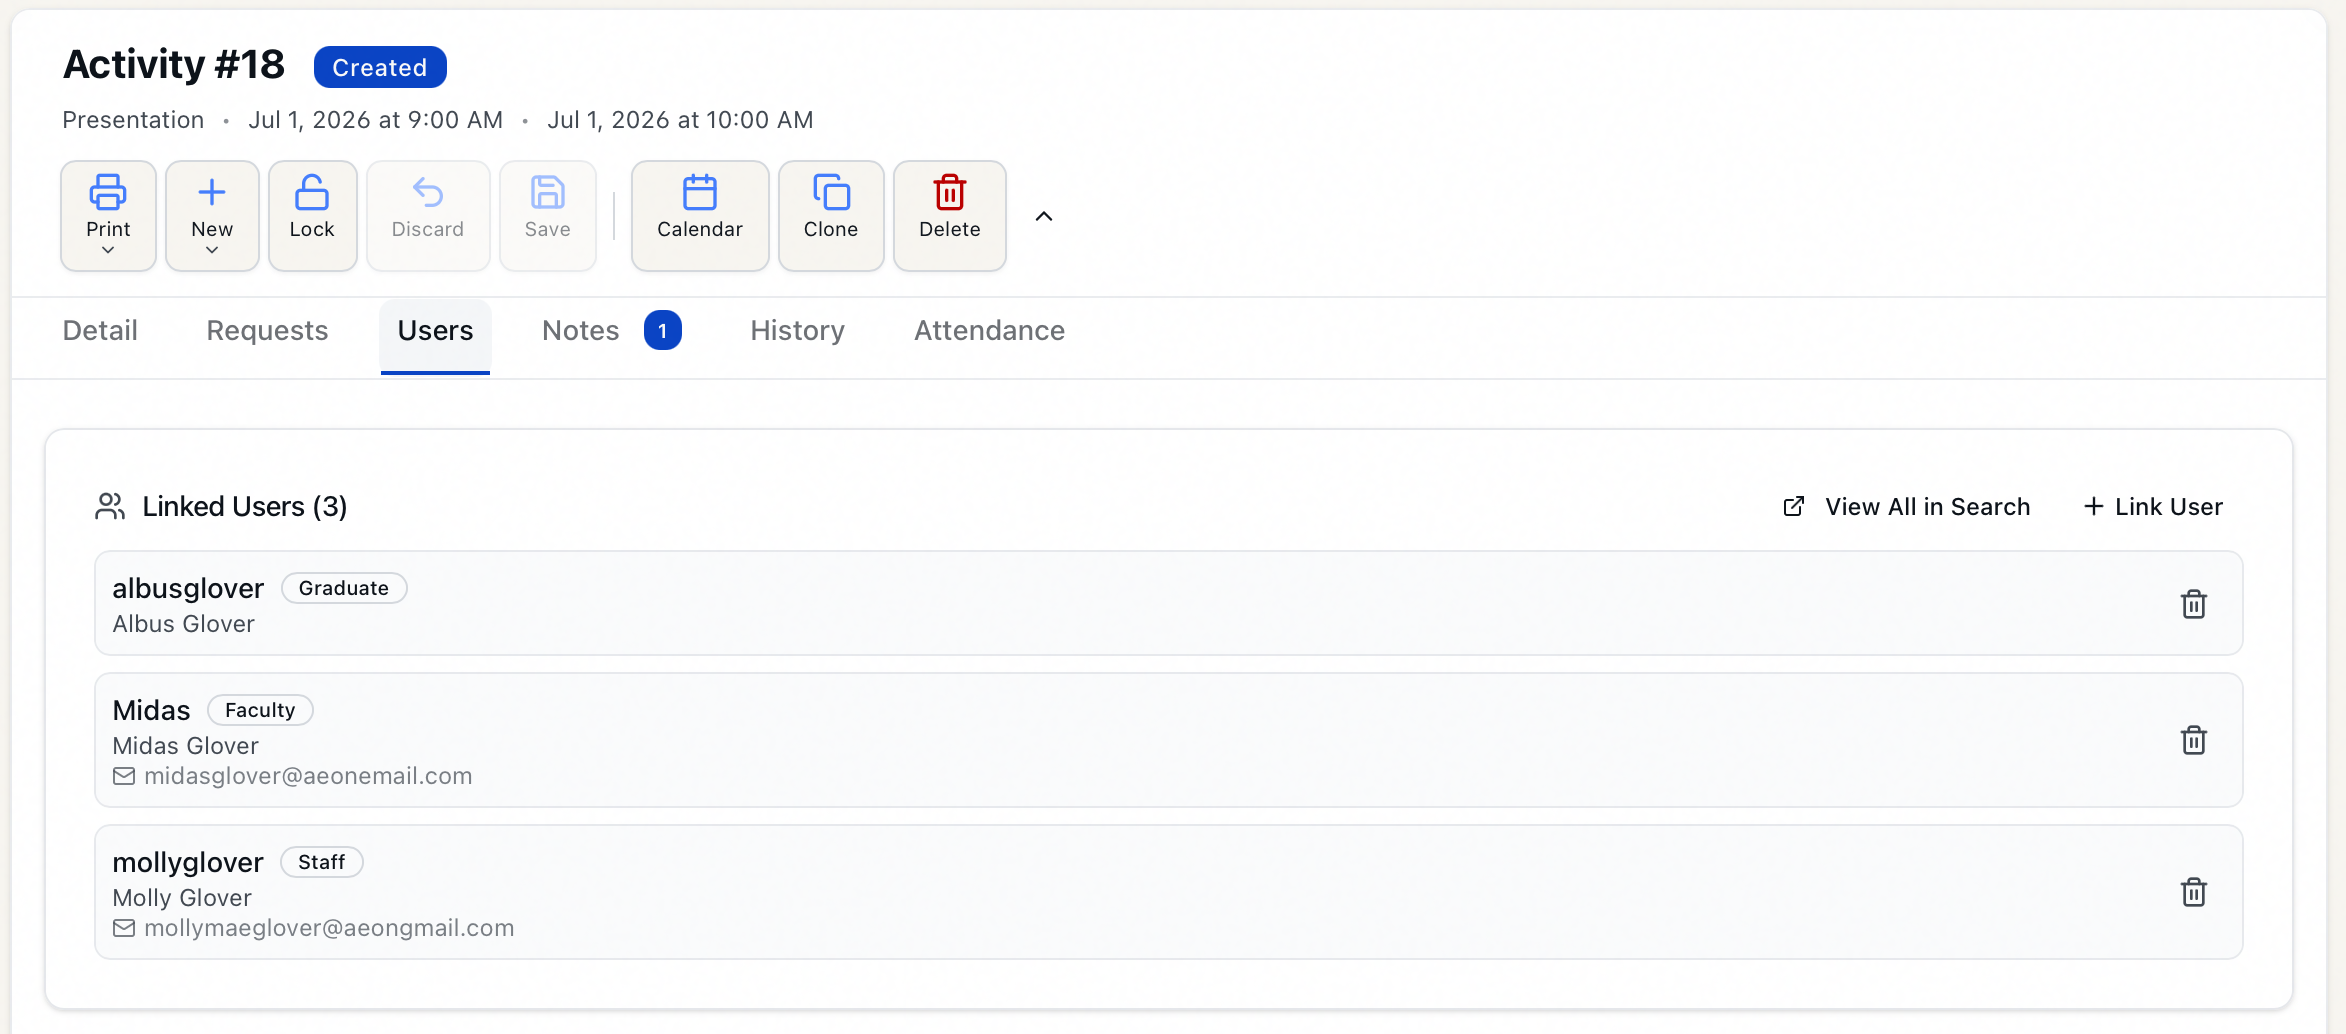
The Users tab shows everyone currently linked to the activity under the heading Linked Users with a running count, for example Linked Users (12). Each row shows the user's username, their account status as a small badge, their name, and their email. Clicking a row opens that user's record.
Linking a user
- On the Users tab, click Link User.
- The Link User to Activity dialog opens. In Search Users, type at least 2 characters of a username, first name, or last name. Results appear as you type.
- Click a result to select it; the chosen person appears under Selected User. (Users already linked to this activity are filtered out of the results, so you can't add the same person twice.)
- Click Link User to finish.
A confirmation — User "jdoe" linked to activity — appears, and the new member shows up in the Linked Users list.
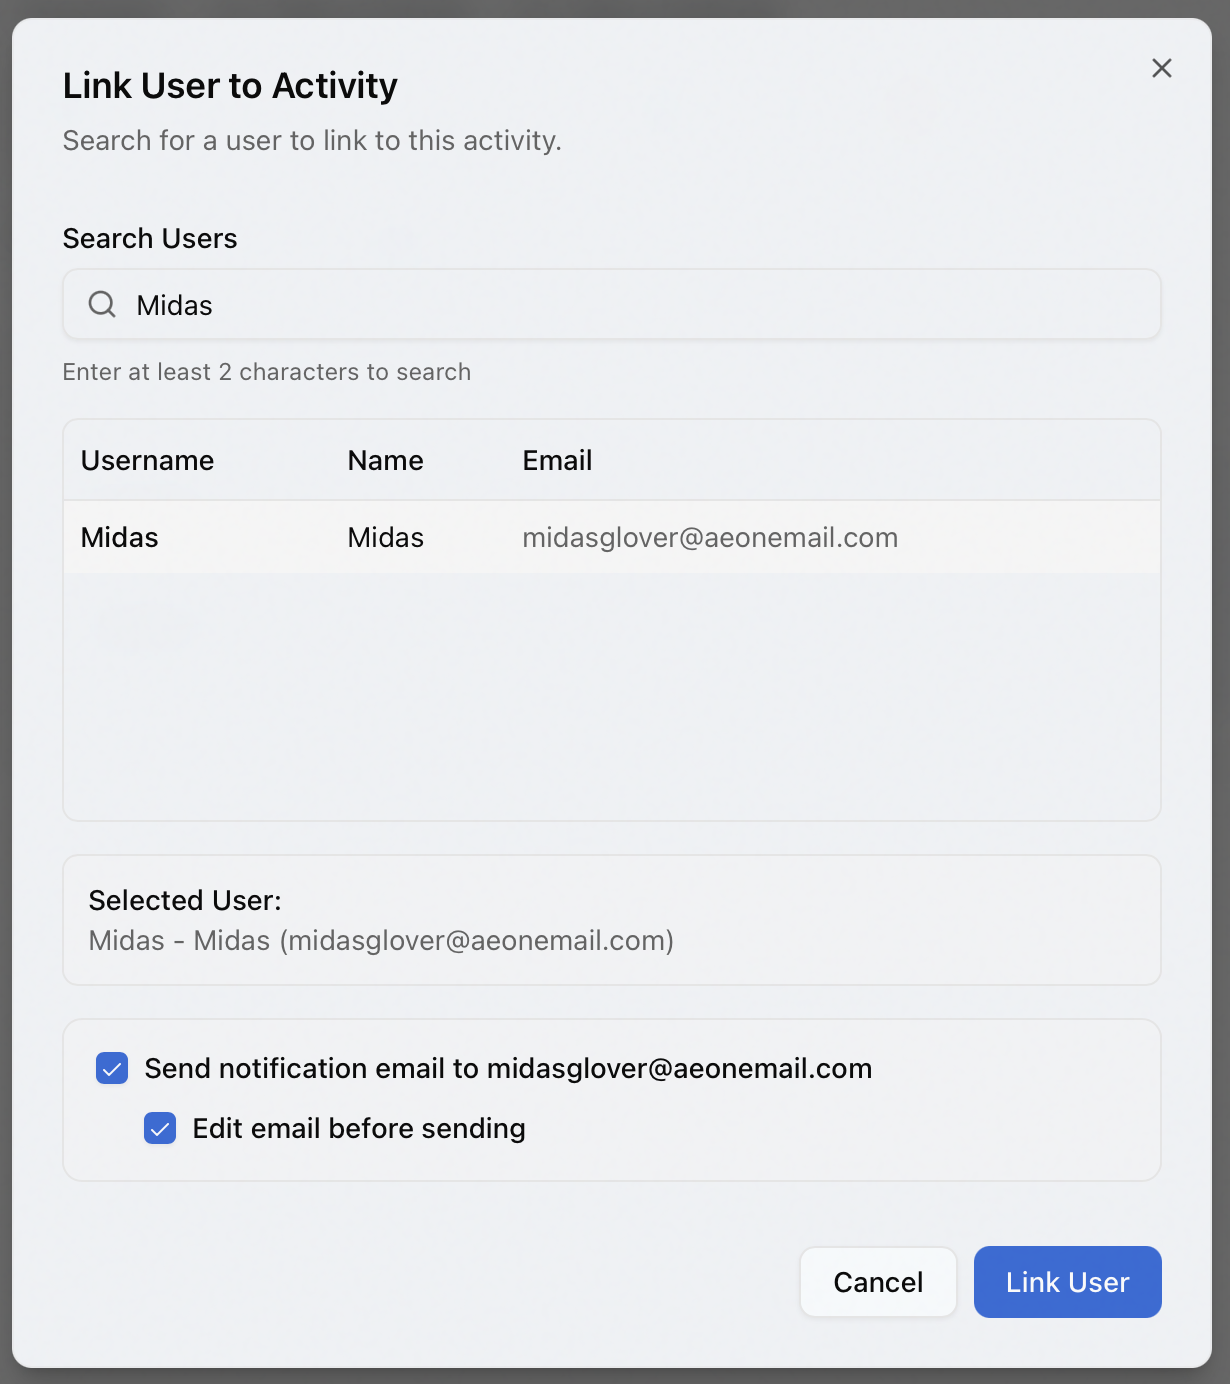
If you don't need to send an email, you can skip the buttons entirely: double-click a search result (or highlight it and press Enter) to link that user immediately.
Sending a notification email when you link someone
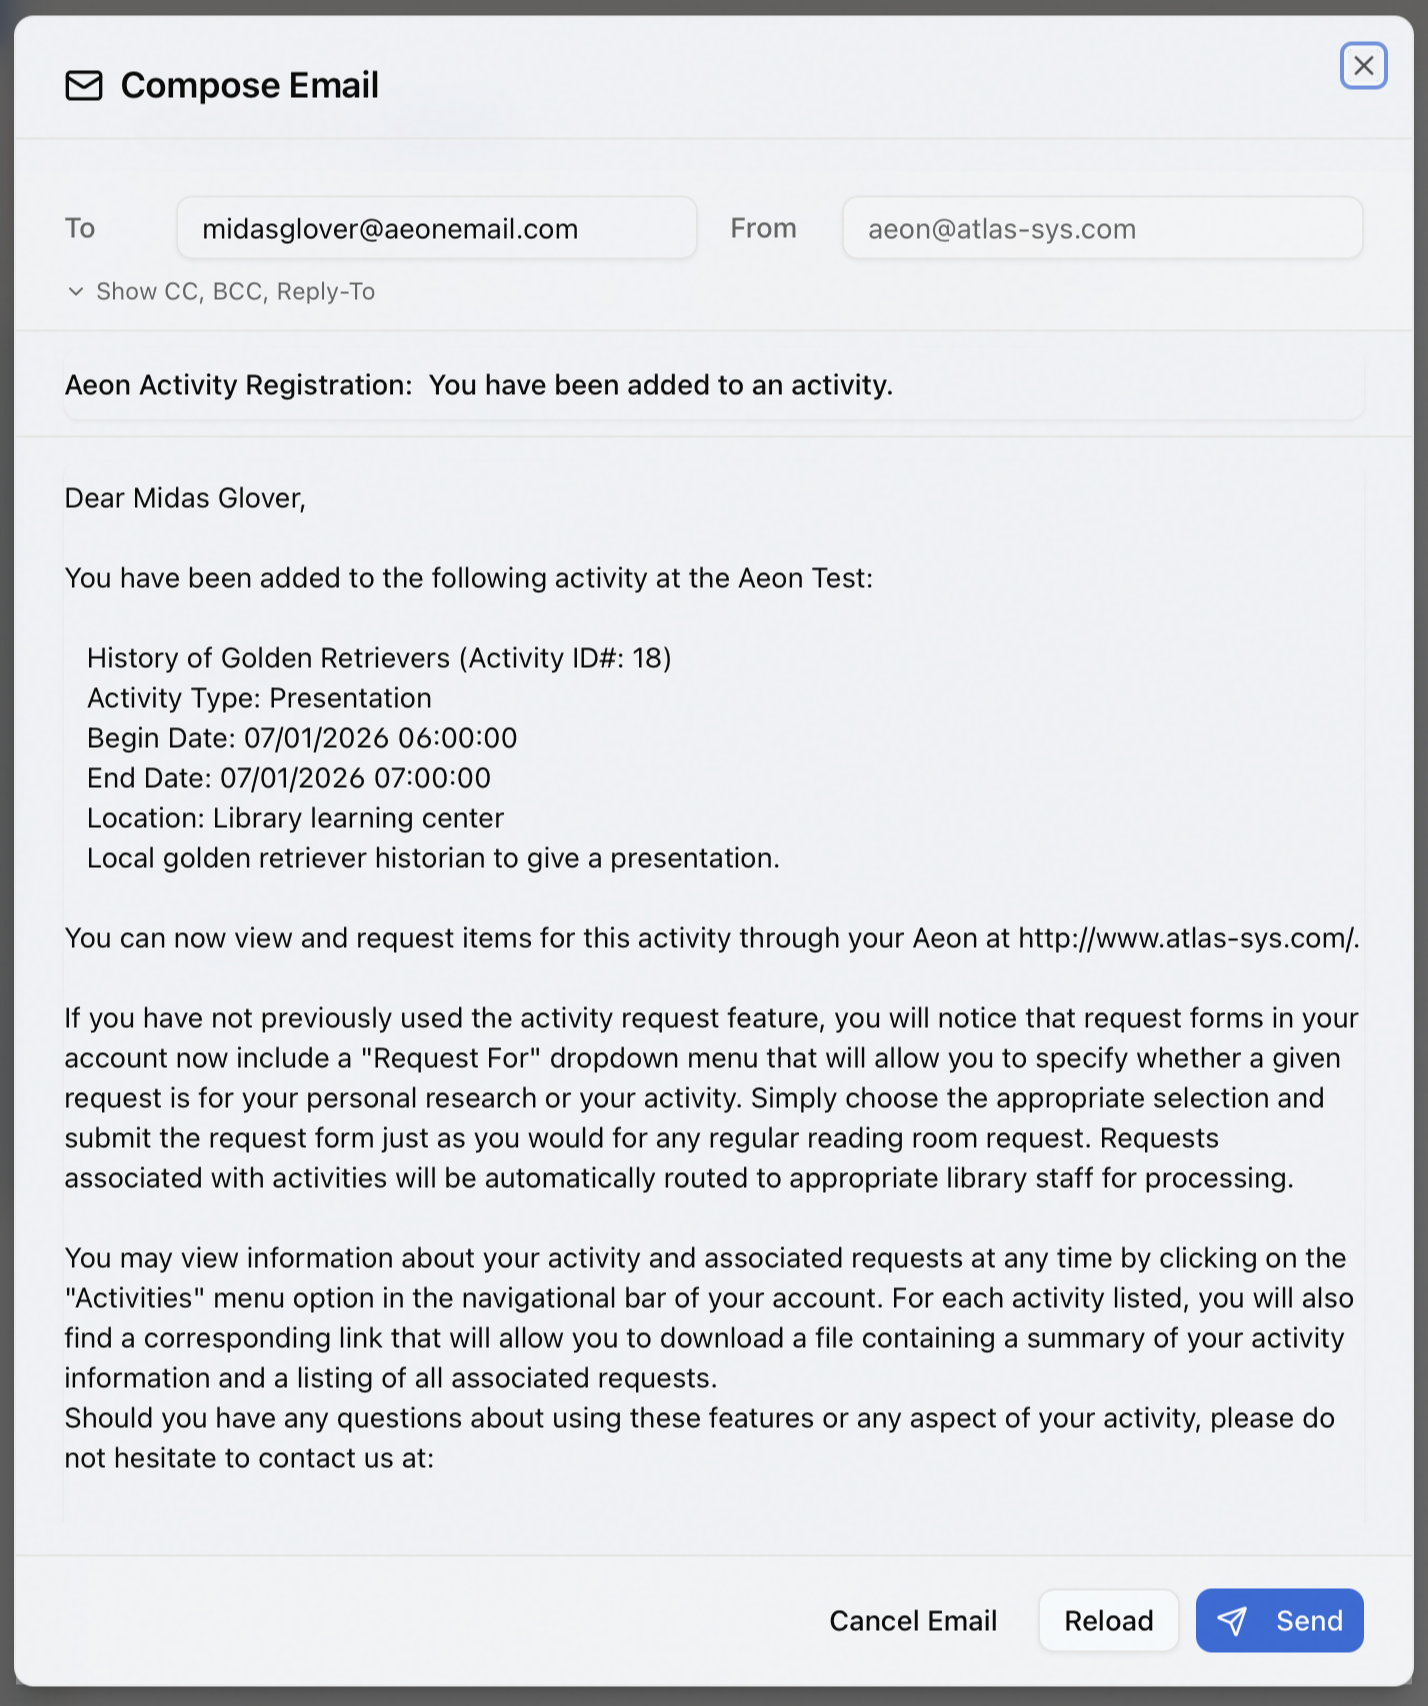
When you select a user who has an email address on file, the dialog offers Send notification email to address. Tick it to email the user that they've been added to the activity (this uses the UserAddedToActivity email template).
- Leave Edit email before sending unchecked to send the templated message automatically as soon as you click Link User.
- Tick Edit email before sending to open the email composer first, so you can review or adjust the message before it goes out.
If the selected user has no email address on file, the option reads Send notification email (no email address on file) and is disabled — link them, then add an address to their record if you need to notify them later.
Removing a member
To unlink someone, click the trash icon at the right end of their row. They're removed immediately and you'll see User "jdoe" removed from activity. Unlinking only breaks the link between the user and the activity — it does not delete the user's account or any of their requests.
When an activity has linked users, a View All in Search link appears on the Users tab. It opens the search results for everyone tied to the activity — handy when you want to work with the full roster on a larger screen rather than the tab's compact list.
Tracking attendance (Attendance tab)
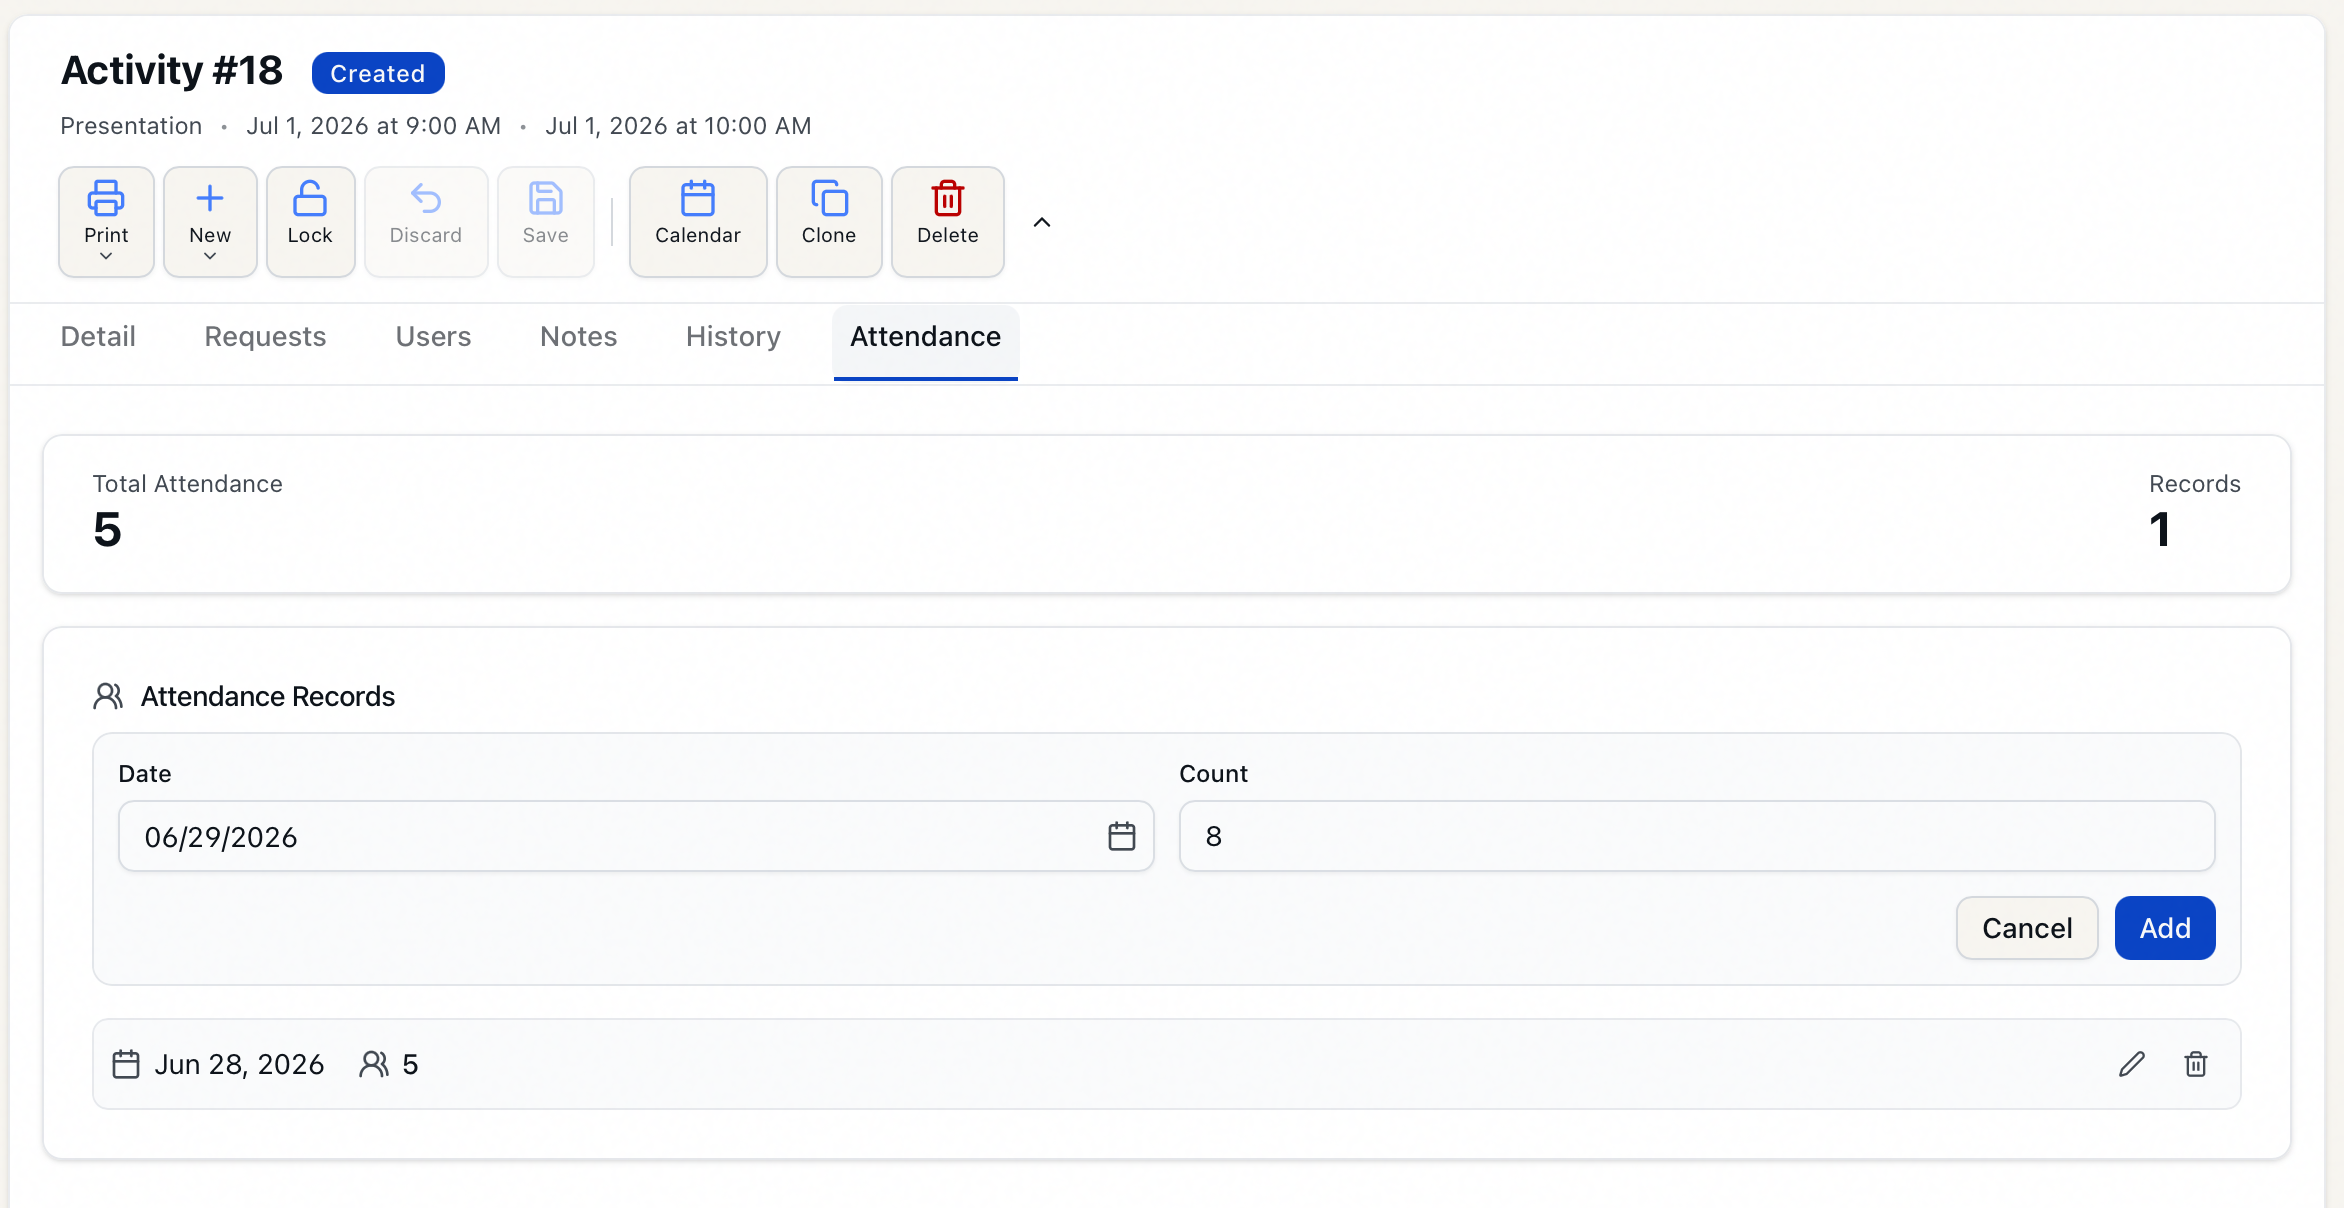
The Attendance tab is a simple log of how many people attended on a given date. At the top, two summary cards show Total Attendance (the sum of every record) and Records (how many dated entries you've logged). Below that, Attendance Records lists each entry with its date and count.
Adding an attendance record
- On the Attendance tab, click Add Record.
- Pick the Date (it defaults to today) and enter the Count — the number of attendees.
- Click Add.
The record appears in the list and the Total Attendance card updates. You can log as many dated records as the activity needs — one per meeting, per day, or however your reading room tracks turnout.
Editing or deleting a record
- To change an entry, click the pencil (edit) icon on its row, adjust the date or count inline, then click the check mark to save (or the X to cancel).
- To remove an entry, click the trash icon. A confirmation dialog — Delete Attendance Record — appears summarizing the date and count; confirm with Delete. This can't be undone.
Adding and editing attendance records require the Edit level of the Activities permission, but deleting one requires the Full level. A staff member who can record turnout may not be able to remove a record — that's intentional, so headcounts aren't erased casually.
Permissions
- Viewing the Users and Attendance tabs requires the View level of the Activities permission. Anyone who can open an activity can read its members and attendance.
- Linking and unlinking users, and adding or editing attendance records, require the Edit level of the Activities permission.
- Deleting an attendance record requires the Full level of the Activities permission.
- These levels are enforced by the API regardless of what the screen shows, so a view-only user who attempts a change will be refused.